Attaching the vf attachment and handle, Attaching the vf attachment, Attaching the handle – Sony LHP-1 Lens Hood User Manual
Page 20
2. Preparation
20
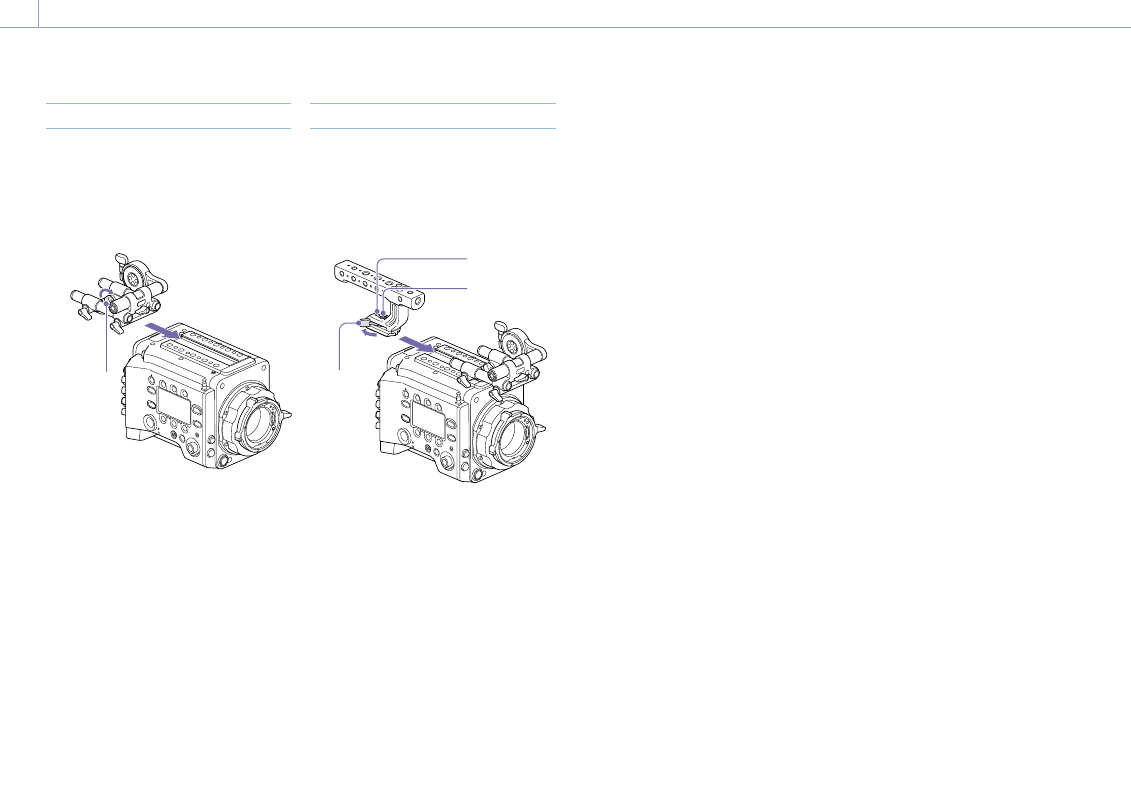
Attaching the VF Attachment
1
Slide the VF attachment on in the
direction of the arrow to attach it.
2
Position the VF attachment in the desired
front/rear position, then turn the lock
lever to secure it in position.
1
2
Lock
lever
[Notes]
• You can also attach the VF attachment in the
front/rear or left/right orientation.
• If the lock lever is difficult to tighten or loosen,
you can use a hex wrench (3 mm) on the lock
screw on the top of the lock lever.
To remove the VF attachment
Turn the lock lever to loosen, press the release
button and slide the VF attachment off in the
reverse direction from when attaching it.
Attaching the Handle
1
Slide the handle on in the direction of the
arrow to attach it.
2
Position the handle in the desired front/
rear position, then turn the lock lever to
secure it in position.
2
1
Lock screw
Hex socket
bolt
Lock
lever
[Notes]
• You can also attach a lock screw using a hex
wrench (5 mm) to secure it in position.
• If the lock lever on the handle becomes loose
during use, you can secure the handle by
tightening a hex socket bolt (2 mm) beside the
lock screw.
• You can also attach the handle in the reverse
orientation.
To remove the handle
Turn the lock lever to loosen, press the release
button and slide the handle off in the reverse
direction from when attaching it.
Attaching the VF Attachment and Handle