Navigating the system, Jog/shuttle wheel & affiliated buttons, Main menu buttons explained – Teac MX-2424 Tutorial User Manual
Page 13
- 13 -
Navigating the System
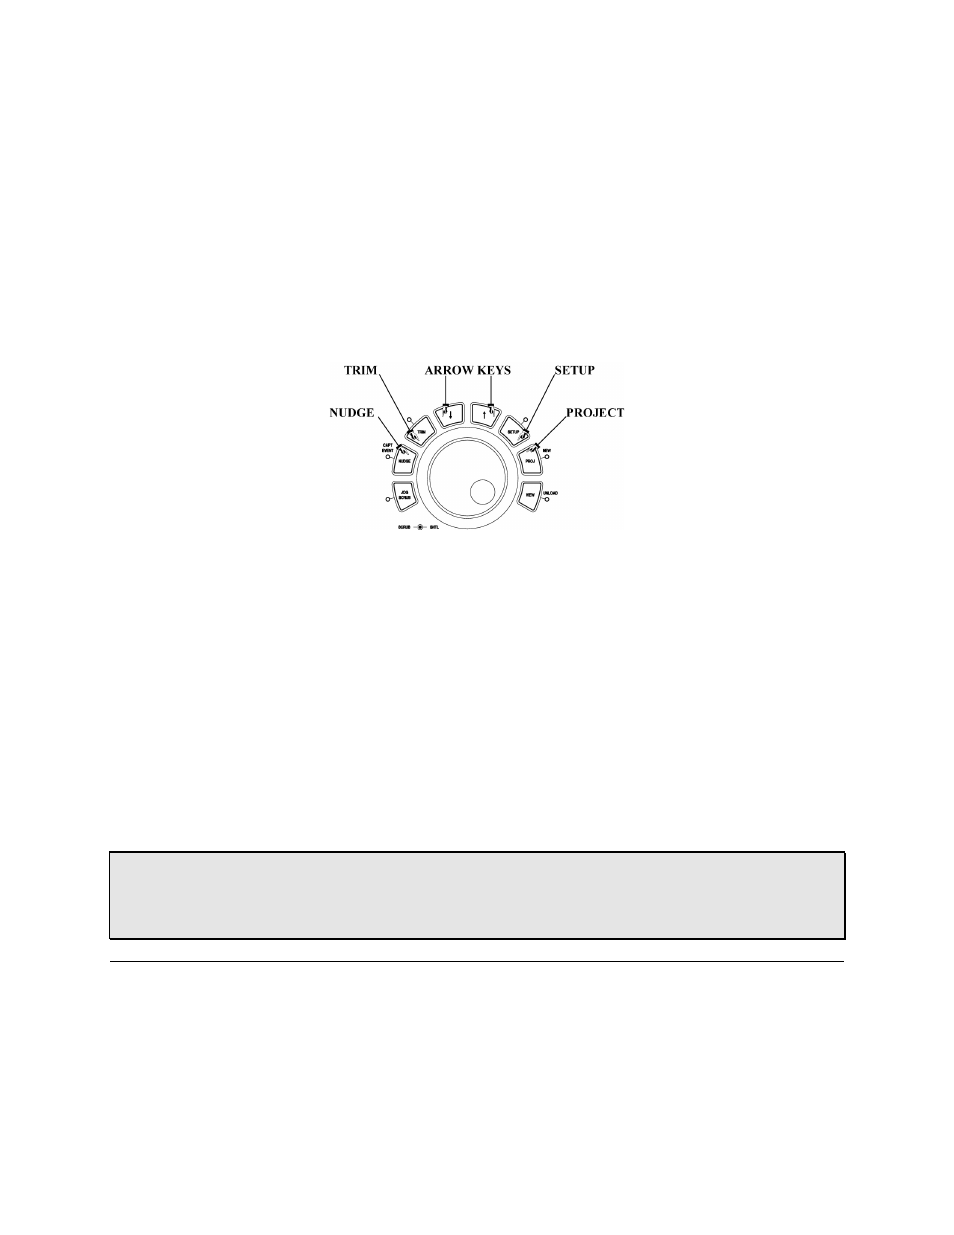
The key to getting around your MX-2424's system, project, and track windows is the
Jog/Shuttle Wheel section. The Jog/Shuttle Wheel section includes several surrounding
buttons. Using the Jog/Shuttle control and its surrounding buttons, you can reach every
page and scroll through every menu in the MX-2424. Figure 3-2 is a close-up of this
section.
Jog/Shuttle Wheel & Affiliated Buttons
To the right of the Jog/Shuttle Wheel are your MX-2424's two main menu buttons
([SETUP], [PROJ/NEW]. The two buttons directly above the Jog/Shuttle ([Down Arrow]
and [Up Arrow]) give you value up and down control. The two buttons to the left of the
Jog/Shuttle ([NUDGE/CAPT EVENT], and [TRIM]) are for nudge and trim functions.
The Jog/Shuttle Wheel can be used for dialing in numerical values, selecting
characters, and scrolling.
Main Menu Buttons Explained
Each of the three main menu buttons ([SETUP], [PROJ/NEW], and [VIEW/UNLOAD])
accesses its own unique set of LCD displays. Below are descriptions of these displays
and their associated menu items.
• HOT TIP! — Many buttons on the MX-2424 are dual function, that is, they have a
shifted function. Press [SHIFT] (located near the top right of the numeric keypad in the
Data Entry section) and then hit the button whose shifted function you want to access.
For example, press [SHIFT] and then [COPY/SPLIT] to perform a split edit.