Configuration menu, Configuration menu -5, Table 4-3 – Verilink HDM 2180 (880-503048-001) Product Manual User Manual
Page 51: Figure 4-3, Table 4-4
HDM 2180 Management: Using NCM 2000
Verilink HDM 2180 User Manual
4-5
Table 4-3
Card Administration Menu Commands
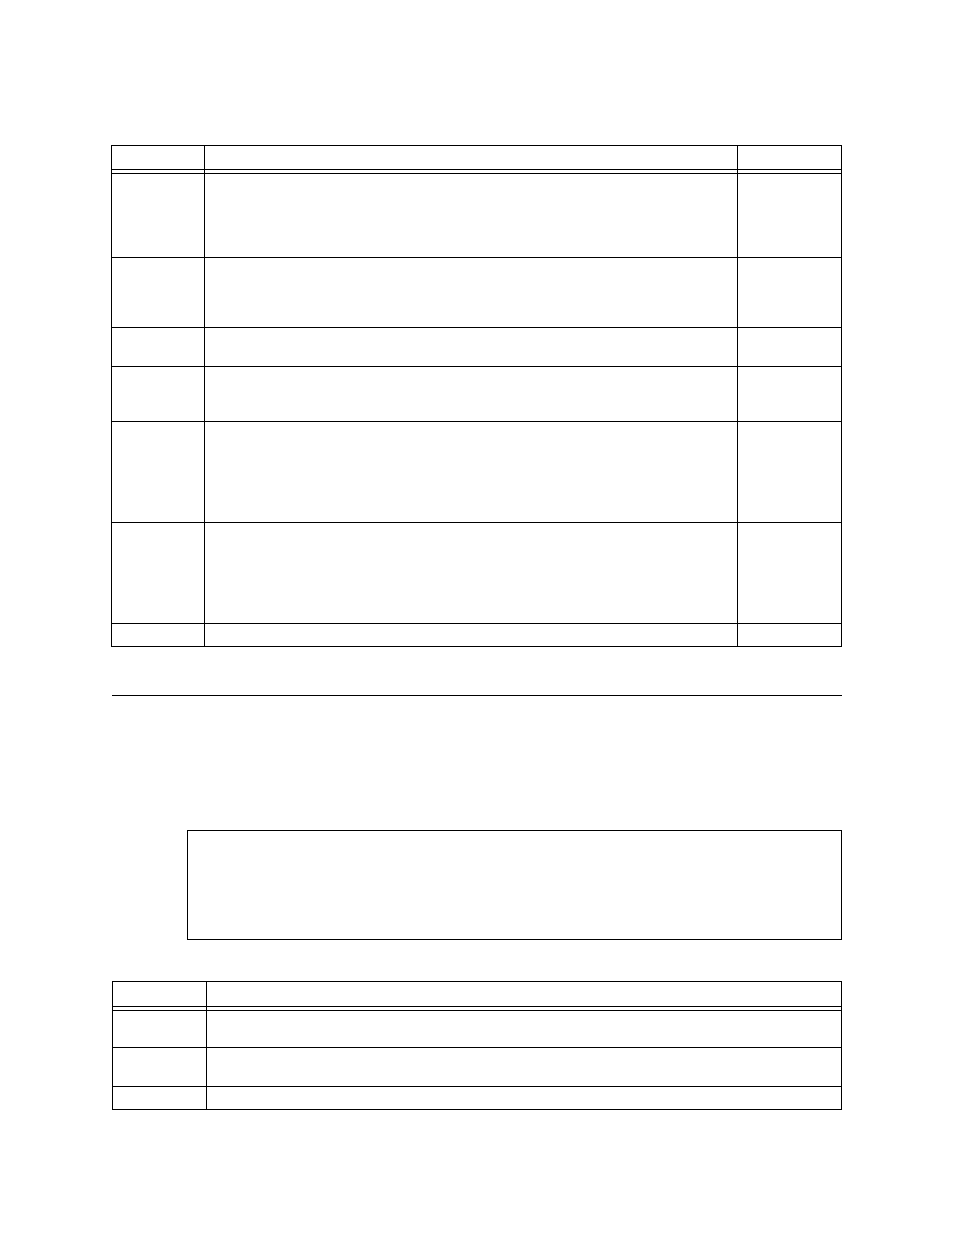
Configuration Menu
Typing the command C from the Main Menu displays the
Configuration Menu. This menu provides access to the menus
used to configure your DS3 port or your HSSI port.
Figure 4-3 Configuration Menu
Table 4-4
Configuration Menu Commands
Command
Description
Options
O
Switch over permanent—Use this option to designate partition A or B and
its corresponding firmware version when you reboot the card. Assign a
permanent partition to boot from in case of power failure. Before choosing
a partition, ensure that a firmware version exists on both partitions using
the Query Firmware command below.
1) A
2) B
P
Change Password—Use this option to assign a new password. Enter the
password at the prompt. Then enter the new password and press the Enter
key. Confirm the new password by reentering it. Passwords can be up to 16
characters.
16
characters
max
Q
Query Firmware—Displays the firmware versions for the A and B partitions
and which partition is in use.
R
Reset Card—Use this option to reboot the card. This option re-initializes the
operation of the firmware currently executing in RAM. It resets the system
registers and restarts the current firmware operation.
Y
Switch Over Once—Use this option mainly when testing new firmware
versions. This option allows you to change from partition A to B or vice
versa and overrides the partition specified in the “Switch Over Permanent”
option, above. This option causes the specified flash to be loaded into
memory and starts it; however, on the next cycling of power, the
permanent partition will be again loaded and started.
1) A
2) B
U
Clear Card Configuration—Clears the configuration of the card and returns
it to the default settings.
[0.0.0.9] [1,5] HDM 2180 > u
Clear card configuration on shelf 1 slot 5 (Y/N)? y Card
configuration cleared
X
Exit this Screen—Returns you to the
Main Menu
.
Command
Description
P
Port Setup—Displays the
HDM 2180 Port Configuration Menu
for the DS3 port,
H
HSSI Setup—Displays the HDM 2180
HSSI Port Configuration Menu
,
,
X
Exit this Screen—Returns you to the
Main Menu
,
.
A [127.255.255.0] [1,1] HDM 2180 > c
A [127.255.255.0] [1,1] HDM 2180 > c
A [127.255.255.0] [1,1] HDM 2180 > c
A [127.255.255.0] [1,1] HDM 2180 > c
-- HDM 2180 CONFIGURATION MENU --
-- HDM 2180 CONFIGURATION MENU --
-- HDM 2180 CONFIGURATION MENU --
-- HDM 2180 CONFIGURATION MENU --
P) Port Setup H) HSSI Setup
P) Port Setup H) HSSI Setup
P) Port Setup H) HSSI Setup
P) Port Setup H) HSSI Setup
x) Exit this screen
x) Exit this screen
x) Exit this screen
x) Exit this screen
A [127.255.255.0] [1,1] HDM 2180 >
A [127.255.255.0] [1,1] HDM 2180 >
A [127.255.255.0] [1,1] HDM 2180 >
A [127.255.255.0] [1,1] HDM 2180 >