Replacing a raid 0 drive, About networking, Replacing a raid 0 drive about networking – Grass Valley K2 Solo 3G Client Service Manual v.9.0 User Manual
Page 48
Replacing a RAID 0 drive
A K2 Solo Media Server’s disk modules are configured as RAID 0, so when one drive fails, all
media is lost. To replace a RAID 0 drive, do the following:
1. Unbind the LUN that has the failed drive.
2. Remove the failed drive from the K2 Solo 3G system chassis.
3. Insert the replacement drive in the K2 Solo 3G system chassis.
4. Restart the K2 Solo 3G system.
5. Using Storage Utility on the K2 Solo 3G system, bind disks as RAID 0.
6. Restart the K2 Solo 3G system.
7. Using Storage Utility on the K2 Solo 3G system, make a new file system.
Restart as prompted.
Always use the Storage Utility to physically identify the failed drive. To identify a drive, in Storage
Utility right-click the drive and select
Identify
. This causes the disk lights to flash.
Refer to related topics in "K2 System Guide" for Storage Utility procedures.
To remove and insert a drive, refer to the mechanical procedure for disk module removal.
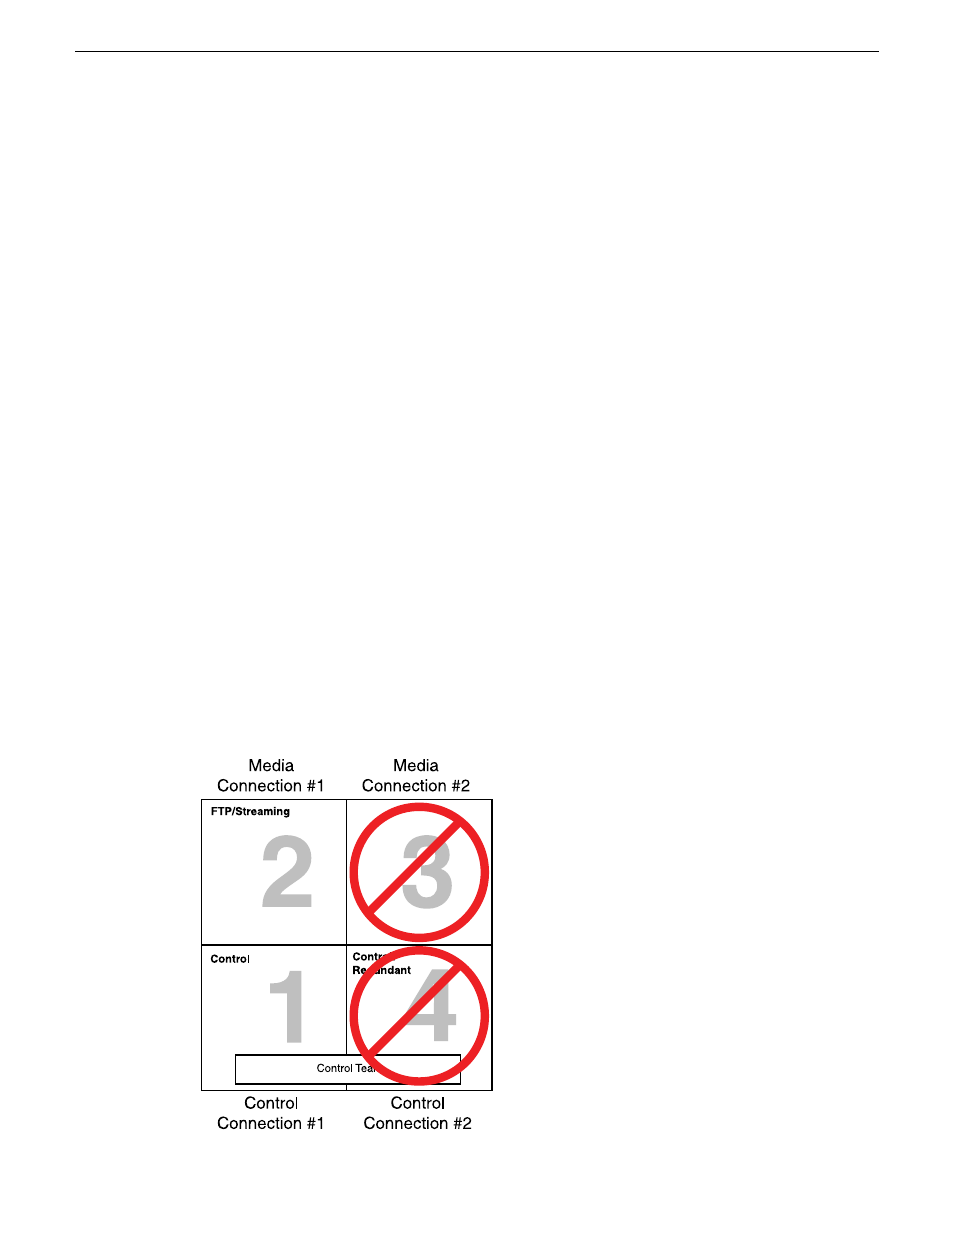
About networking
When you receive a K2 Solo 3G system from the factory, it has a specific network configuration,
including a loopback adapter and two of the four Gigabit Ethernet ports configured as a teamed pair.
The Gigabit Ethernet ports, as viewed when looking at the rear panel, are represented in the following
illustration.
48
K2 Solo 3G Service Manual
06 November 2012
Service procedures