8ultralink 2 installation and operations manual – Rose Electronics UltraLink 2 User Manual
Page 12
8
UltraLink 2 Installation and Operations Manual
Method #2 - Unit configuration via network crossover cable
(all models)
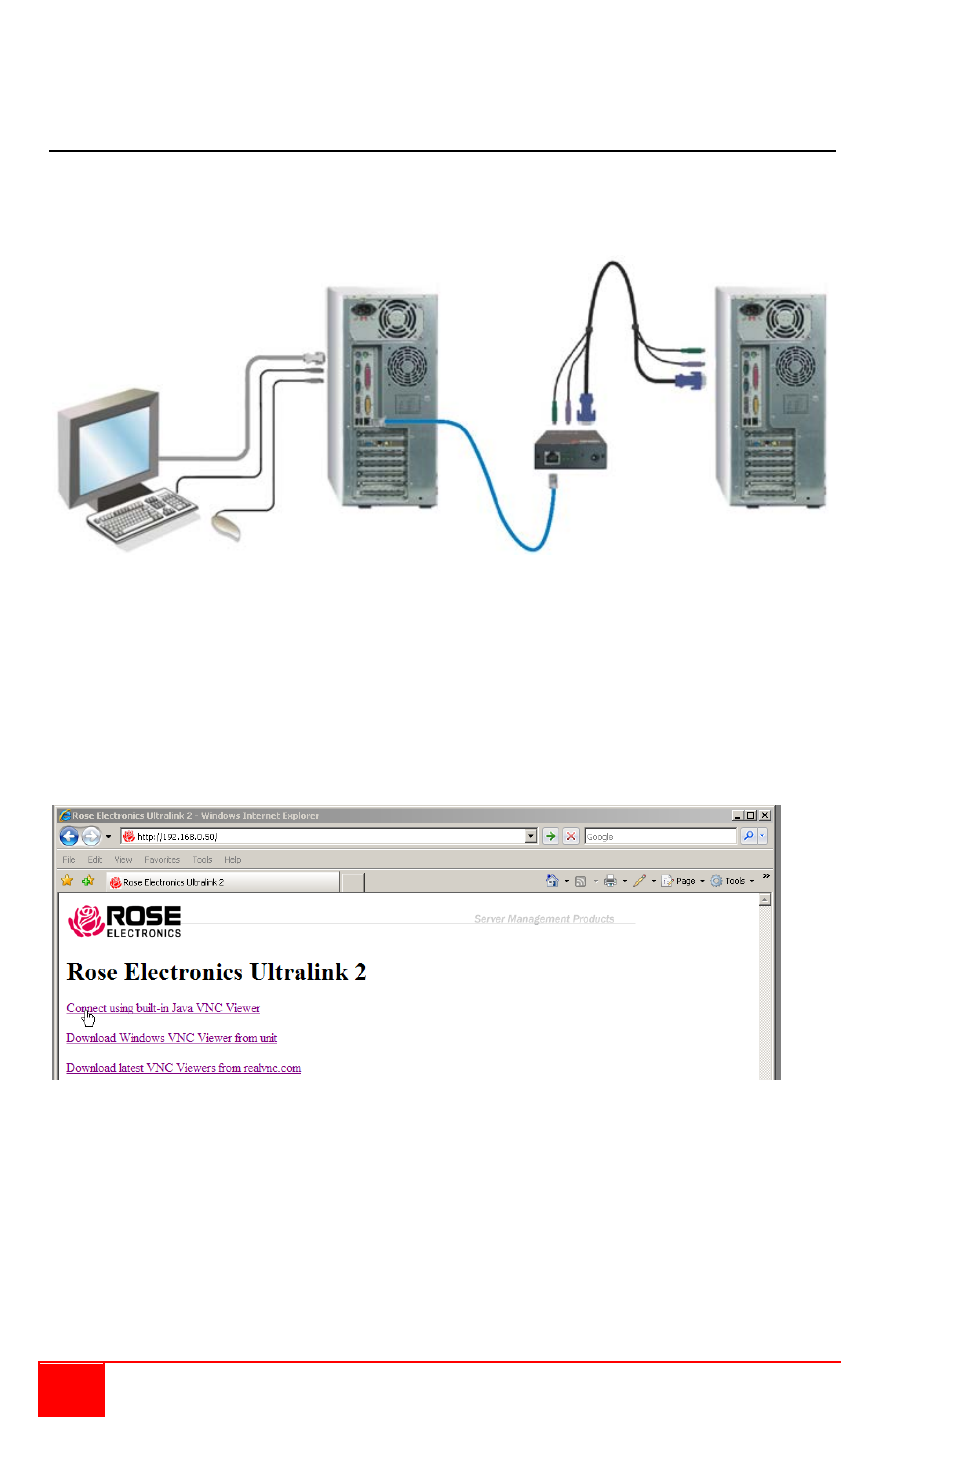
To modify the IP address using method #2, connect the UltraLink 2’s RJ45 port to a
computer configured with an Ethernet card and Window’s operating system (XP or Vista).
Use a network cross over cable to connect the computer to UltraLink 2. Connect the
computer to be accessed as shown below using the supplied CPU adapter cable.
Figure 3. Configure via Network crossover cable
1.
Access the control panel, network tab on the computer being used to configure
the UltraLink 2 and change the existing IP address to 192.168.1.40 and the IP
network mask to 255.255.255.0. This change creates a compatible standalone
network between the UltraLink 2 and the computer.
2.
From the computer used to configure the unit, start a web browser and enter the
IP address 192.168.1.42 (Initial UltraLink 2 default IP address) as the URL.
3.
The UltraLink 2 will answer with the following display in the browser.
Figure 4. Initial connect screen
There are three options available to select from:
1.
Connect using built-in Java VNC Viewer (This option places a temporary Java VNC
applet on the computer being used to connect to UltraLink 2, then displays the initial
connect screen)
2.
Download Windows VNC Viewer from unit (This option downloads the executable file
“VNC_VIEWER.EXE” from the UltraLink 2 to the connecting computer. You can run
this file to connect to the UltraLink 2 directly)
3.
Download latest VNC Viewers from Realvnc.com (Selecting this option will connect to
RealVNC’s web site and download the latest VNC Viewer)
Network
cross over