1 connecting to the processor with tcp/ip, 5 downloading the project to the processor, Connecting to the processor with tcp/ip – ProSoft Technology PTQ-104C User Manual
Page 29: Downloading the project to the processor, Download the project to the processor
49TPTQ-104C ♦ 48TQuantum Platform
Configuring the Processor with Unity Pro
47TIEC 60870-5-104 Client
12TUser Manual
2.4.1 Connecting to the Processor with TCP/IP
The next step is to download (copy) the project file to the processor. The
following steps demonstrate how to use an Ethernet cable connected from the
Processor to the PC through an Ethernet hub or switch. Other connection
methods may also be available, depending on the hardware configuration of the
processor and the communication drivers installed in Unity Pro.
1 Connect the PC and the processor to an Ethernet hub.
2 Open the PLC
menu, and select
S
ET ADDRESS
.
Important: The Set Address
dialog box is divided into two areas. Enter the address and media
type in the PLC
area of the dialog box, not the S
IMULATOR
area.
3 Enter the IP address in the address field. In the M
EDIA
dropdown list, choose
‘TCPIP’.
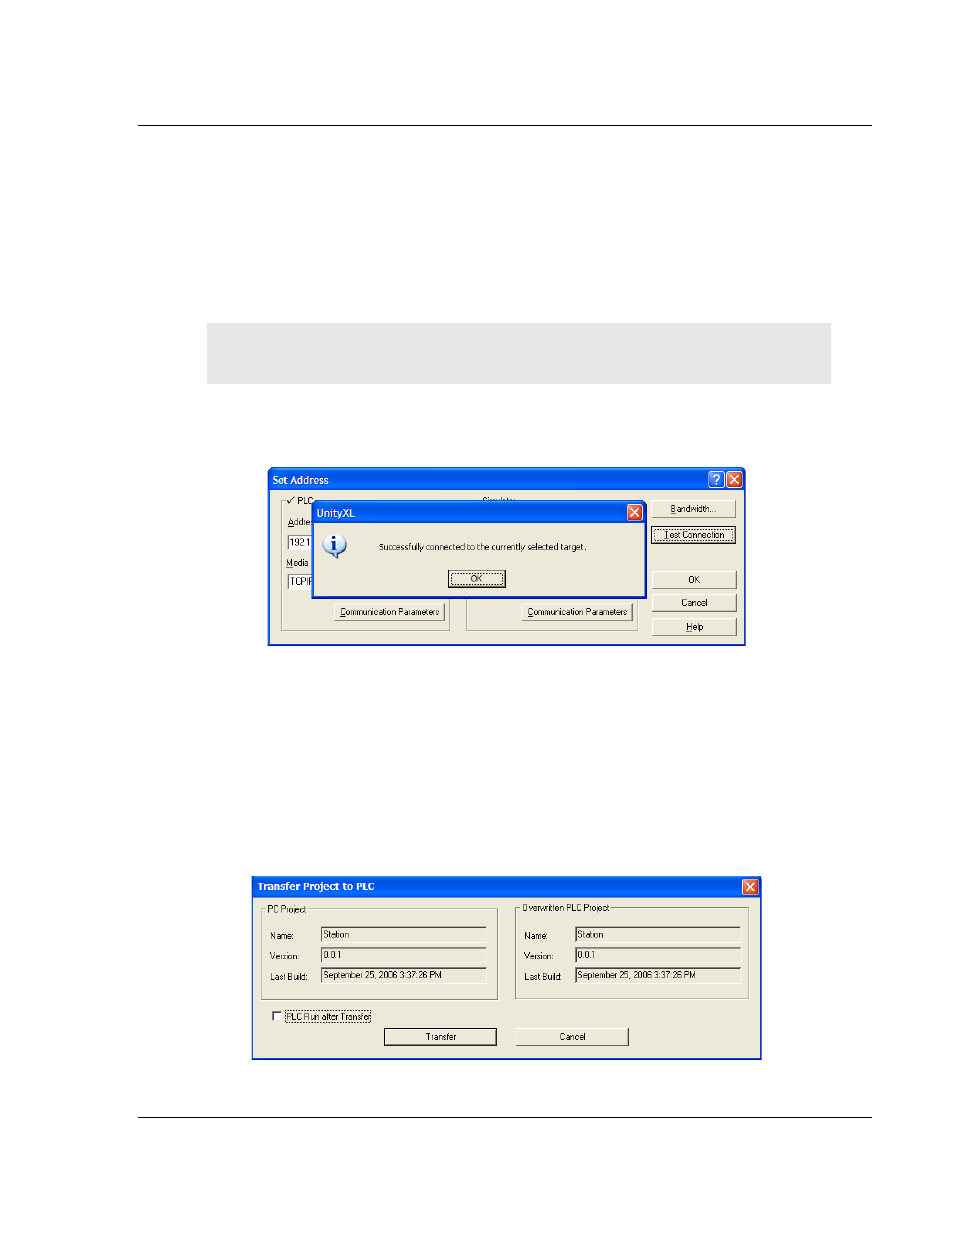
4 Click the
T
EST
C
ONNECTION
button to verify that the settings.
2.5
Downloading the Project to the Processor
1 Open the PLC
menu and then choose C
ONNECT
.
This action opens a
connection between the Unity Pro software and the processor, using the
address and media type settings that were configured in the previous step.
2 On the PLC
menu, choose T
RANSFER
P
ROJECT TO
PLC. This action opens
the
T
RANSFER
P
ROJECT TO
PLC
dialog box. If the PLC needs to go to "Run"
mode immediately after the transfer is complete, select (check) the PLC
R
UN
AFTER
T
RANSFER
check box.
ProSoft Technology, Inc.
Page 29 of 136
March 4, 2013