2 – 4 in “connecting to listed, Access points” (= 132) to connect to the – Canon PowerShot SX60 HS User Manual
Page 132
132
Before Use
Basic Guide
Advanced Guide
1
Camera Basics
2
Auto Mode /
Hybrid Auto Mode
3
Other Shooting Modes
5
Tv, Av, M, C1, and C2 Mode
6
Playback Mode
7
Wi-Fi Functions
8
Setting Menu
9
Accessories
10
Appendix
Index
4
P Mode
3
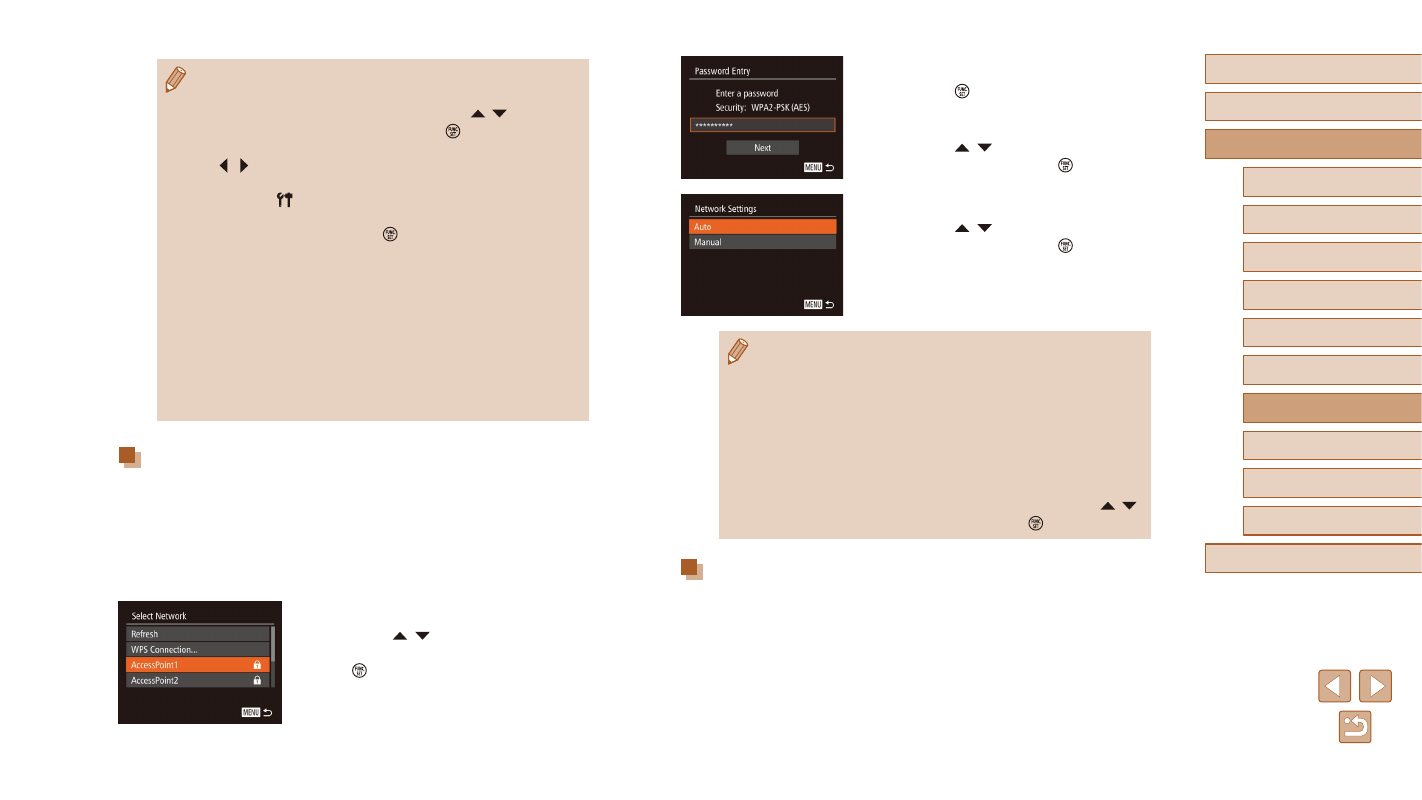
Enter the access point password.
●
Press the [ ] button to access the
keyboard, and then enter the password
●
Press the [ ][ ] buttons to choose
[Next], and then press the [ ] button.
4
Choose [Auto].
●
Press the [ ][ ] buttons to choose
[Auto], and then press the [ ] button.
●
To save images to a connected computer,
follow the procedure from step 8 in “Using
WPS-Compatible Access Points” (= 130).
●
To determine the access point password, check on the access
point itself or refer to the user manual.
●
Up to 16 access points will be displayed. If no access points are
detected even after you choose [Refresh] in step 2 to update the
list, choose [Manual Settings] in step 2 to complete access point
settings manually. Follow on-screen instructions and enter an
SSID, security settings, and a password.
●
When you use an access point that you have already connected
to for connecting to another device, [*] is displayed for the
password in step 3. To use the same password, press the [ ][ ]
buttons to choose [Next], and then press the [ ] button.
Previous Access Points
You can reconnect to any previous access points automatically by
following step 4 in “Using WPS-Compatible Access Points” (= 130).
●
To reconnect to the access point, confirm that the target device is
already connected to it, and then follow the procedure from step 8 in
“Using WPS-Compatible Access Points” (= 130).
●
To switch access points, choose [Switch Network] on the screen
displayed after connection, and then either follow the procedure in
“Using WPS-Compatible Access Points” (= 130) from step 5 or the
procedure in “Connecting to Listed Access Points” (= 132) from step 2.
●
Once you have connected to devices via the Wi-Fi menu, recent
destinations will be listed first when you access the Wi-Fi menu.
You can easily connect again by pressing the [ ][ ] buttons to
choose the device and then pressing the [ ] button. To add a
new device, display the device selection screen by pressing the
[ ][ ] buttons, and then configure the setting.
●
If you prefer not to display recent target devices, choose MENU
(= 30) ► [ ] tab ► [Wi-Fi Settings] ► [Target History] ► [Off].
●
A message is displayed if the nickname you enter begins with
a symbol or space. Press the [ ] button and enter a different
nickname.
●
When the camera is connected to a computer, the camera screen
is blank.
●
Mac OS: If CameraWindow is not displayed, click the
[CameraWindow] icon in the Dock.
●
To disconnect from the camera, turn off the camera.
●
If you chose [PIN Method] in step 6, a PIN code will be displayed
on the screen. Be sure to set this code in the access point.
Choose a device in the [Select a Device] screen. For further
details, refer to the user manual included with your access point.
Connecting to Listed Access Points
1
View the listed access points.
●
View the listed networks (access points)
as described in steps 1 – 4 of “Using
2
Choose an access point.
●
Press the [ ][ ] buttons to choose a
network (access point), and then press
the [ ] button.