Shooting – Canon PowerShot SX60 HS User Manual
Page 48
48
Before Use
Basic Guide
Advanced Guide
1
Camera Basics
2
Auto Mode /
Hybrid Auto Mode
3
Other Shooting Modes
5
Tv, Av, M, C1, and C2 Mode
6
Playback Mode
7
Wi-Fi Functions
8
Setting Menu
9
Accessories
10
Appendix
Index
4
P Mode
6
Continue registering face
information.
●
To register up to 4 more points of face
information (expressions or angles),
repeat step 3.
●
Registered faces are more easily
recognized if you add a variety of face
information. In addition to a head-on
angle, add a slight side angle, a shot
when smiling, and shots inside and
outside.
●
The flash will not fire when following step 3.
●
If you do not register a birthday in step 4, Babies or Children icons
(= 37) will not be displayed in [
] mode.
●
You can overwrite registered face info, and add face info later if
you have not filled all 5 face info slots (= 47).
Shooting
If you register a person ahead of time, the camera will prioritize that
person as the main subject, and optimize focus, brightness, and color for
that person when shooting.
●
When you point the camera toward a
subject, the names of up to 3 registered
people will be displayed when they are
detected.
●
Shoot.
●
Displayed names will be recorded in still
images. Even if people are detected, but
their names are not displayed, the names
(up to 5 people) will be recorded in the
image.
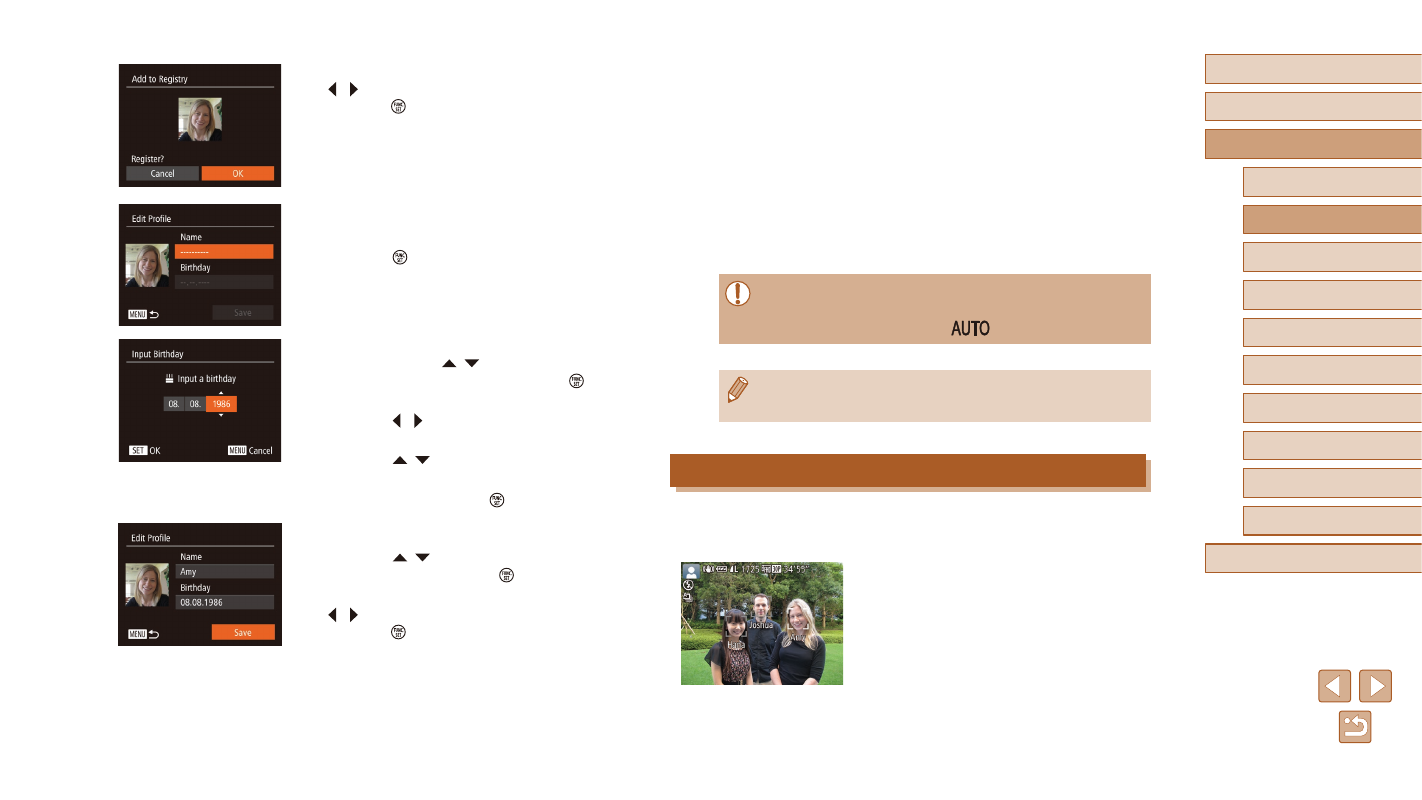
●
After [Register?] is displayed, press the
[ ][ ] buttons to choose [OK], and then
press the [ ] button.
●
The [Edit Profile] screen is displayed.
4
Register the person’s name and
birthday.
●
Press the [ ] button to access the
keyboard, and then enter the name
●
To register a birthday, on the [Edit Profile]
screen, press the [ ][ ] buttons to
choose [Birthday], and then press the [ ]
button.
●
Press the [ ][ ] buttons to choose an
option.
●
Press the [ ][ ] buttons to specify the
date.
●
When finished, press the [ ] button.
5
Save the settings.
●
Press the [ ][ ] buttons to choose
[Save], and then press the [ ] button.
●
After a message is displayed, press the
[ ][ ] buttons to choose [Yes], and then
press the [ ] button.