Channel settings – MOTU UltraLite-mk5 USB-C Audio/MIDI Interface User Manual
Page 39
C U E M I X 5
39
CHANNEL SETTINGS
3
4
5
2
1
13
12
11
10
9
8
7
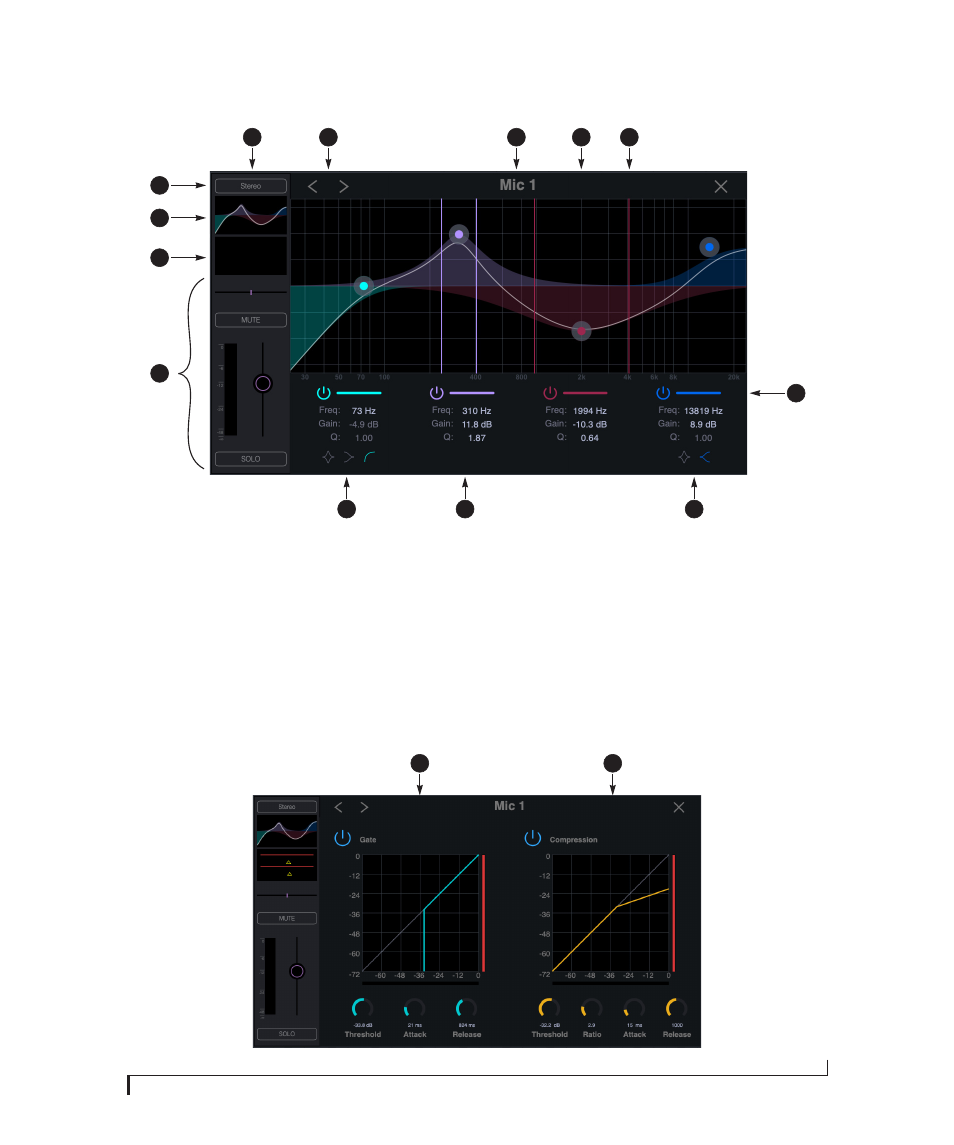
Click any of the items at the top of a
channel strip (items #1, 2 or 3 on
page 38) to access the Channel Settings
shown here.
1. The
Channel Settings Sidebar
displays basic settings for the
channel.
2. The
Next/Previous Channel
buttons
display the settings for adjacent
channels in the mix.
3. Click the
Channel Name
to rename
the channel.
4. Drag the
Frequency/Gain
handle for
an EQ band to change the frequency
and/or gain for the band.
5. Drag the
Q (bandwidth)
handles for
an EQ band to change them. The
handles are color-coded to match
the color of their respective EQ band.
6.
Enables
(or disables) the EQ band.
7. Click the
Notch/Shelf
switch to
toggle the filter type.
8. Click filter settings to edit them
directly. See “Four-band parametric
9. Click the
Notch/Shelf/Low-cut
switch
to change the filter type.
10.
Basic channel settings
(gain, pan,
solo, mute and level meter) are
shown here for convenience.
11. Click to access the
Compressor
and
Gate
.
12. Click to access the
Parametric EQ
settings.
13. The
Stereo Link
button links or
unlinks the channel to an adjacent
channel for stereo pairing.
14. The Gate processor is available on
Mic inputs 1 and 2 only. See “Gate”
15. The Compressor is available on all
analog inputs. See “Compressor” on
14
15
6