Reverb – MOTU UltraLite-mk5 USB-C Audio/MIDI Interface User Manual
Page 42
C U E M I X 5
42
REVERB
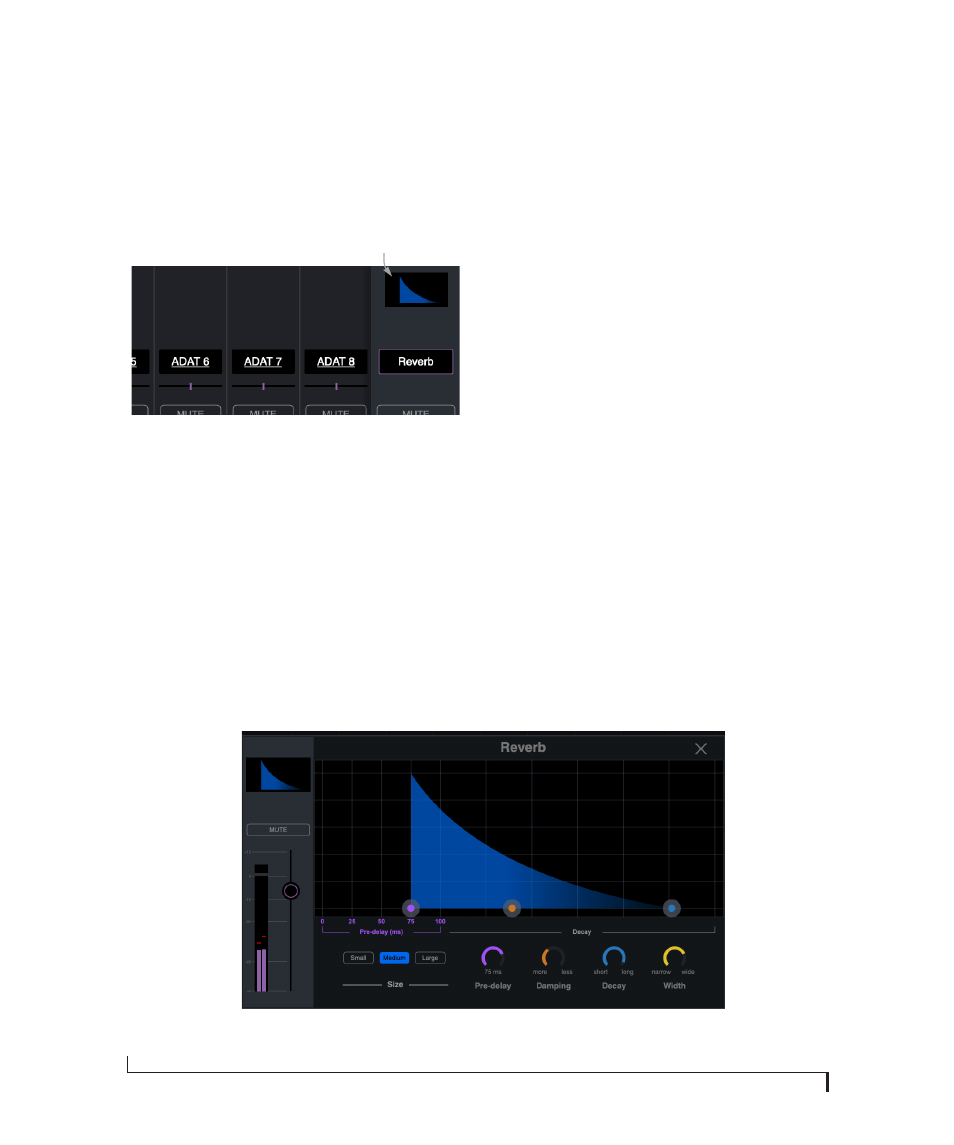
To access the reverb settings: go to the Reverb bus
tab (item #2 on page 36) and then click the
thumbnail at the top of the reverb bus fader, as
shown below.
Figure 6-3: Accessing the Reverb processor.
Reverb settings
The Reverb processor (Figure 6-4) provides
Small
,
Medium
and
Large
room sizes, along with
Pre-Delay
(see below),
Damping
,
Decay
(length)
and
Width
(stereo image) controls, which you can
adjust with the handles on the graph or the
settings below.
Predelay
Predelay is the amount of time before the acoustic
energy from the source returns to the listener,
after reflecting off the surfaces of the listening
space. The very first reflections helps you perceive
information about the listening space, (size,
distance, surface type, etc.) In large rooms, it takes
a while (on the order of milliseconds) before the
first reflections return to the listener. Predelay is
useful for adding clarity, as it delays these
reflections, before the onset of full reverberation.
For example, with pre-delay added to vocals, the
reflections won’t start until after the initial sound
of a word has been sung.
Routing inputs and groups to the reverb
processor
The reverb processor is a single, independent unit
that provides stereo reverb. Use the channels in the
Reverb mix tab (item #2 on page 36) to route input
signals to it. All incoming signals to the reverb
processor are merged and processed together. The
resulting stereo output from the reverb can then
be added into any other mix bus with the Reverb
channel strip (item #5 on page 37).
Click here to access the
reverb settings
Figure 6-4: The reverb processor.