ONICON F-4000 Series User Manual
Page 19
11451 Belcher Road South, Largo, FL 33773 • USA • Tel +1 (727) 447-6140 • Fax +1 (727) 442-5699 • [email protected]
F-4000 Series Ultrasonic Flow Meter Manual 05/15 - 0707-13 / 18838
Page 19
11. Ensure that the bracket is sitting on a smooth area without any raised spots (seams,
etc.). Mark a generous rectangle around the bracket with a pencil, marker or chalk.
Remove the bracket and the Mylar guide.
12. Clean and de-grease the area within the rectangle. Use the small sanding block
provided with the installation hardware as necessary to remove any grit, corrosion,
rust, loose paint or other contaminants. The cleaned surface should extend at least ½”
beyond the length and width of the mounting bracket.
13. Replace the Mylar guide back in the same position it was in and re-tape it to the pipe.
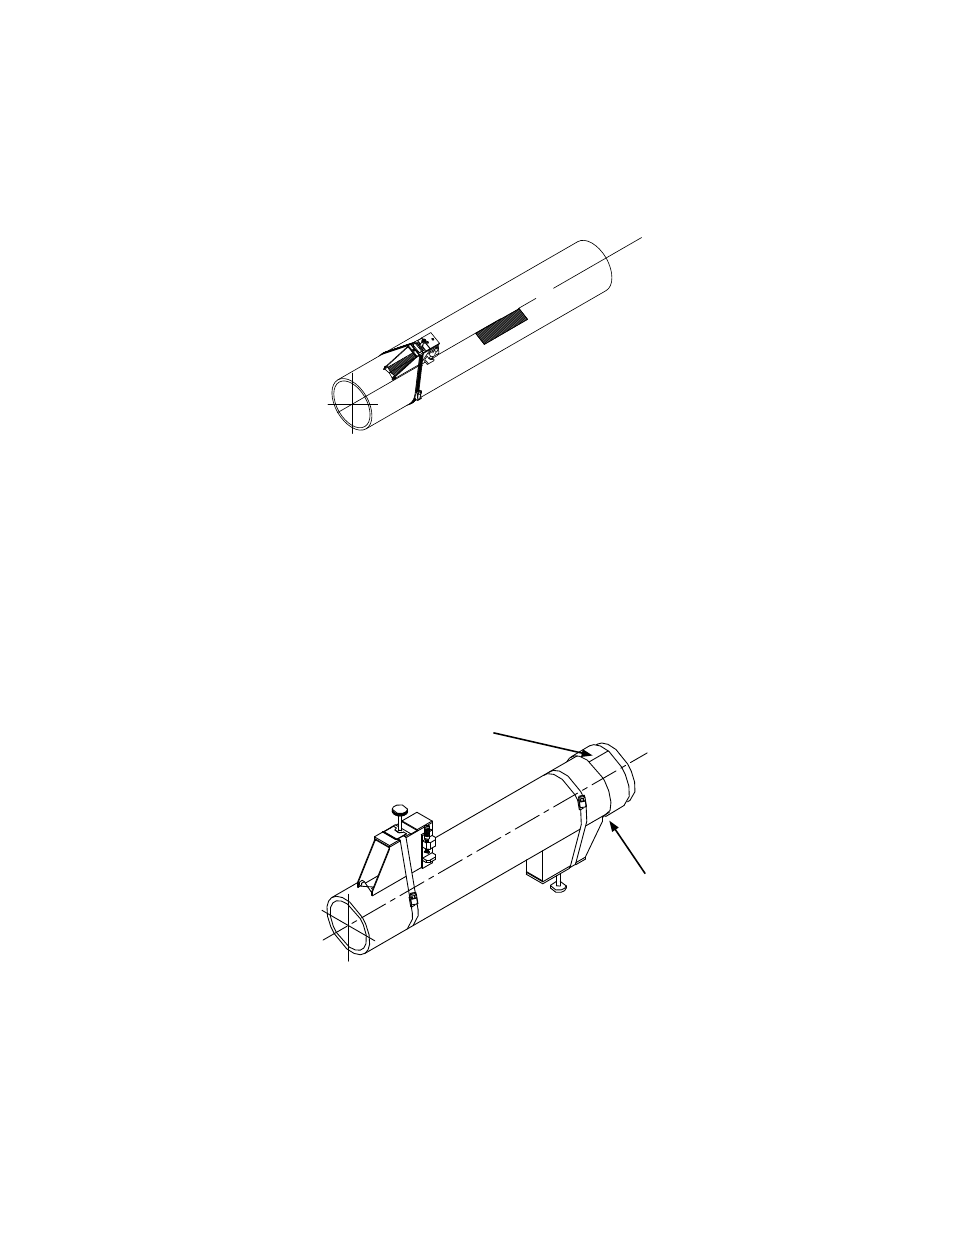
14. Position the bracket as before against the edge of the guide with its tapered roller
centered on the half way mark drawn on the guide. Secure it in place with a mounting
strap as shown below. Make sure the mounting strap tightening screw is facing toward
the bracket so you can hold it in place while tightening the screw. Note that the angled
end of the bracket must be facing away from where the other bracket will be mounted.
While tightening the strap, check to ensure that the bracket remains centered on the
pipe. (The bracket is centered on the pipe when the bottom edges of both aluminum
side plates on the bracket are in full contact with the pipe surface.)
Mylar spacing guide aligned
with marks on pipe.
Bracket aligned with edge of
guide and centered on marks
on the guide.