Fronius IG 300 User Manual
Page 41
33
-
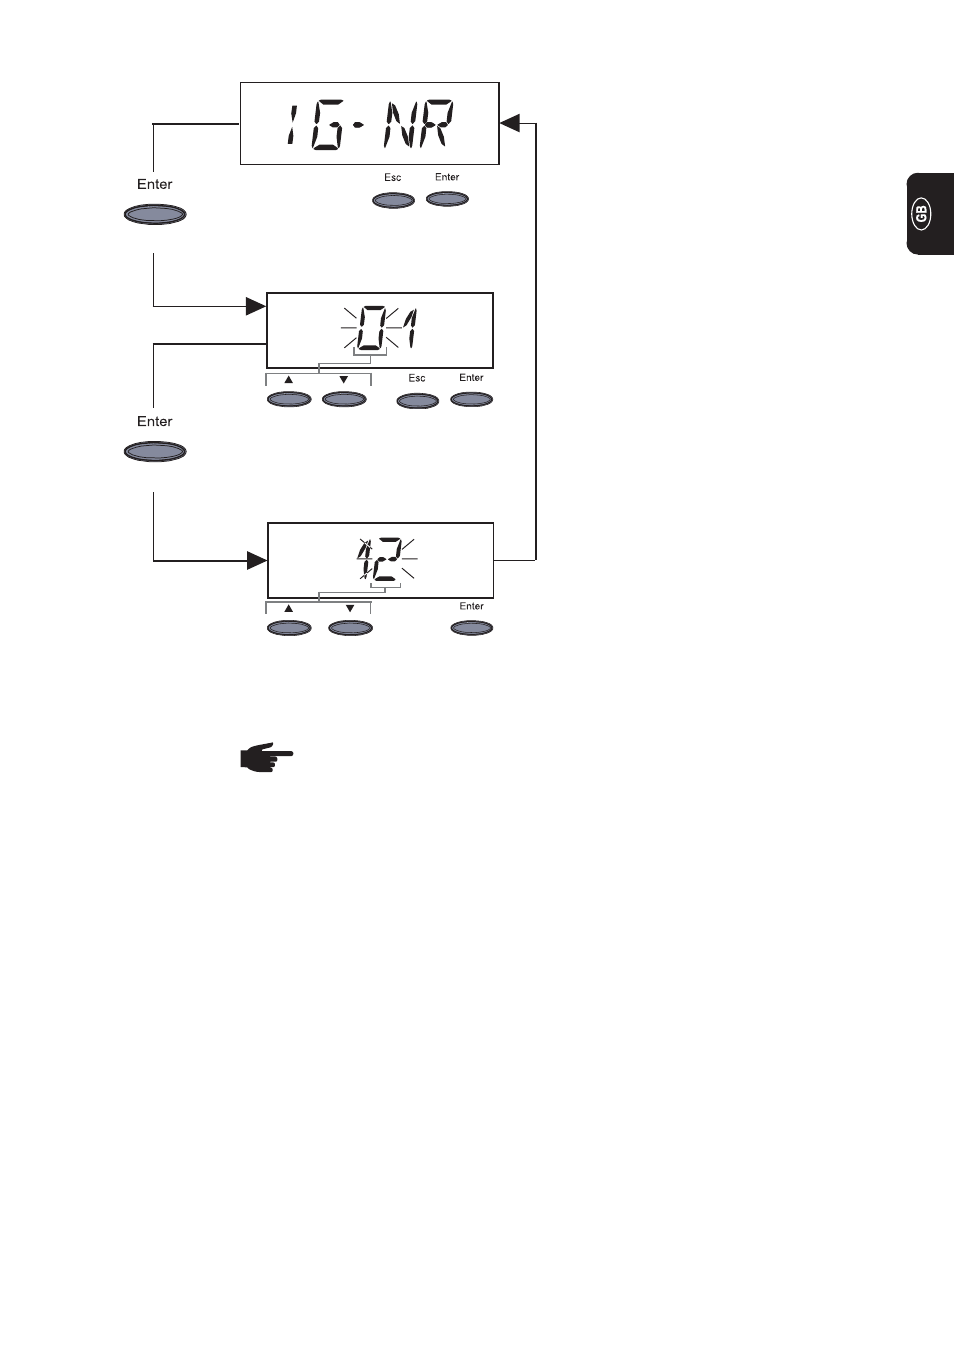
„IG no.“ ... Sets the number (=
address) of the FRONIUS IG in a
system with several interconnected
photovoltaic inverters
-
To initiate „IG no.“ adjustment: Press
„Enter“ key (D)
(D)
(B)
Enter address (01 ... 99) (factory setting:
01)
-
First digit flashing
-
Use key (A) or (B) to select a number
for the first digit
-
Press “Enter” key (D) to confirm
-
Next digit flashing
(A)
(B)
(D)
(A)
-
The procedure for entering the se-
cond digit is the same as for the first
digit (described above)
(D)
(D)
(C)
(C)
(D)
-
Accept the IG no.: Press „Enter“ key (D)
-
Restore previous setting: Press „Esc“ key (C)
NOTE! If several FRONIUS IGs are interconnected with a datalogger and data
communication is to be performed, then each FRONIUS IG should be assigned
a different address.
It is important to assign a different address to each FRONIUS IG to enable the datalog-
ger to distinguish between the individual inverters. If there are two FRONIUS IGs with
the same address in the system, then data communication with the datalogger will not be
possible. A different address should be assigned to any FRONIUS IGs on which status
message 504 appears.
Important! If your version does not have a display unit, information on how to set the
address can be found in the chapter entitled “Installation”, section entitled “Design
without display: Set address”.