Installation - direct gas piping, Step 3 connect the supply gas line, Step 2 install additional regulator if required – Greenheck DG / DGX with Pilot Ignition (463555 IOM) (Pre-2008) User Manual
Page 11: Step 4 pipe the optional vent line, Step 5 test the system for leaks, Warning
11
Installation - Direct Gas Piping
Installation
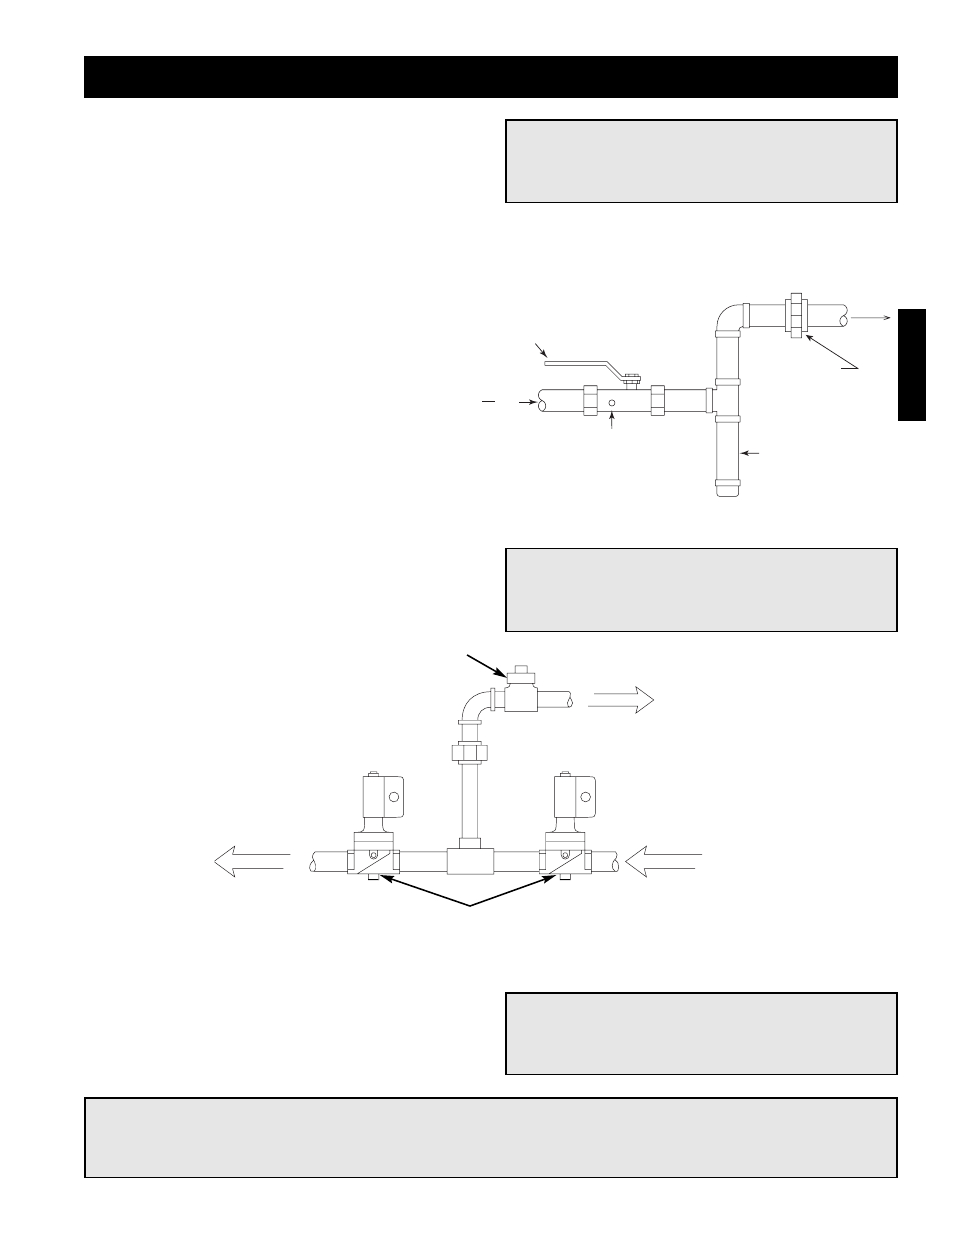
To
Controls
Gas Cock
From
Gas
Supply
6 in. Trap
1/8 in. Plugged Tap
Ground Joint Union
Step 3 Connect the Supply Gas Line
A manual shut off valve (gas cock), 1/8 in. plugged
test port and 6 in. drip leg must be installed prior to
the gas train. The valve and the test port must be
accessible for the connection of a test gauge. Supply
gas connections must be made by a qualified installer
and are not furnished by Greenheck
Step 2 Install Additional Regulator if
Required
When the supply gas pressure exceeds the maximum
gas pressure shown on the direct gas nameplate, an
additional regulator (by others) is required to reduce
the pressure. The regulator must have a listed leak
limiting device or it must be vented to the outdoors.
Step 4 Pipe the Optional Vent Line
If an optional vent line is located between the safety
shutoff valves it must be piped to the outdoors.
Step 5 Test the System for Leaks
Check both the supply lines and the factory piping for
leaks. Apply a soap and water solution to all piping
and watch for bubbling which indicates a leak.
WARNING!
The factory piping has been checked for leaks, but should be rechecked due to shipping and
installation.
WARNING!
NEVER test for a gas leak with an open flame.
NOTE!
The regulator located inside the unit is used to
adjust the unit’s maximum output temperature.
NOTE!
Reference the National Fuel Gas Code for
additional vent line requirements.
Safety Shut-off Valves
Vent Line Solenoid
To Burner
Vent Line
To Outdoors
From Supply
Supply Gas Line
Optional Vent Line