Appendix b - usb driver installation, Usb driver installation – Orion System Lead Controller User Manual
Page 48
Appendix B - USB Driver Installation
Lead/Lag Controller Technical Guide
48
USB Serial Converter and Serial Port Driver
Installation
The internal USB communication port of the Lead/Lag Controller
uses a specialized driver that must be installed on your Windows PC
before communication to the device can be established.
NOTE:
You may already have this driver installed on your PC if
you are using a USB-Link 2 or CommLink 5.
1. Before you begin, you must determine if your computer
is running 32-bit or 64-bit Windows. Open the System
information by clicking the
<Start>
button, clicking
<Control Panel>
, and clicking
<System>
. Under
System, you can view the system type. Based on what
type of system you have, you will choose 32_Bit.exe or
64_Bit.exe from the list of fi les shown in Step 10.
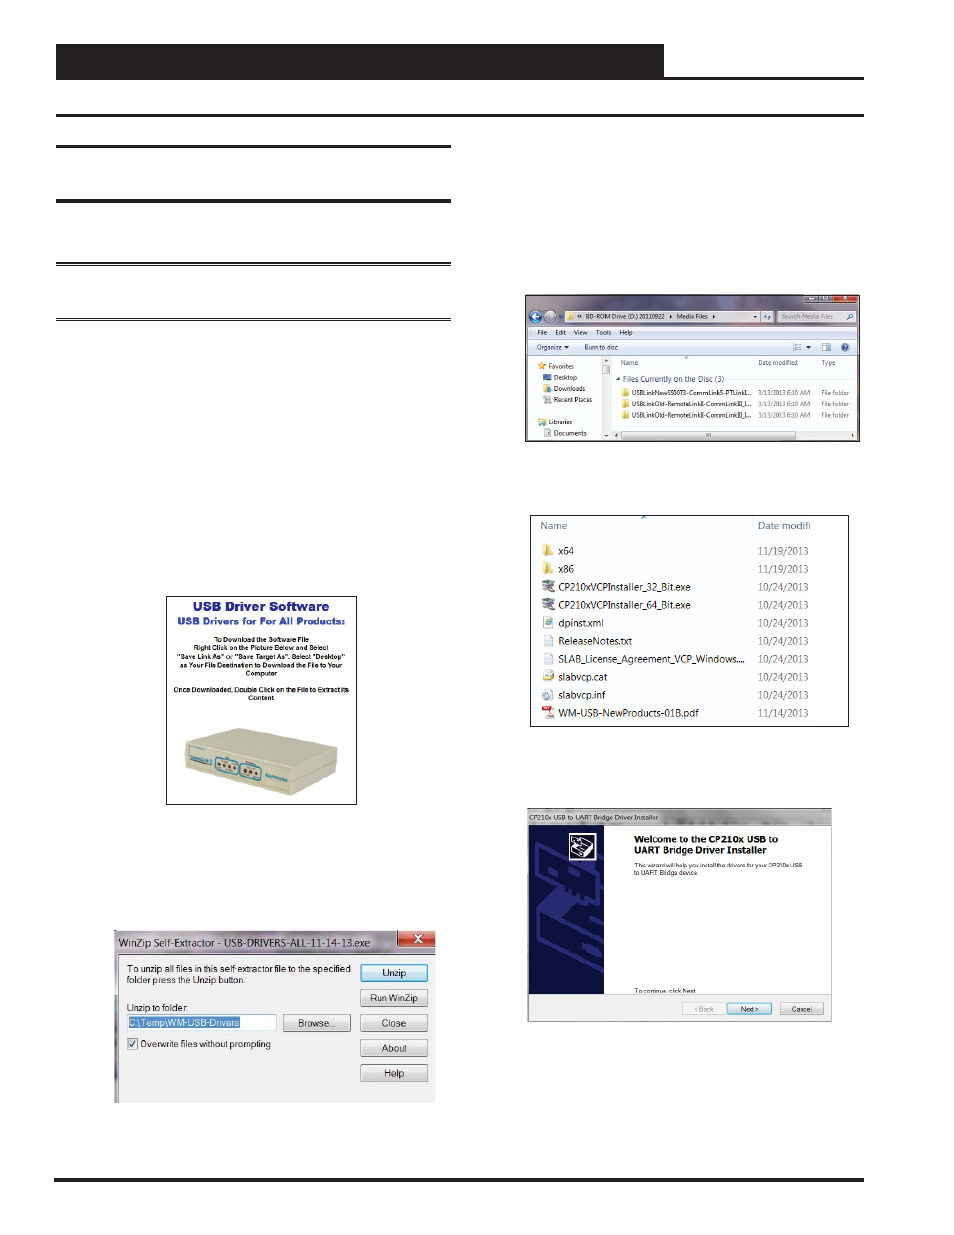
2. Insert the USB Drivers CD-ROM into your CD-ROM
drive or download the USB Drivers fi le from www.
orioncontrols.com/software-new.html. If using the CD-
ROM, go to Step 7. If downloading the fi le, you will
need to scroll down the page and right-click the picture
of the CommLink in the box labeled “USB Drivers For
All Products” to download the driver fi les.
3. Click
<Save Link As>
or
<Save Target As>
and
select Desktop as the destination.
4. Go to the “USB-DRIVERS-ALL.exe” fi le on your desk-
top. Double-click on this fi le and choose “Run” from the
options list. The following window will appear:
5. Select
<Unzip>
and the fi le will be unzipped to the
folder C:\Temp\WM-USB-Drivers folder by default.
6. Next,
go to the C:\Temp\WM-USB-Drivers folder and
now go to Step 9.
7. Click your
<Start>
button and then click,
<Computer>
.
8. Double-click your CD-ROM drive. Open the Media
Files Folder.
9. Double-click the folder “USBLink NewSS0073”.
10. The following list of fi les will display. Choose 32_Bit.
exe or 64_Bit.exe based on what type of system you
determined you have in Step 1.
11. In the window that pops up, shown below, click
<Next>
and the installation program will walk you through the
rest of the steps.
12. When successful installation has occurred, connect the
USB cable between the PC and the Lead/Lag Controller.
The PC will automatically recognize the device and a
COM port will be assigned.
NOTE: The COM port used must not be greater than
COM9. If the PC assigned a COM port greater than
COM9, please proceed to page 49 to change the USB
COM port.
USB Driver Installation