Communication settings – Orion System Lead Controller User Manual
Page 7
Lead/Lag Controller Technical Guide
Section 1: Lead/Lag Wiring & Setup
7
Communication Settings
Before Applying Power
In order to have a trouble free start-up, it is important to follow a
few simple procedures. Before applying power for the fi rst time, it
is very important to correctly address the controller and run through
a few simple checks.
Communication Settings
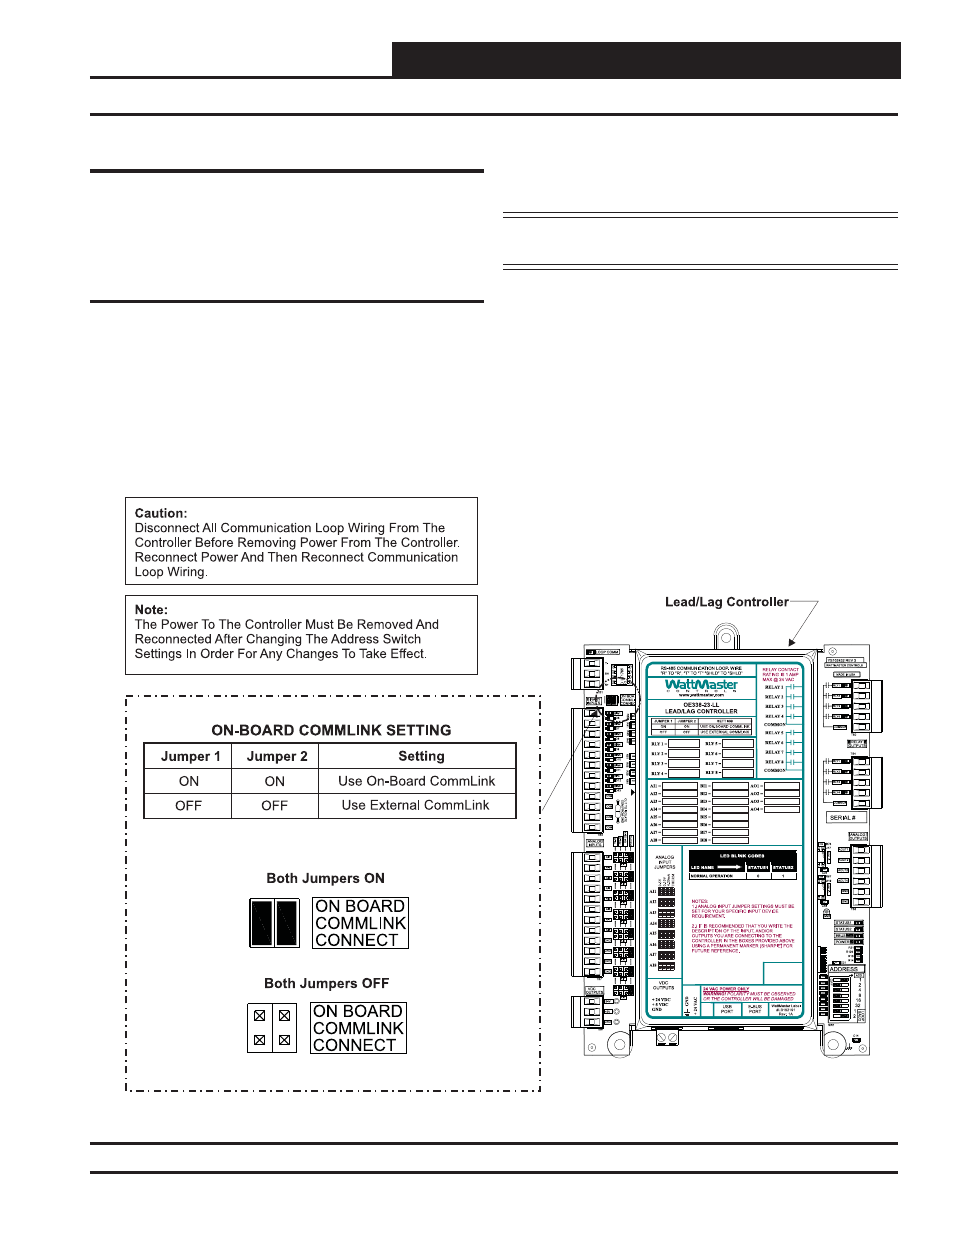
Stand Alone Operation
The Lead/Lag Controller has an on-board CommLink that is used
during Stand-Alone Operation. When confi gured for Stand-Alone
operation, a computer running Prism 2 software can be connected
directly to the USB port located at the bottom of the Lead/Lag
Controller for programming and monitoring. In order to operate in
Stand-Alone Mode, two things need to be set. First, both CommLink
Jumpers found on the upper left hand side of the board need to be set
to ON. See Figure 3 for details. Second, the Baud Rate determined
by setting ADDRESS Dipswitches 7 and 8 needs to be set to OFF/
ON. See Figure 4, page 8 for details.
NOTE: If using the Internal CommLink, you must set up
the USB drivers. See Appendix B, page 48.
Network Operation
The Lead/Lag Controller can be confi gured for connection to a
networked system that has an external CommLink. In this case, the
on-board CommLink would not be used. For this confi guration,
two things need to be set. First, both CommLink Jumpers found on
the upper left found on the upper left hand side of the board need
to be set to OFF. See Figure 3 for details. Second, the Baud Rate
determined by setting ADDRESS Dipswitches 7 and 8 needs to be
set to OFF/OFF if using a CommLink IV and to OFF/ON if using a
CommLink 5. See Figure 4, page 8 for details.
Figure 3: Lead/Lag Controller Address Switch Setting