Set drive adr configuration, Replace a faulted drive, Replace a faulted drive -4 – Yaskawa CM013 V7 DeviceNet Option User Manual
Page 47
Automatic Device Recovery 3-4
Set Drive ADR Configuration
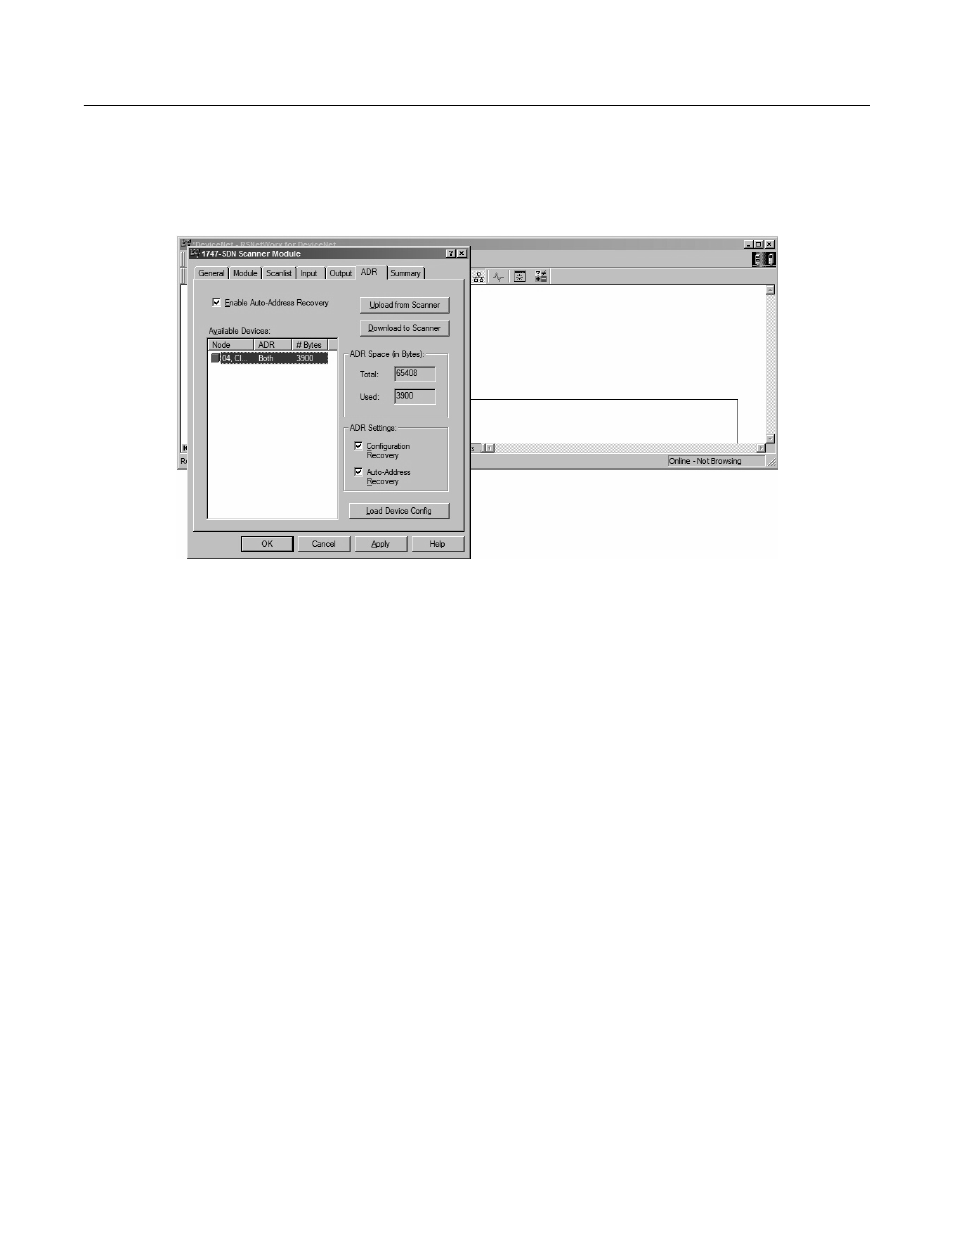
After the scan list has been verified and the electronic keys have been entered for the devices on the network, select the ADR tab and
highlight the device. Check Enable Auto-Address Recovery, then select Load Device Config. Check Configuration Recovery, then check
Auto-Address Recovery. Once the ADR settings for all devices have been entered, select Download to Scanner to save the ADR
configuration data to the scanner.
Fig 3.5 – Device ADR Configuration
Replace a Faulted Drive
Verify that the replacement drive is identical to the faulted drive. The replacement drive must be of the same drive family (V7AM) and same
drive model (20P4, 22P2, etc.) as the faulted drive.
Verify that the main power has been shut off and locked out and that there is no voltage present at the drive. Connect the replacement drive's
power and motor leads. Refer to the appropriate drive user and/or technical manual for the proper way to connect the drive. Install the
DeviceNet Option Card but do not connect it to the DeviceNet network. Set the DeviceNet Option Card baud rate switch to 9 for Auto Sense
and set the MAC ID address switches to 99. With the motor's load disconnected, apply power to the drive and verify that it functions properly
from the operator keypad.
Set the drive control mode to the control mode of the faulted drive and remove power from the drive. Set the DeviceNet Option Card MAC
ID address switches to 63. Reapply power to the drive.
Auto-tune the drive.
Connect the DeviceNet Option Card to the DeviceNet network.