4 adding a dde frame, Adding a dde frame – Daktronics Venus DataStreamer User Manual
Page 42
36
Creating Messages for a DAKTicker
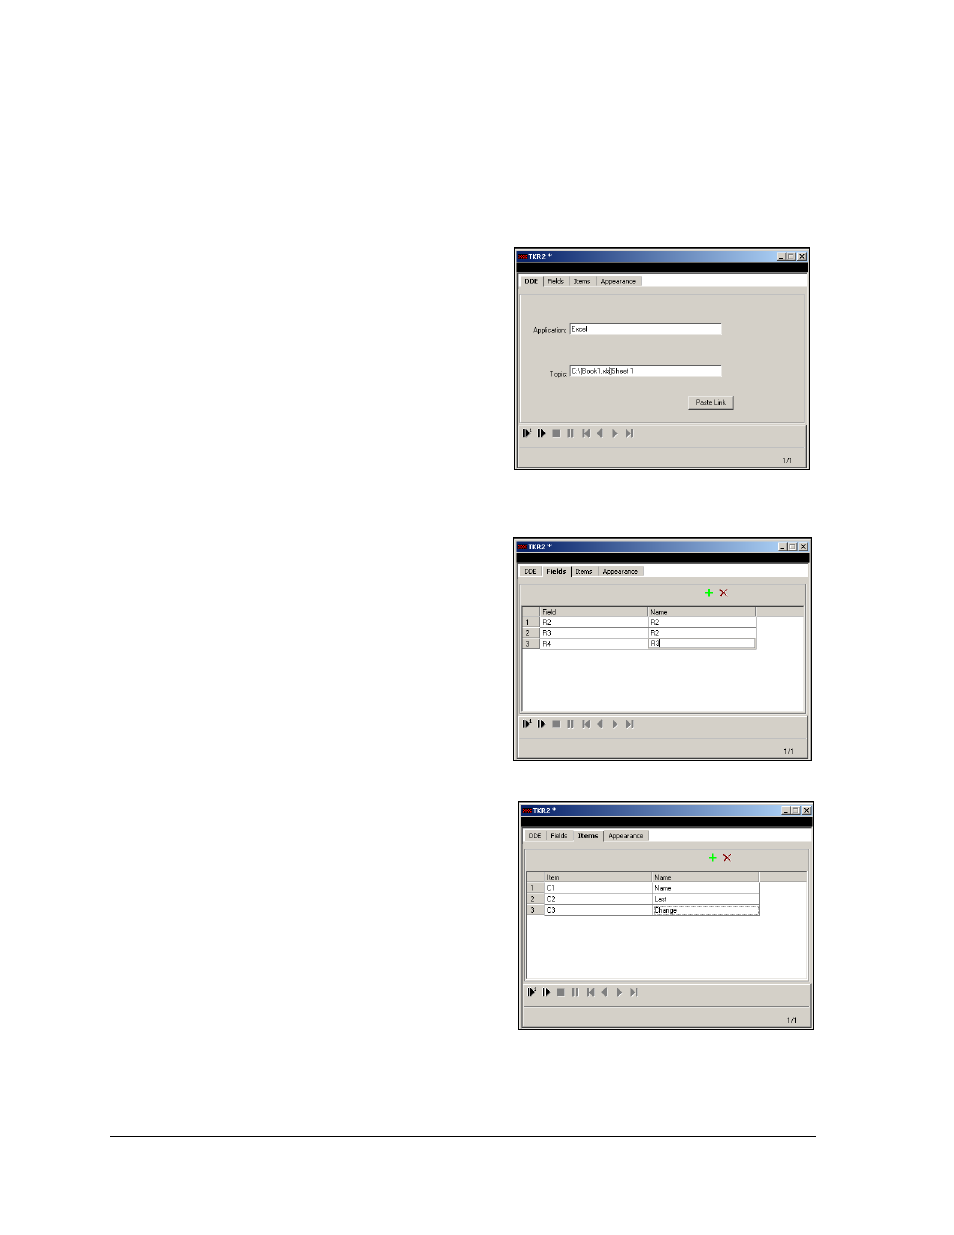
6.4 Adding a DDE Frame
Dynamic Data Exchange (DDE) frames are used to display information from other DDE
compliant programs such as Microsoft Excel. The following example explains the process as
it would work for information coming from an Excel spreadsheet.
To add a DDE frame, complete the following
steps:
1. Click the DDE icon located in the left
toolbar. The DDE window will appear.
2. Enter the name of the application
which is the source of the information
to be displayed, in this case, Excel as
shown in Figure 57.
3. Enter the complete file name (including
file extensions and worksheet name) of
the file to be monitored in the topic field.
4. Click the Fields tab and the Fields
dialog window will appear as shown
in Figure 58. Fields are similar to the
rows on a spreadsheet.
5. Create a new entry line for field
information by clicking on the “+” sign
to the top right of the dialog box.
6. In the Field area, enter the row
numbers of the information that will be
monitored.
7. In the Name field, enter the row number
of the identifying information for the
data that is being monitored.
Note: This can be left blank or used as
an override field to override the label
for a set of data associated with a row in
the spreadsheet.
8. Click the Items tab. The Items window
will appear as shown in Figure 59.
9. In the Item field, enter the column
location of the information that is being
monitored. (Items are similar to columns on a spreadsheet.)
Figure 57: DDE Frame Dialog
Figure 58: DDE Fields Tab
Figure 59: DDE Items Tab