9 entering database information, Entering database information – Daktronics Venus DataStreamer User Manual
Page 69
Creating Messages for the Panelized DataTrac
63
7.9 Entering Database Information
Database information stored in private database systems may also be shown on a display. To
show database information, complete the following steps.
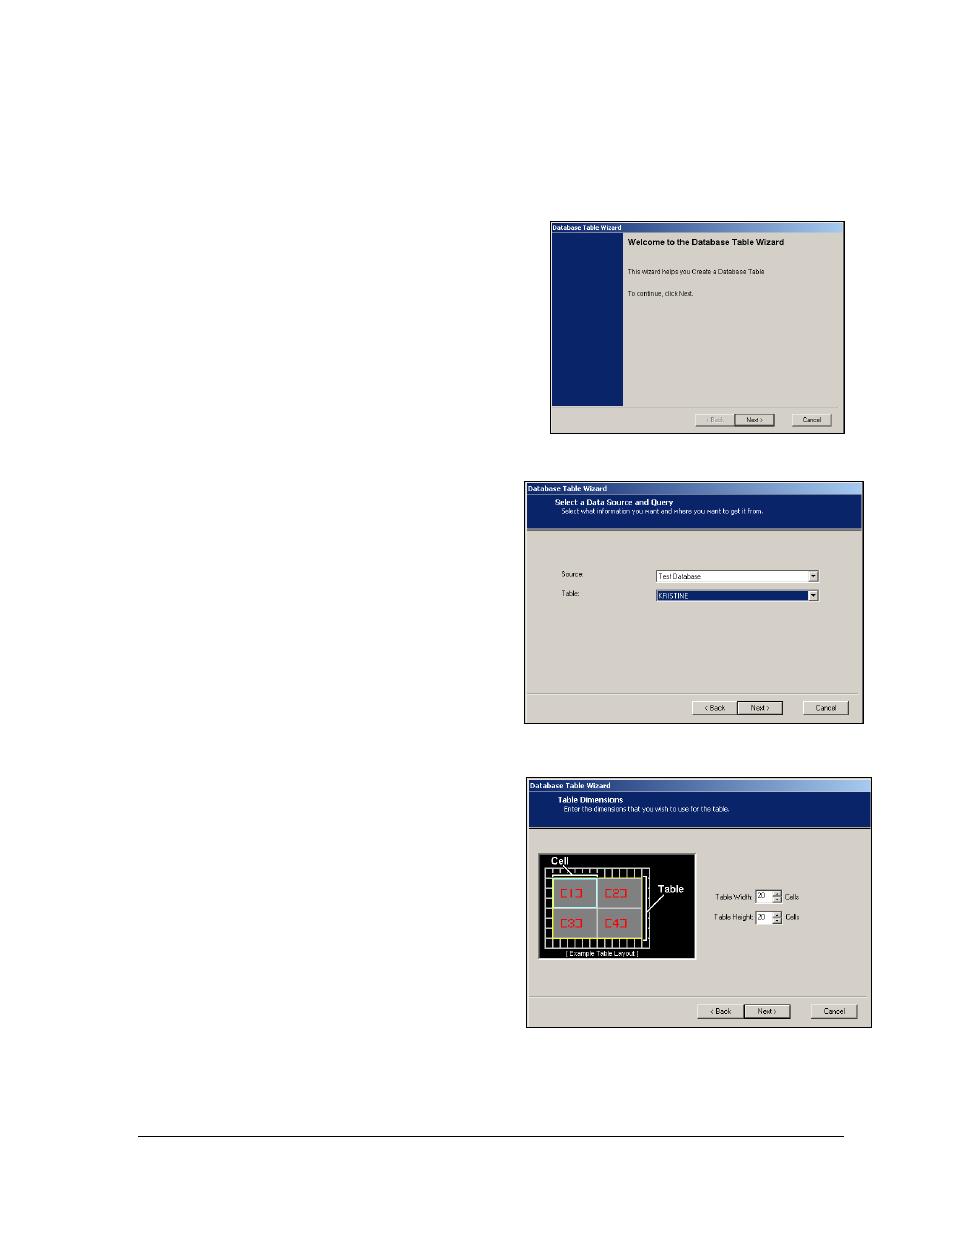
1. Click the Database icon from the left
toolbar and the Database Table Wizard
will open as shown in Figure 116. Click
Next.
2. Click the down arrow next to the Source
field and select the appropriate database
as shown in Figure 117. (Note:
Databases must be configured prior to
being selected. Refer to Section 3.4.)
3. Click the down arrow next to the Table
field and select the appropriate table.
4. Click the up and down arrows next
to the Table Width field to set the
number of columns the table will
contain as shown in Figure 118.
Repeat this step in Table Height to set
the number of rows the table will
contain. Click Next.
5. Click the up and down arrows to set
the width and height of each cell
within the table as shown in Figure
119. Click Next.
6. In the Field Configuration dialog,
enter the Number of Fields to be
located in each cell as shown in
Figure 120. Click in the first field
under the Field column and select the
information to be displayed in that
field of the table.
7. In the Line and Character columns,
choose the line and character on
which the field should be displayed
within each cell. For example, line 1
is the very top line of the defined cell
and character 2 is the second column
from the left of the defined cell.
Figure 116: Database Table Wizard
Figure 117: Database Source Selection
Figure 118: Setting Table Dimensions