Powering up – Omnia Audio Omnia.11 User Manual
Page 23
7
Powering Up
Now you are ready to power up the Omnia.11 for the first time.
Connect AC power to the unit using the appropriate supplied power cable for your location.
(There is no power switch!)
When the Omnia.11 is first powered on, you will see text-based boot status messages followed by some graphics test
screens and finally the main screen as shown below.
This main screen’s metering will appear “frozen” for a while as the I/O board finishes booting up. This is normal.
Audio will appear at the analog audio and AES/EBU outputs approximately 1 minute from power-on. Livewire I/O
initialization will take a bit longer.
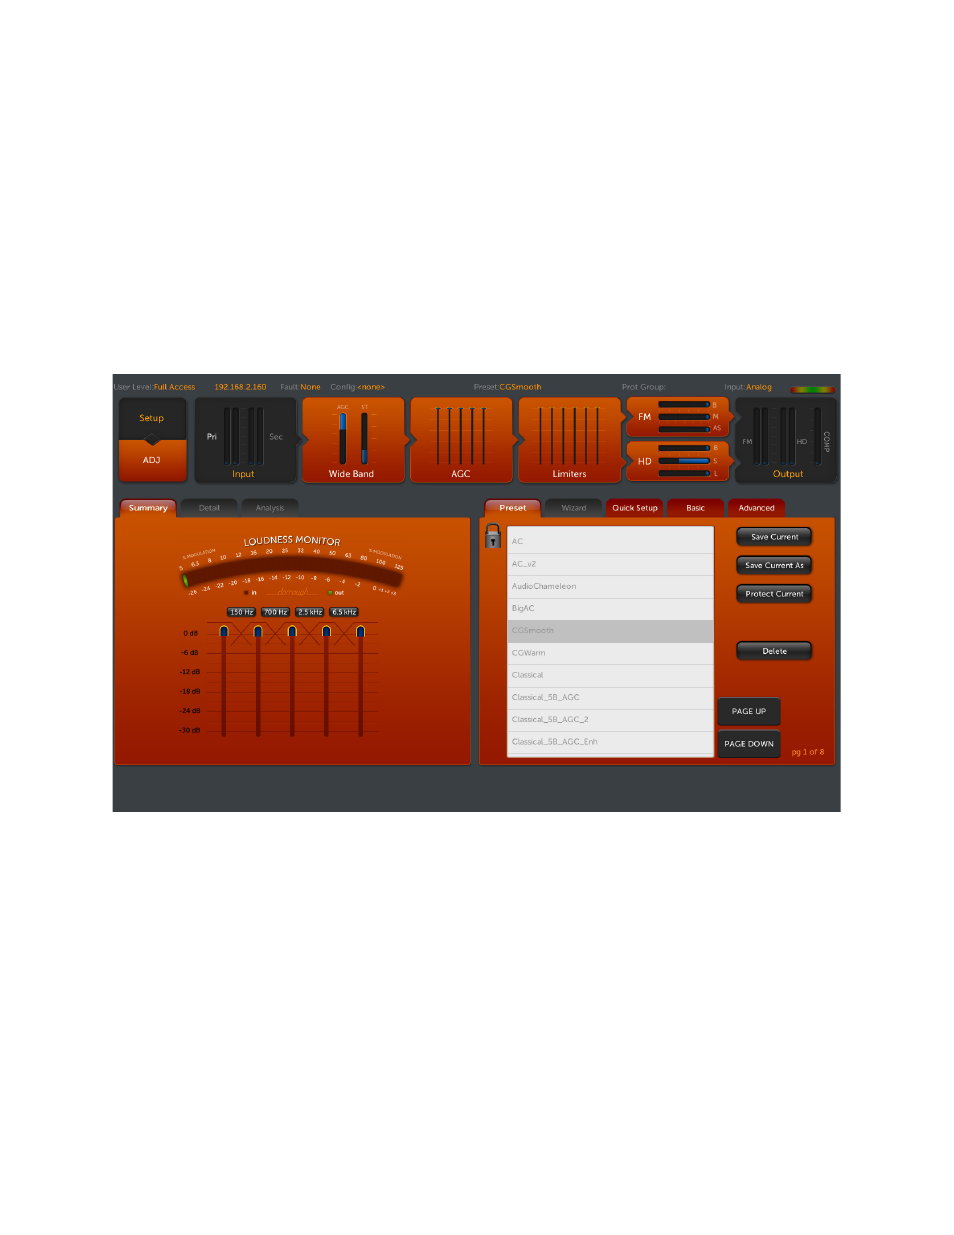
Initial Screen After Bootup: The “Preset” Screen
You will see that the screen defaults to the Preset menu, showing the currently running preset highlighted in the
alphabetically arranged preset list. You will also notice that the presets appear “grayed-out”. The preset list defaults
to locked mode in order to prevent an unintended preset change when bringing the touchscreen out of screensaver
mode. To make the preset list active, simply touch the “padlock” icon button in the upper-left corner of the preset
list. It will then change to an “open padlock” icon and will unlock the preset list. Now you can simply touch the
desired preset to put it on the air. To re-lock the preset list, simply touch the “open padlock” icon button again or
you can simply exit the preset list by selecting any other icon button and the list will be re-locked automatically.
The Omnia.11 is now ready for configuration and use.
Please proceed to the next chapter to learn how to use the touch screen graphical user interface and how to configure
the Omnia.11 for your system.