Figure 48 – H3C Technologies H3C S7500E Series Switches User Manual
Page 93
82
Figure 48 Power module installation flow
To replace a power module:
1.
Prepare an antistatic mat to place the removed power module.
2.
Wear an ESD wrist strap and make sure it has a good skin contact and is well grounded. For more
information, see "
3.
Turn off the switch on the power module.
4.
Remove the cable from the power module.
5.
Use a Phillips screwdriver to loosen the captive screw on the power module, as shown in callout 1
on
.
6.
Holding the power module handle with one hand and supporting the bottom of the power module
with the other, gently pull the power module out, as shown in callout 2 on
7.
Put the removed power module on the antistatic mat.
8.
Install a new power module. For the installation procedures, see "
After removing the power module, if you do not install a new power module, install a blank panel.
As shown in callout 3 on
, align the screws on the blank panel with the screw holes on
the switch, and then use a screwdriver to fasten the screws on the blank panel.
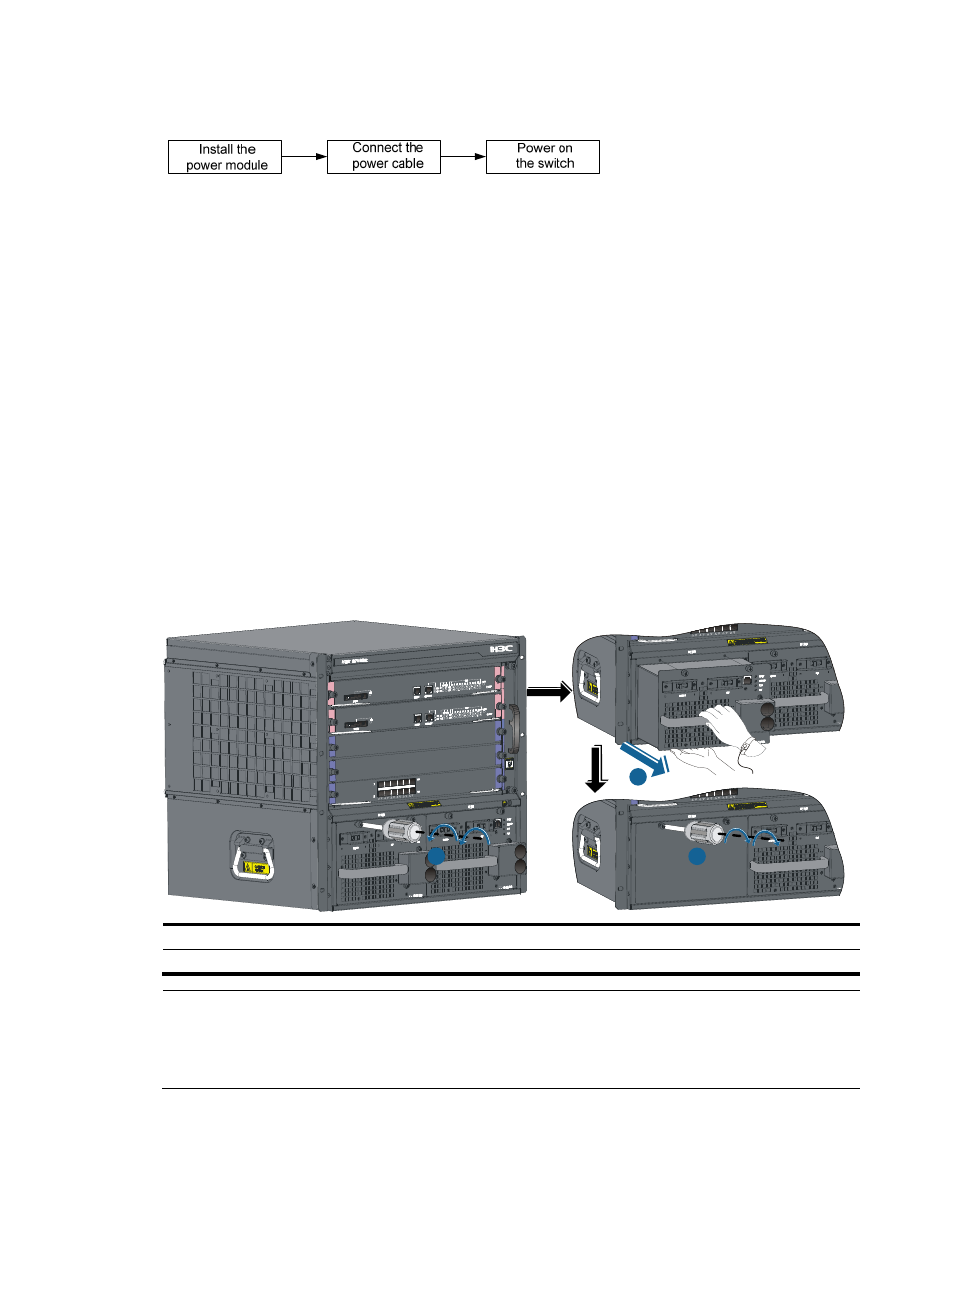
Figure 49 Removing the power module
(1) Loosen the captive screw
(2) Pull the power module out
(3) Fasten the screw on the air filter (optional)
NOTE:
If the power module to be removed is in a power adapter, and the power module to be installed does not
need a power adapter, remove the power adapter after removing the power module. The procedures for
removing a power adapter are the same as removing a power module.
1
2
3