Sony Signature Series NW-WM1ZM2 Walkman Digital Music Player User Manual
Page 18
18
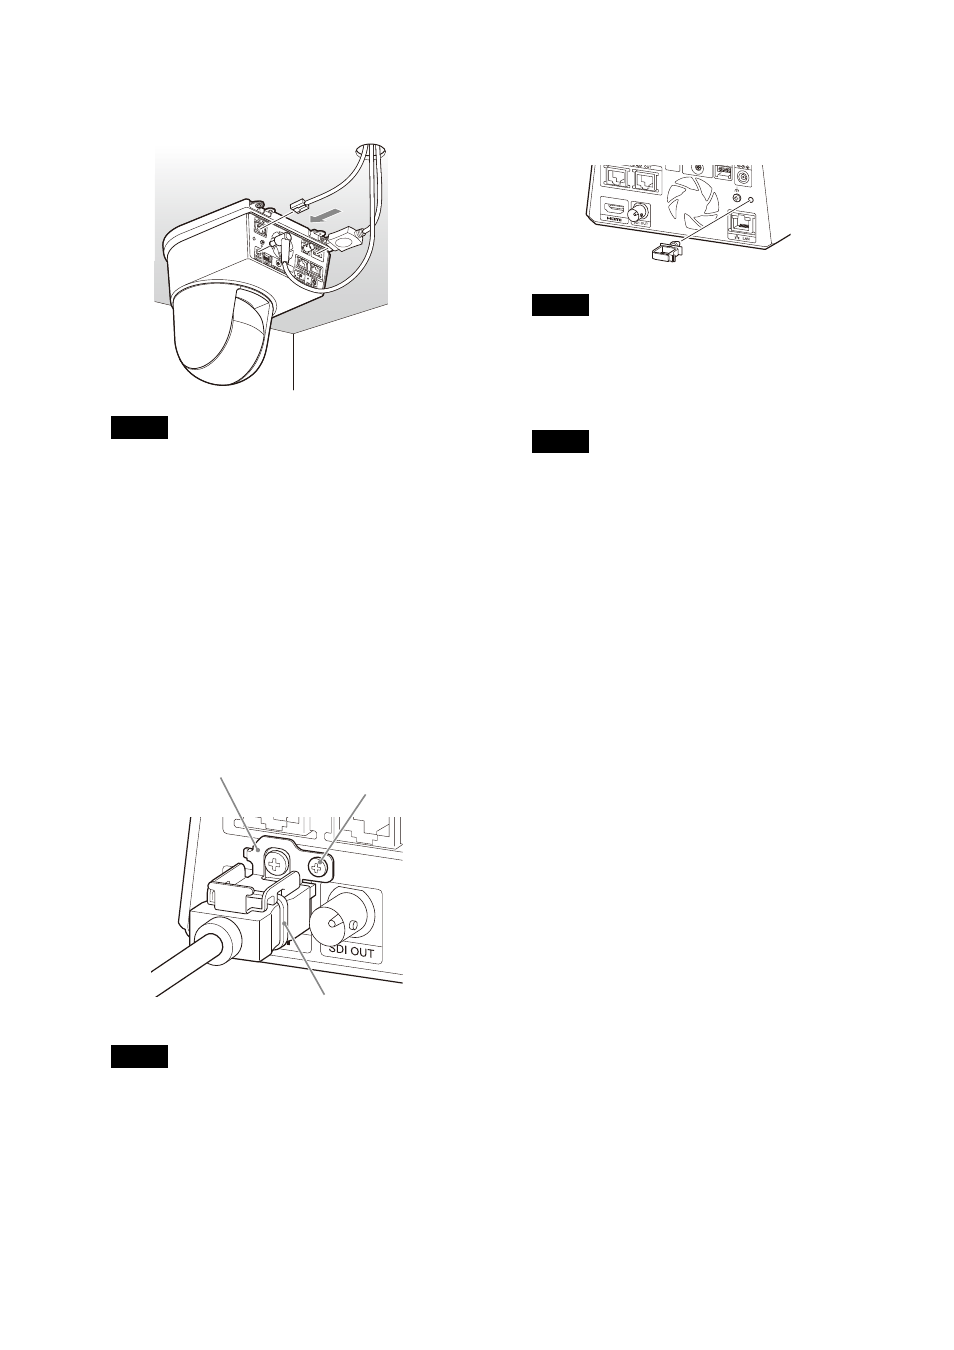
6-1
Connect the cables to the terminals at the
back of the camera.
Notes
• Make sure no load is applied to the
connectors of the cables.
• For measures that prevent the HDMI cable
from being pulled out, proceed to step 6-2
after connecting the HDMI cable. Then,
connect all the other cables.
• To prevent the AC adapter cord from
coming off, proceed to step 6-3, then
connect the other cables.
6-2
To prevent the HDMI cable from coming off,
mount the HDMI cable fixing plate with the
supplied screw (single, M2.6 × 6, black) on
the back of the camera, then fix the HDMI
cable with a banding band, etc.
Note
Do not attach the HDMI cable on the camera
if you will not use it.
6-3
To prevent the AC adapter cord from
coming off, attach the supplied cord
clamper to the rear of the camera and fix
the AC adapter cord.
Note
The cord clamper cannot be replaced once
attached to the camera.
7
Adjust the image flip function to optimize
the ceiling mounting status.
Note
The preset settings, P/T Range Limit and PTZ
Auto Framing setting return to their default
settings when the image flip function setting
is changed. When setting, make sure to set
the image flip function before the preset
settings.
How to remove the camera
1
Remove the 3 screws used to attach the
camera in step 5 of “How to install the
camera”.
2
While pushing the entire camera up
towards the ceiling, move the camera to the
front.
The hooks will disengage and you can
remove the camera.
Ceiling
HDMI cable fixing plate
Banding band
M2.6 × 6 (supplied)