Establishing communication, Changing settings, Establishing communication -2 – Basler Electric DECS-100 User Manual
Page 54: Changing settings -2

5-2
DECS-100 BESTCOMS™ Software
9287500991 Rev M
Establishing Communication
Communication between BESTCOMS and the
DECS-100 must be established before viewing
metering values or reading or changing settings.
BESTCOMS screen settings are updated only
after communication is opened or the
communication settings have been changed.
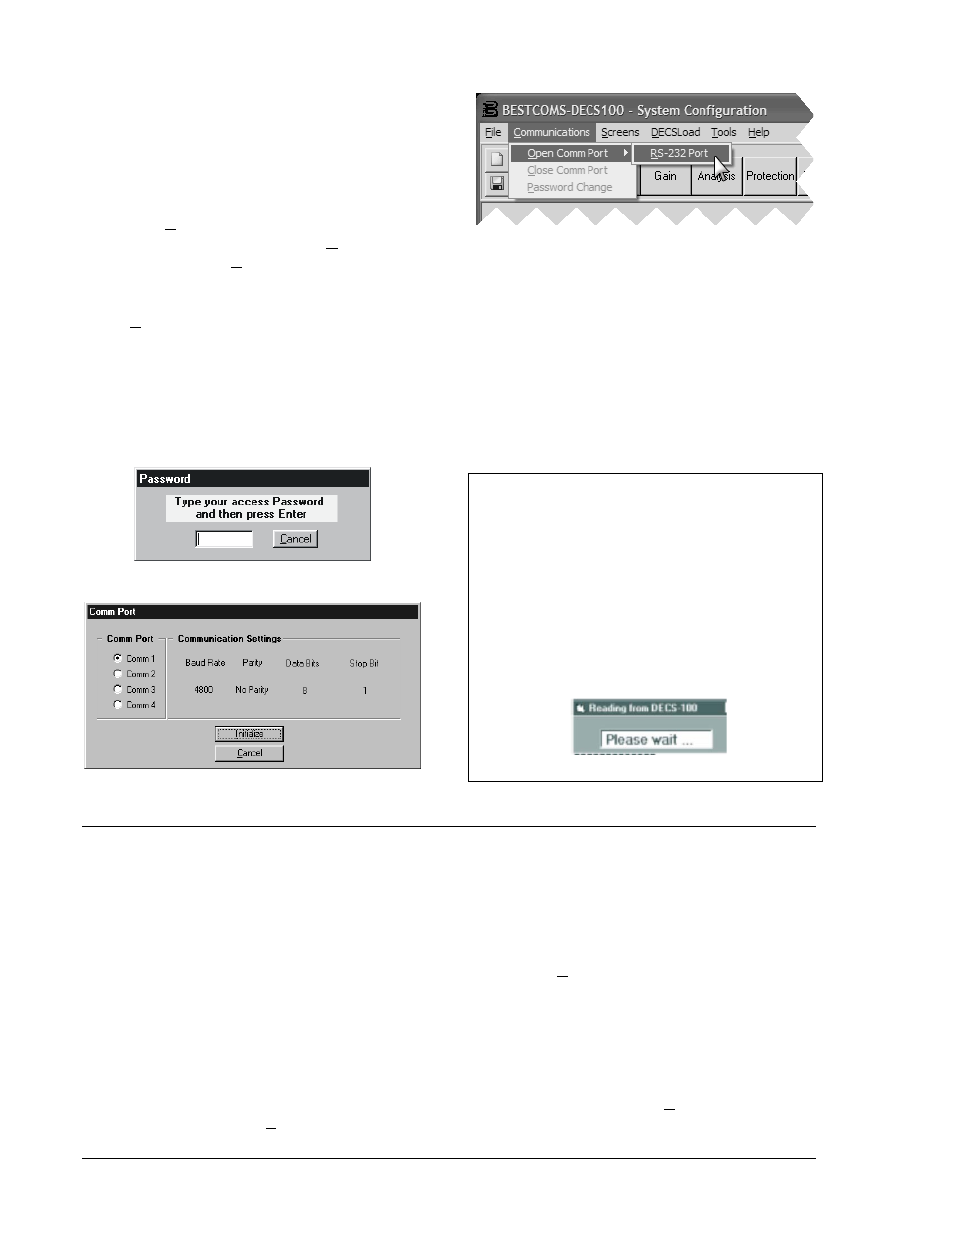
Open the DECS-100 communication port by
clicking on Communications on the menu bar,
hovering the mouse pointer over Open Comm
Port, and clicking RS-232 Port. Figure 5-2
illustrates the menu selections for opening the
DECS-100 communication port.
Figure 5-2. Communication Port Menu Selection
When RS-232 Port is selected, the Password dialog box of Figure 5-3 appears and prompts you to enter
a password. Each DECS-100 is delivered with "decs" as the default password. See the Password
Protection sub-section for information about changing the password.
After the correct password is entered, the Communication Initiation screen of Figure 5-4 is displayed.
Select Comm 1, Comm 2, Comm 3, or Comm 4 as the active communication port on your PC and click
the Initialize button. BESTCOMS initializes communication by obtaining the configuration settings from
the DECS-100.
Figure 5-3. Password Dialog Box
Figure 5-4. Communication Initiation Screen
NOTE
BESTCOMS may display the dialog box of
Figure 5-5 when initializing DECS-100 commu-
nication, obtaining DECS-100 configuration set-
tings, or performing other tasks. It's important to
wait until the box disappears before trying to
execute communication commands. Issuing
commands while the Wait dialog box is present
may disrupt communication between the DECS-
100 and BESTCOMS.
Figure 5-5. Wait Dialog Box
CHANGING SETTINGS
Settings are arranged into six groups.
• System Configuration
• Setting Adjustments
• Control Gain
• Analysis
• Protection/Relay
• Metering/Operation
Each setting group has a corresponding toolbar button that can be selected to access that group of
settings. The six setting groups can also be accessed by clicking Screens on the menu bar and then
selecting the desired setting group from the list. Once a setting group is accessed, the individual settings
of the group can be viewed and changed.
A setting is changed by clicking within the setting field and typing the new setting. The range limits of a
setting can be viewed by double-clicking the setting. Once all desired setting changes have been made
on a setting group screen, the settings must be sent to the DECS-100 before viewing other screens.
Otherwise, the settings changes will be lost. Settings changes can be sent to the DECS-100 by clicking
the SendToDECS button. Settings can also be sent to the DECS-100 by clicking Communications on
the menu bar and clicking Send To DECS.