2 electrical connections, 1 power supply, Lectrical connections – K-Patents SeedMaster 2 User Manual
Page 24
4
TECHNICAL DATA, MOUNTING AND ELECTRICAL CONNECTIONS
24
24
NOTE:
AC and DC types of supply can be connected to the device at the same time. When AC supply is available it
will be selected for use, otherwise the DC supply will be the active one. Switch-over from one to the other is
automatic and bumpless.
Temperature range (ambient)
Operation
0…50
˚C
Storage
- 25…70
˚C
Enclosure
IP66, NEMA 4X
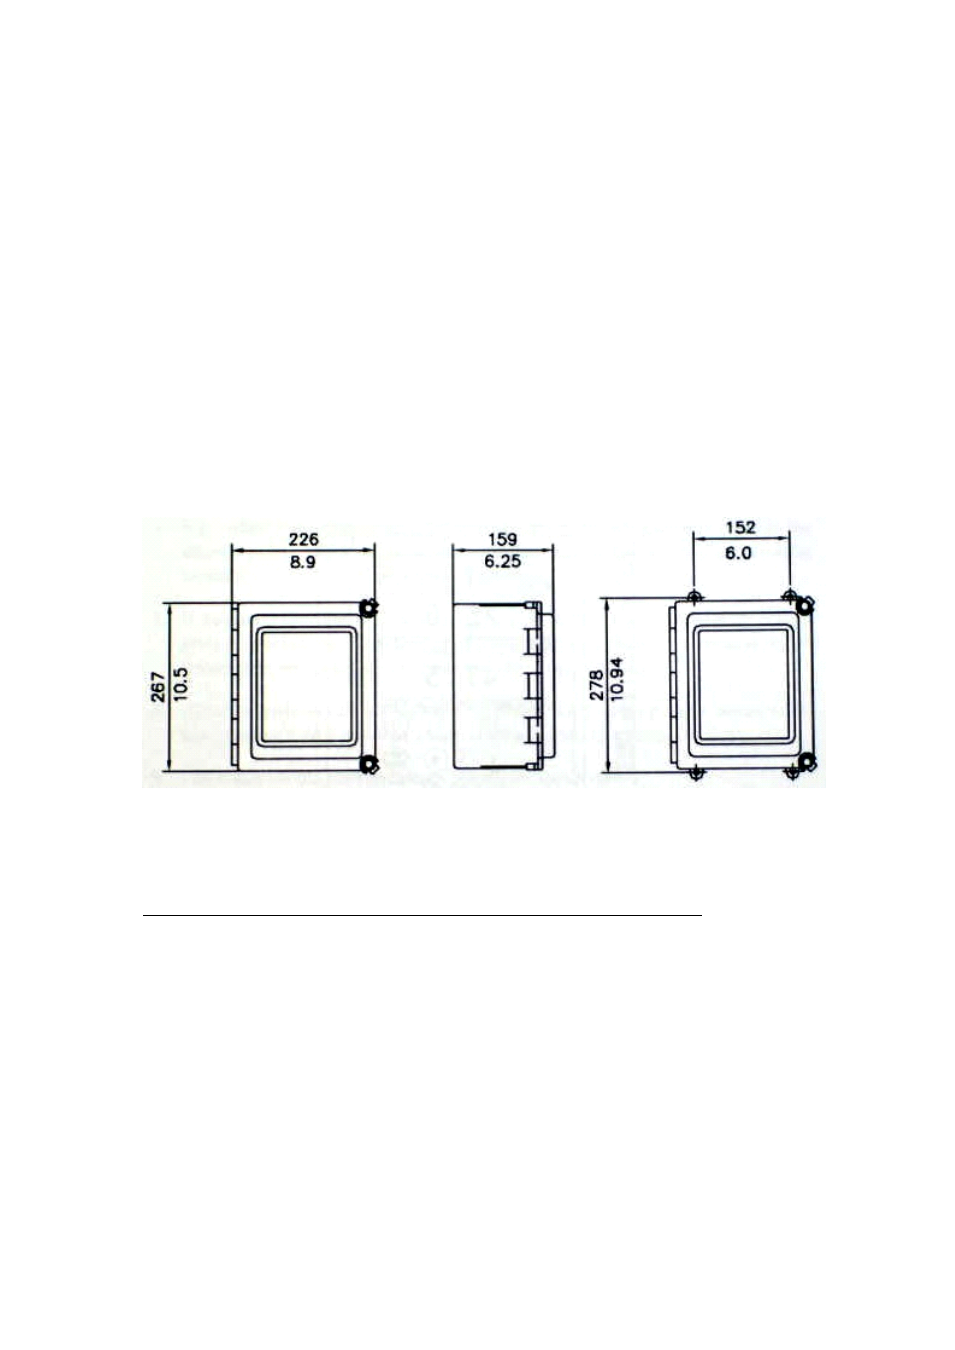
Size (mm / inch)
H: 267 / 10,5; W: 226 / 8,9; D: 159 / 6,25
NOTE:
The SeedMaster 2 enclosure is identical to the one used by the Indicating Transmitters of the K-PATENTS
refractometer family and should be mounted taking into account the same considerations, that is:
•
do not expose it to direct sunlight and rain, or splash water,
•
avoid vibration,
•
mount it vertically on an upright surface in a dry and well-lit area,
•
do not drill mounting holes in the enclosure.
Fig. 4.1 SeedMaster 2 dimensions and mounting feet measures
4.2 Electrical connections
4.2.1 Power supply
Power to the instrument must be connected by a cable with protective earth connection. Even if DC supply is
used (see Ch. 4.1), in order to maintain the accuracy of the analog inputs the protective earth connection
must be used via the mains connector.
NOTES:
1. There is no mains switch in the instrument! An external power switch should be used.
2. Check if your mains voltage specification and that of the instrument are identical before first
switching on the instrument!
WARNING!
Check if the power is off before opening the Front panel. If the red POWER LED on the Front panel is
ON, turn off the power first by unplugging the power supply cable or switch it OFF with the external power
switch.