8 set up seedmaster 2, 1 set up display, Et up – K-Patents SeedMaster 2 User Manual
Page 55: Display, 8set up seedmaster 2
8 SET UP SeedMaster 2
55
55
8
SET UP SeedMaster 2
Actual use of SeedMaster 2 can follow only after having completed the CONFIGURATION and SET UP
operations. It is advised to start with CONFIGURATION.
SET UP defines some display parameters and the details of data inputs and outputs.
8.1 Set up DISPLAY
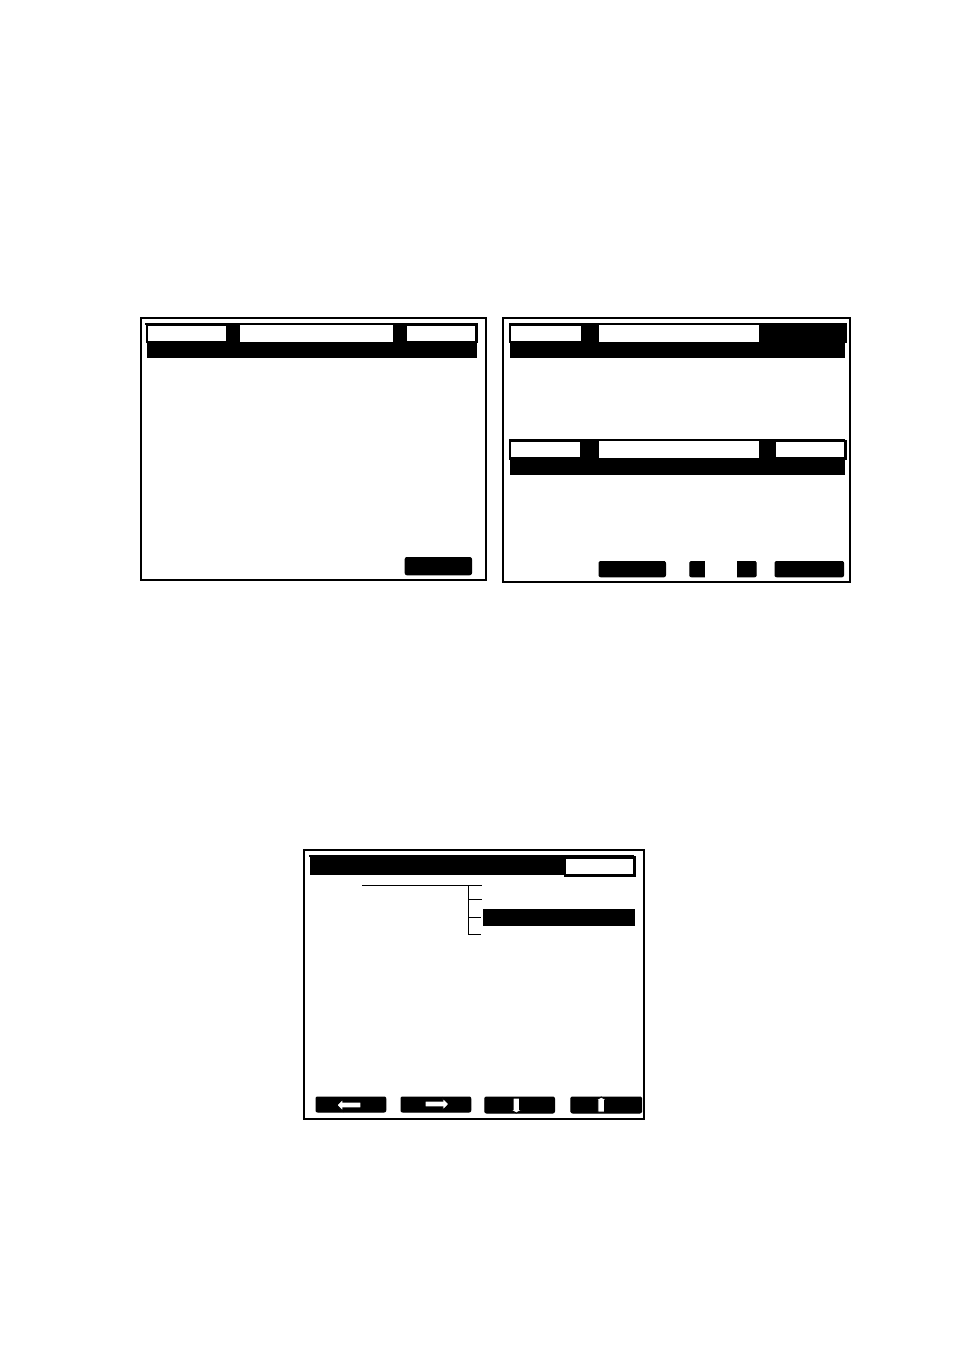
Set up DISPLAY can be accessed from the MAIN DISPLAY:
SEEDED
MAIN
DISPLAY
1 / 0 . 1
SEEDED
MAIN
DISPLAY
1 / 0 . 1
SEED: SUPS
=1 .12 AUT STRT: 141M BU
SEED: SUPS
=1 .12 AUT STRT: 141M BU
SUPS. 1 . 1 4
LI. PUR.
9 2 .2 %
SUPS. 1 . 1 4
LI. PUR.
9 2 .2 %
DENS. 1 4
8 1 kg/m3
LI. CONC.
8 1 . 2 %
DENS. 1 4
8
1 kg/m3
LI. CONC.
8 1 . 2 %
MA. SOL.
8 8 . 7 %
MO. CONS.
3 6 . 4 A
MA. SOL. 8 8 . 7 %
MO. CONS.
3 6 . 4 A
CR. CT.
4 1 . 3 %
TEMP.
6 9 . 8 C
CR. CT. 4 1 . 3 %
TEMP.
6 9 . 8 C
CONSIST. 7 8 . 2 %
LEVEL
7 7 . 5 %
CONSIST. 7 8 . 2 %
LEVEL
7 7 . 5 %
WARNSD
MAIN
DISPLAY
2 / 0 . 2
SEED: SUPS
=1 .12 AUT STRT: 21M SC
SUPS.
1 . 0 5
LI. PUR.
9 5. 2 %
DENS. 1
4 0 1 kg/m3
LI. CONC.
8 1 . 2 %
MA. SOL. 8 1 . 2 %
MO. CONS.
3 6 . 4 A
CR. CT.
0 . 0 %
TEMP.
6 9. 8 C
CONSIST. 2 8 . 2 %
LEVEL
3 7 . 5 %
MENU
2
1
2
1
MENU
1
Fig. 8.1
NOTES:
1. The upper half and the lower one of the LCD are distinguished as
Instrument No.1, or I1, and Instrument No.2, or I2,
Implemented by SeedMaster 2, respectively.
2. If both instruments are active, that is there are two crystallizers served, the appropriate instrument must be
selected first. By default, I1 (the upper half of the LCD) is selected. It is signaled by the backlit area in the
upper right corner (1 / XXX, where 1 is the instrument number, and XXX is the TAG of the Crystallizer),
and by the backlit number in the lowest row of the screen.
3. For operations with the second crystallizer push key 2 first. A similar area (2 / YYY) in the lower half
of the LCD will be backlit showing instrument selection.
After having selected the instrument pushing MENU brings up the screen shown in Fig. 8.2, where “Set up”
should be selected. The selected item is shown inverted (white characters on black background).
1 / 0 . 1
Menu
Manual seeding
Display
Set up
Configuration
Fig. 8.2
NOTE: For information on the different KEY-s and KEY-OPERATIONS see: Ch. 6.4 Basic key
operations.
Entering the selected Display leads to the details of display set up (Fig. 8.3 a) and Fig. 8.3 b)).