Quick start, Startup – NCast PR-HD User Manual
Page 12
NCast Presentation Recorder Reference Manual
2. Quick Start
2.1. S
TARTUP
2.1.1. A Really Short Start
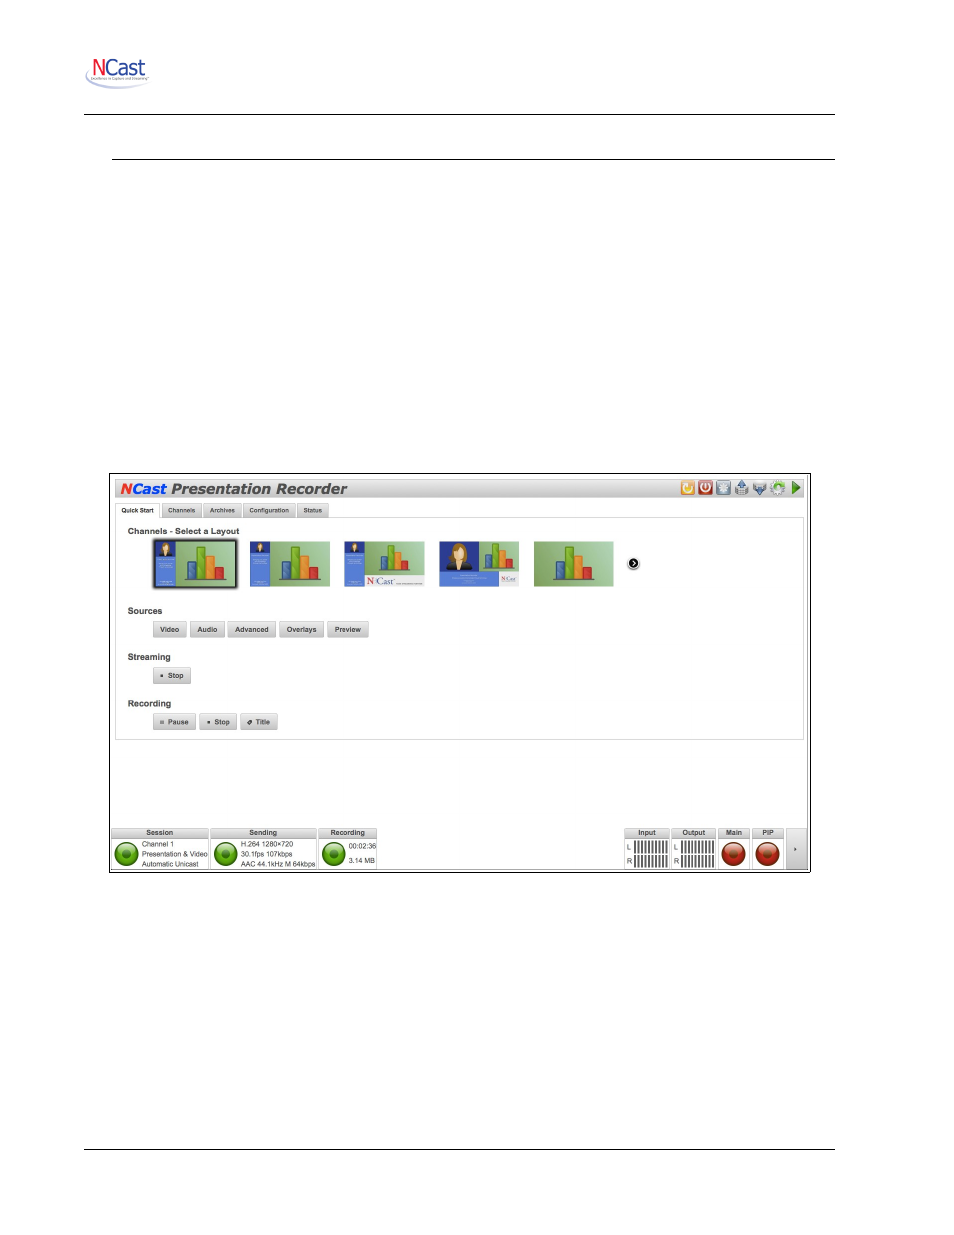
Here’s a very short description on how to get started:
1. Plug the unit into a network with DHCP, plug in a display to the VGA Out, plug your laptop into the
VGA In, a camera (if you have one) into a video connector and turn on the power.
2. When you see the bootup screen with the IP network address, log into the unit at
http://ipaddress using “admin” as the user and “ncast” as the password.
3. On the Quick Start page select your Channel Layout, your Video Sources, your Audio
Sources and then press Streaming Start.
4. Click on the Streaming View button, press “Launch Quicktime Player in Window” and you’re
done!
2.1.2. Mini Start
This is a short introduction on how to get started with a Presentation Recorder:
1. Plug the unit into a network, plug in a display to the VGA Out, plug your laptop into the VGA In, a
camera (if you have one) into a video connector and turn on the power. If you aren’t using DHCP
and need to enter static IP addresses, edit a “ntwkconf.txt” file onto a USB stick and plug it into a
USB port. See the Configuration → Network tab (7.3.16.) for details on this file.
2. When you see the bootup screen with the IP network address, log into the unit at
http://ipaddress using “admin” as the user and “ncast” as the password.
3. Go to the Configuration → Personal tab and fill in all the information required.
NCast Corporation
Revision 2.2
Page 12