Confi guring the pt-link controller, Pt-link ii lon, Technical guide – Orion System PT-Link II LON User Manual
Page 8: Pt-link ii interface 8
PT-Link II LON
®
Technical Guide
PT-Link II Interface
8
Confi guring the PT-Link Controller
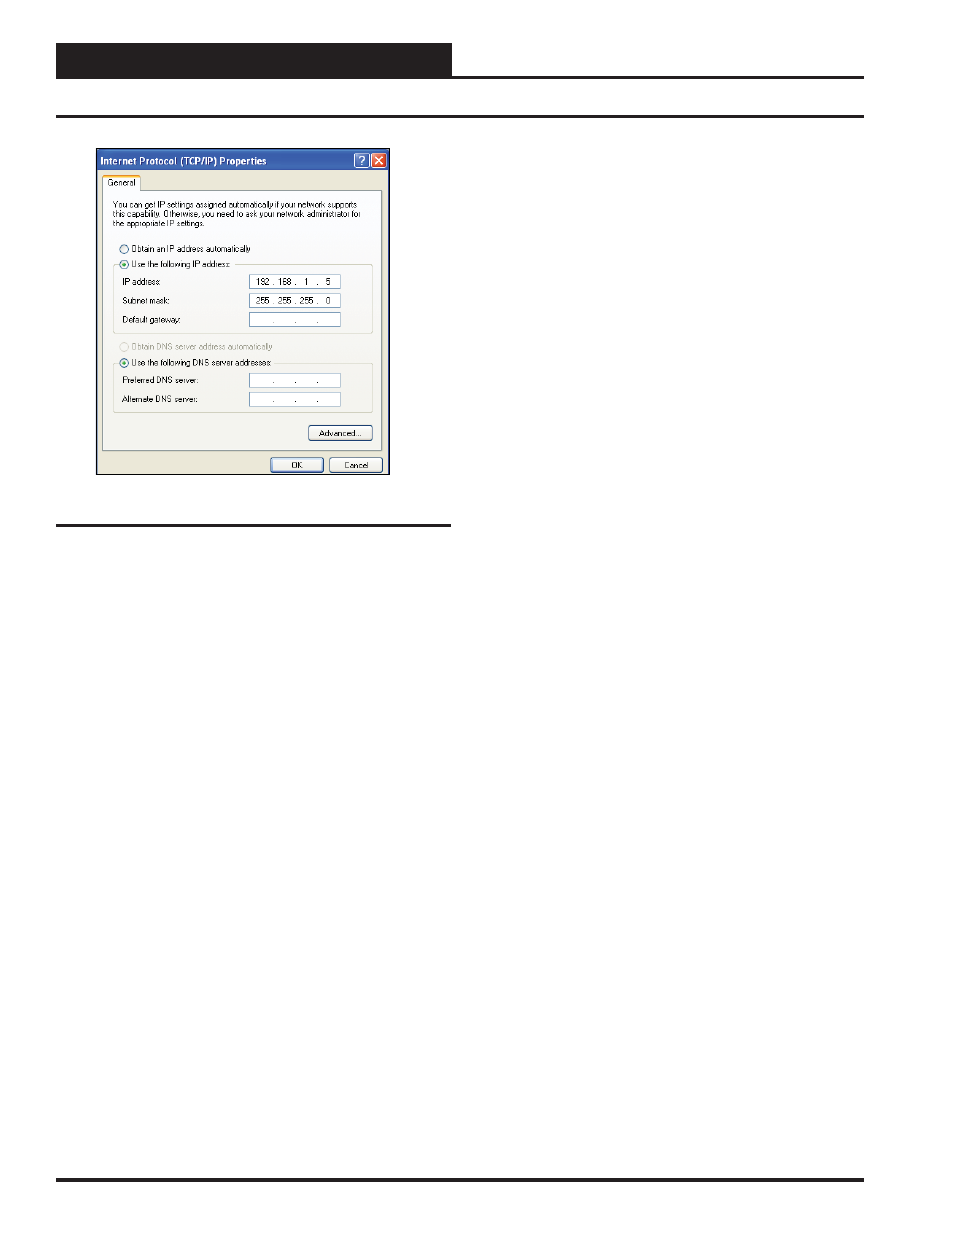
6). Select the radio button in front of Use the following
IP
address (Figure 8) and write down the current defaults
so that you can re-enter them when you fi nish confi guring
the PT-Link II and then type in the following
information:
a.) IP address 192.168.1.5
b.) Subnet mask 255.255.255.0
c.) Default Gateway is blank
7.) Click
<OK>
until all of the above network confi guration
windows are closed. You may have to reboot the computer
before the new values are valid.
Computer IP Address Set-up for
Windows Vista, 7 & 8
1.) Click
<start>
; then click
<Control Panel>
(Vista &
Windows 7). Click
<start>
; then right-click for
<All apps>
.
Click
<All apps>
and then click
<Control Panel>
(
Windows 8).
2.) Click on the Network and Internet icon.
3.) Click Network and Sharing Center.
4.)
From the shaded box in the left side of the window, select
Manage Network Connections (Vista) or Change adapter
settings (Windows 7).
5.) Right-click on the Local Area Connection icon and select
<Properties>
for the drop down window.
6.) Choose Internet Protocol Version 4 (TCP/IPv4) by
highlighting it and then click
<Properties>
. The Internet Pro-
tocol Properties Window will appear (Figure 8).
7.) Select the radio button in front of Use the following
IP
address (Figure 8) and write down the current defaults
so that you can re-enter them when you fi nish confi guring
the PT-Link II and then type in the following
information:
a.) IP address 192.168.1.5
b.) Subnet mask 255.255.255.0
c.) Default Gateway is blank
8.) Click
<OK>
until all of the above network confi guration
windows are closed. You may have to reboot the computer
before the new values are valid.
Figure 8: Internet Protocol Properties Window