2 - mixer, Inputs and assignments, Checking assignments – Teac 2488 User Manual
Page 21: Breaking assignments, 2 – mixer
TASCAM 2488 User’s Guide
21
2 – Mixer
Inputs and assignments
The 2488 has eight inputs, marked from
A
through
H
,
and twenty-four mixer channels.
Inputs
A
through
D
are fitted with dual XLR-1/4"
balanced inputs and can be supplied with +48 V
phantom power for condenser microphones.
WARNING
Never connect or disconnect microphones to or from
inputs
A
through
D
with the phantom power turned
on.
Never use unbalanced dynamic microphones with
microphone inputs
A
through
D
with phantom power
turned on. If you are in any doubt, consult your local
audio expert.
Inputs
E
through
H
are suitable for line input, and are
fitted with 1/4" balanced jacks. An unbalanced “mir-
ror” of H, with an impedance suitable for electric
guitars and basses, is provided at the front of the unit.
It is possible to record up to eight tracks at one time,
with the inputs being freely assignable to the tracks.
Assigning inputs is carried out by pressing and hold-
ing the appropriate input key below the
TRIM
con-
trols (the key flashes), and then pressing the
appropriate channel
SELECT
key(s) which will also
flash. It is also possible to reverse the order (press
and hold a channel’s
SELECT
key and press the
appropriate input key).
An input can be assigned to more than one channel,
but of course a channel cannot be fed by more than
one input.
This shows an instrument (guitar or bass) plugged
into input
H
being assigned to channel 1
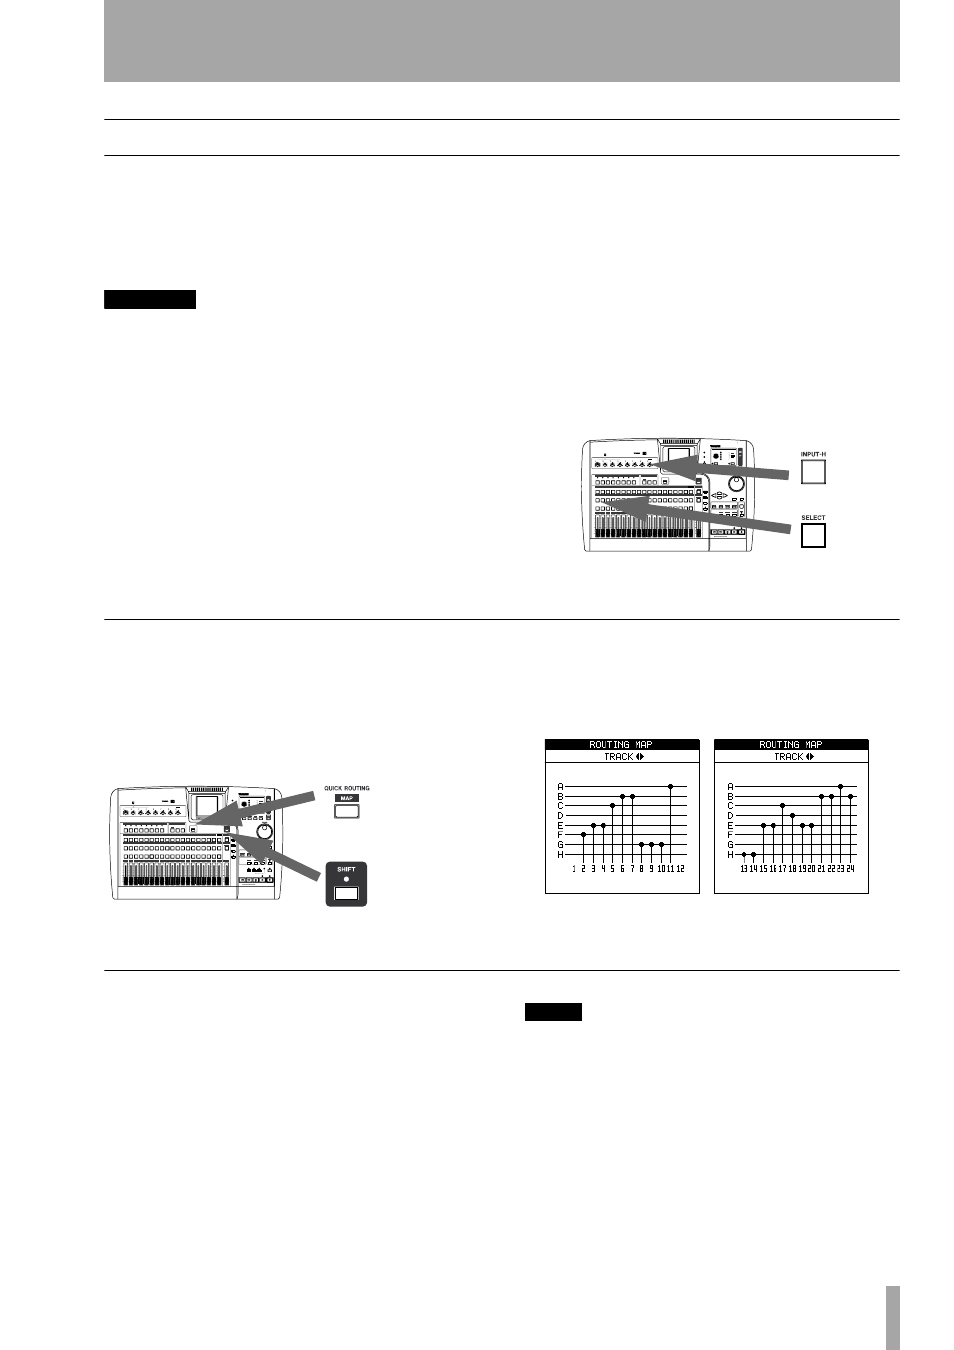
Checking assignments
When either an input key (or channel
SELECT
key)
is pressed and held down it flashes, together with the
channel (or input key) to which it has been assigned.
Also, if the
SHIFT
key is pressed, followed by the
MAP
key, a screen is shown with the current assign-
ments.
The eight inputs are represented by horizontal lines,
which are joined to the channel labels at the bottom
of the screen by vertical lines when they are assigned
to the channels.
Use the left and right cursor keys to change between
viewing channels
1
through
12
, and
13
through
24
.
Breaking assignments
If an input or channel
SELECT
key is held down, the
assigned channel (or input) key flashes. Press the
other key to break the assignment.
NOTE
Assigning and unassigning linked channels (see “Link-
ing channels” on page 25) works in much the same way
as for single channels. Pressing one
SELECT
key of a
linked channel pair is typically the same as pressing
both together.