Connect ground wire, Mount the v7 profibus-dp option – Yaskawa V7 PROFIBUS-DP User Manual
Page 13
Installation 1-7
Connect Ground Wire
Connect the ground wire to the ground connector on the back of the V7 PROFIBUS-DP Option. Select the wire of the appropriate length
based on drive model.
Table 1.2 – Ground Cable & Drive Models
Cable Length
Drive Models
6” (150mm)
20P1, 20P2, 40P2
8.5” (220mm)
20P4, 20P7, 21P5, 22P2, 23P7, 40P4, 40P7, 43P7, 41P5, 42P2
12.5” (320mm)
25P5, 27P5, 47P5
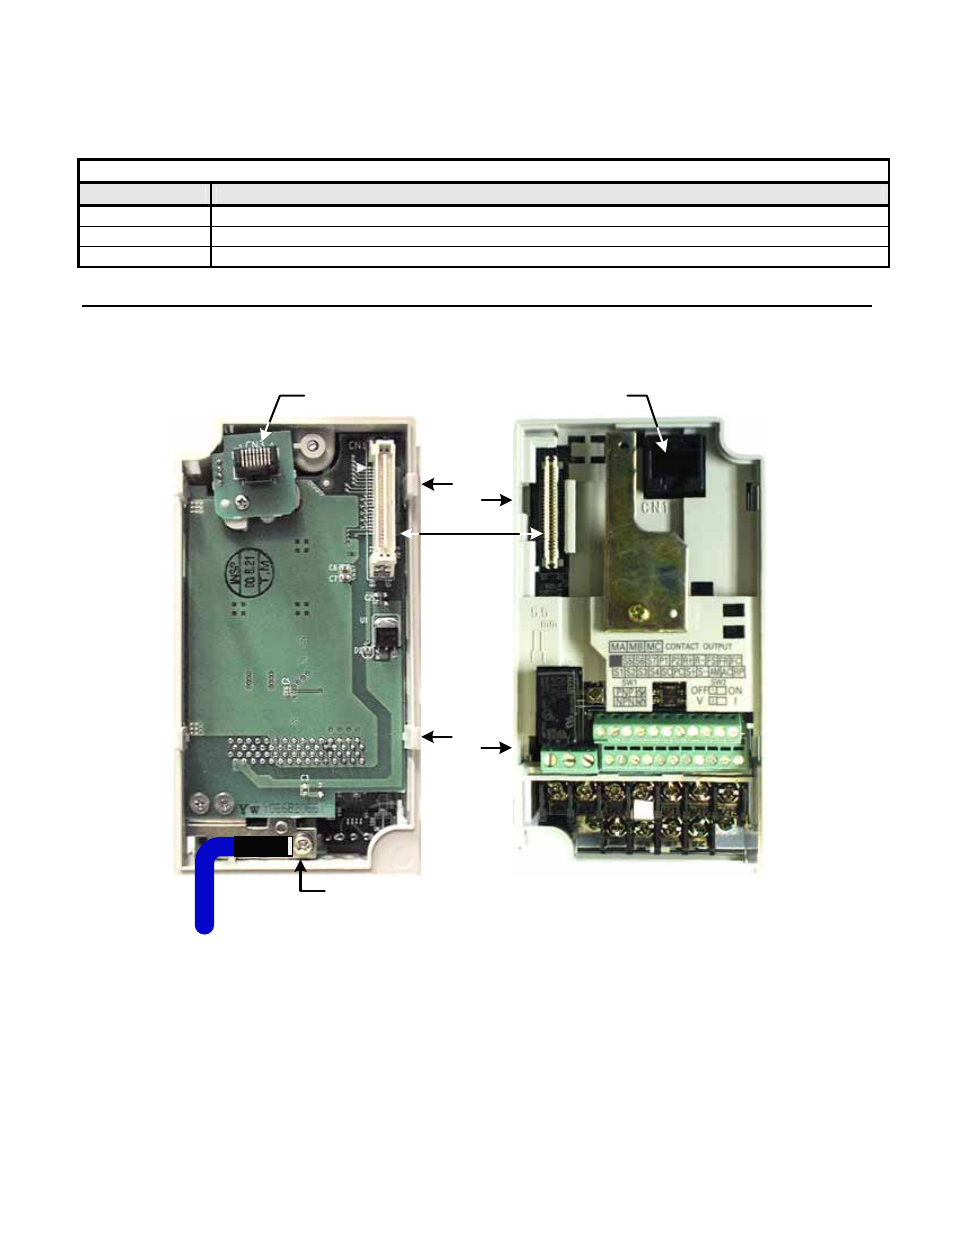
Mount the V7 PROFIBUS-DP Option
Mount the V7 PROFIBUS-DP Option onto the drive by following the instructions below.
Figure 1.3 – Mount the V7 Option
Align the CN1 connector on the back of the option with its mating CN2 connector on the front of the drive.
Simultaneously align the CN3 connector, the male RJ45 connector, on the back of the option with the CN1 connector, the female
RJ45 connector, on the front of the drive.
Align the tabs on the option with their corresponding slots on the front of the drive.
Press the option and the drive together until the tabs lock into their associated slots.
Secure the option to the V7 drive by tightening the locking screw at the top-center on the front of the option.
Connect the ground wire from the V7 PROFIBUS-DP Option to the ground terminal on the V7 drive.
CN1 - CN2
Tab
CN3 - Male RJ45
Connector
CN1 - Female
RJ45 Connector
Slot
Tab
Slot
E
Ground Terminal
Ground Wire