Customizing controls and display, Customizing display information – Canon PowerShot G3 X User Manual
Page 102
102
Playback Mode
Wi-Fi Functions
Setting Menu
Accessories
Appendix
Index
Before Use
Basic Guide
Advanced Guide
Camera Basics
Auto Mode /
Hybrid Auto Mode
Other Shooting Modes
P Mode
Tv, Av, M, C1, and C2 Mode
Customizing Controls and Display
Customizing Display Information
Customize what screen is displayed when you press the [
] button
on the shooting screen. You can also customize what information is
displayed.
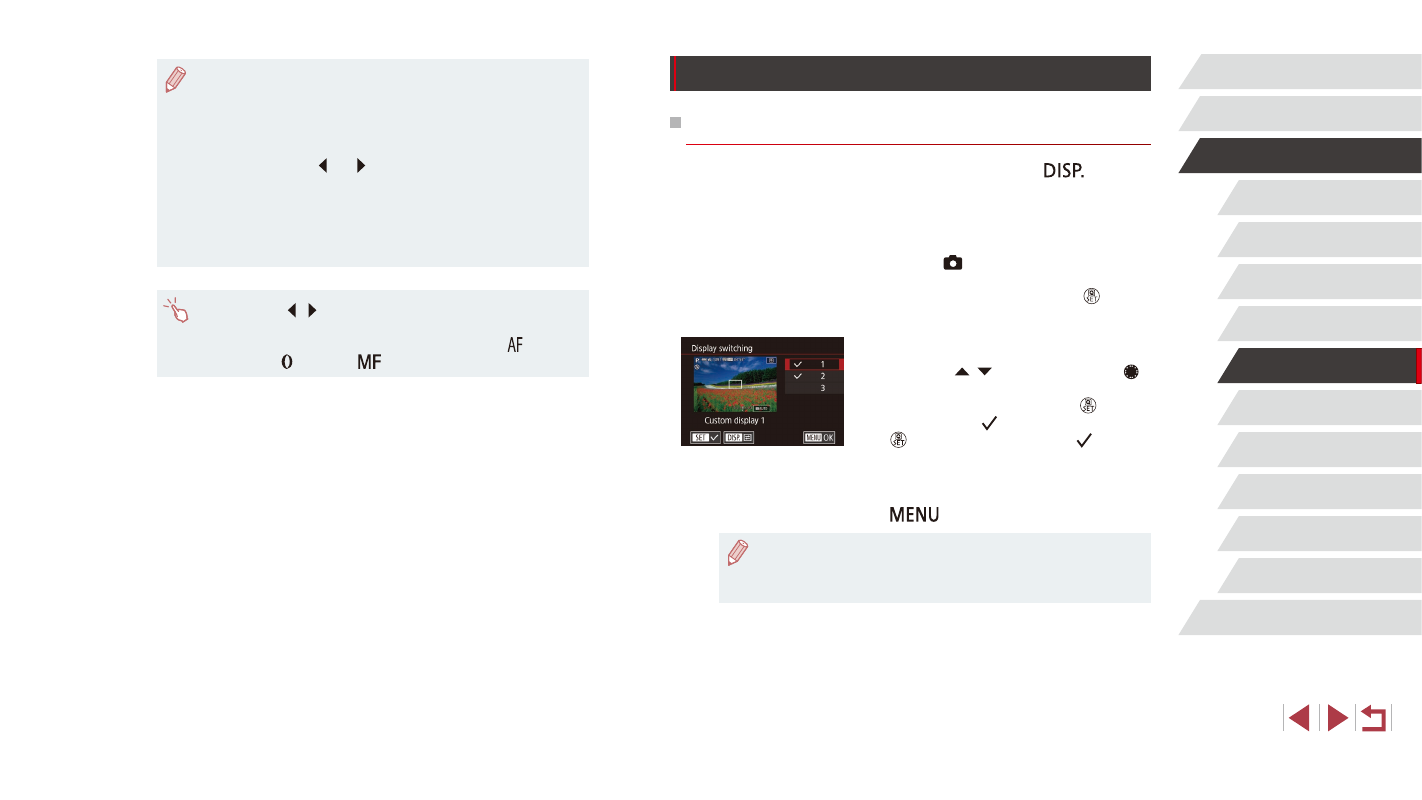
1
Access the setting screen.
z
Choose [ 1] tab ► [Shooting
information display] ► [Display
switching], and then press the [ ] button
2
Configure the setting.
z
Press the [ ][ ] buttons or turn the [ ]
dial to choose any screen you prefer not
to display, and then press the [ ] button
to remove the [ ] mark. Pressing the
[ ] button again will add the [ ] mark,
which indicates that it is selected for
display.
z
To return to the menu screen, press the
[
] button.
●
An example of display with the options selected in step 2 is shown
at left for reference.
●
At least one option must be selected.
●
In [AUTO] mode, you can also adjust the exposure before
recording by turning the exposure compensation dial.
●
When the ISO speed is fixed, an exposure level mark based on
your specified value is shown on the exposure level indicator for
comparison to the standard exposure level. The exposure level
mark is shown as [ ] or [ ] when the difference from standard
exposure exceeds 3 stops.
●
You can check the ISO speed in [AUTO] mode by pressing the
shutter button halfway. If standard exposure cannot be obtained
with your specified shutter speed and aperture value, the ISO
speed is displayed in orange.
●
By touching [ ][ ], you can also adjust setting items selected by
touch on the bottom of the screen.
●
Focus can be adjusted during recording by touching [ ] and
turning the [ ] ring while [
] is displayed.