Creating your own albums – Canon PowerShot G3 X User Manual
Page 132
132
Wi-Fi Functions
Setting Menu
Accessories
Appendix
Index
Before Use
Basic Guide
Advanced Guide
Camera Basics
Auto Mode /
Hybrid Auto Mode
Other Shooting Modes
P Mode
Tv, Av, M, C1, and C2 Mode
Playback Mode
4
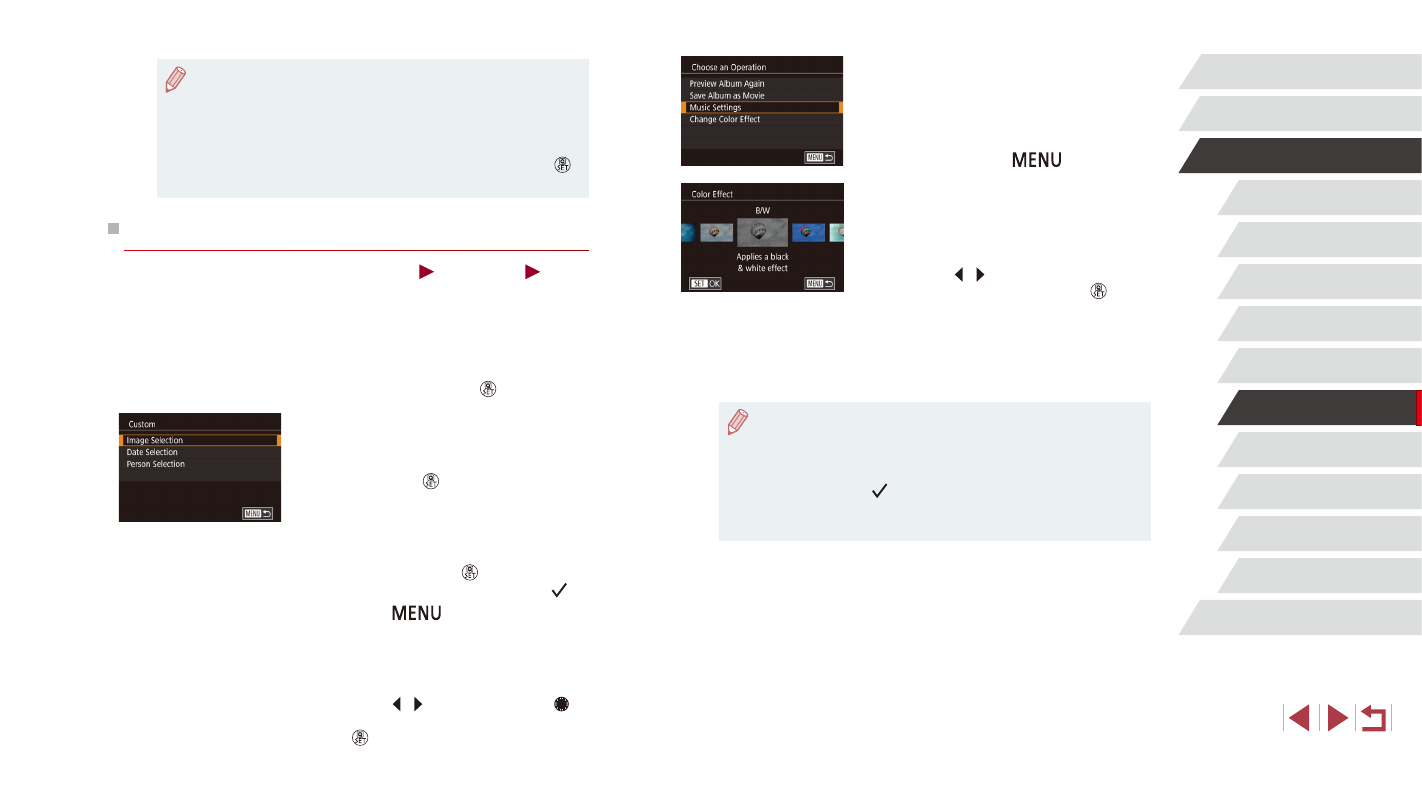
Choose background music.
z
When the screen at left is displayed,
choose [Music Settings]. Add background
Background Music to Albums” (= 131),
and then press the [
] button.
5
Choose a color effect.
z
On the screen in step 4 of “Viewing
Albums (Story Highlights)” (= 130),
choose [Change Color Effect].
z
Press the [ ][ ] buttons to choose a
color effect, and then press the [ ]
button.
6
Save the album.
z
Follow step 4 in “Viewing Albums (Story
Highlights)” (= 130) to save albums.
●
Up to 40 images can be selected if you choose [Image Selection].
The second time you create a custom album, [Select images
based on previous settings?] is displayed. To use previously
selected images as the basis, choose [Yes]. The previous images
are labeled with [ ], and multiple images are displayed at once.
●
Up to 15 dates can be selected if you choose [Date Selection].
●
The color effect may not be applied to some images.
●
If you prefer not to add background music, set [Add BGM] to [No]
on the screen in step 3.
●
To use only background music instead of movie audio, set [Audio
Mixer] to [BGM only] on the screen in step 3.
●
To listen to a sample of the background music selected in [Track],
choose [Sample BGM] on the screen in step 3 and press the [ ]
button.
Creating Your Own Albums
Still Images
Movies
Create your own albums by choosing desired images.
1
Choose to create a Custom album.
z
Following steps 1 – 3 in “Viewing Albums
(Story Highlights)” (= 130), choose
[Custom] and press the [ ] button.
2
Choose a selection method.
z
Choose [Image Selection], [Date
Selection], or [Person Selection], and
then press the [ ] button.
3
Choose album elements.
z
Once you select the elements for your
album and press the [ ] button, your
selected elements are labeled with [ ].
z
Press the [
] button after you
are finished selecting still images,
digest movies, or short clips in [Image
Selection], dates in [Date Selection], or
people in [Person Selection].
z
Press the [ ][ ] buttons or turn the [ ]
dial to choose [Preview], and then press
the [ ] button.