CONTA-CLIP CONTA-Sign 5.2 User Manual
Page 35
Page 35 of 67
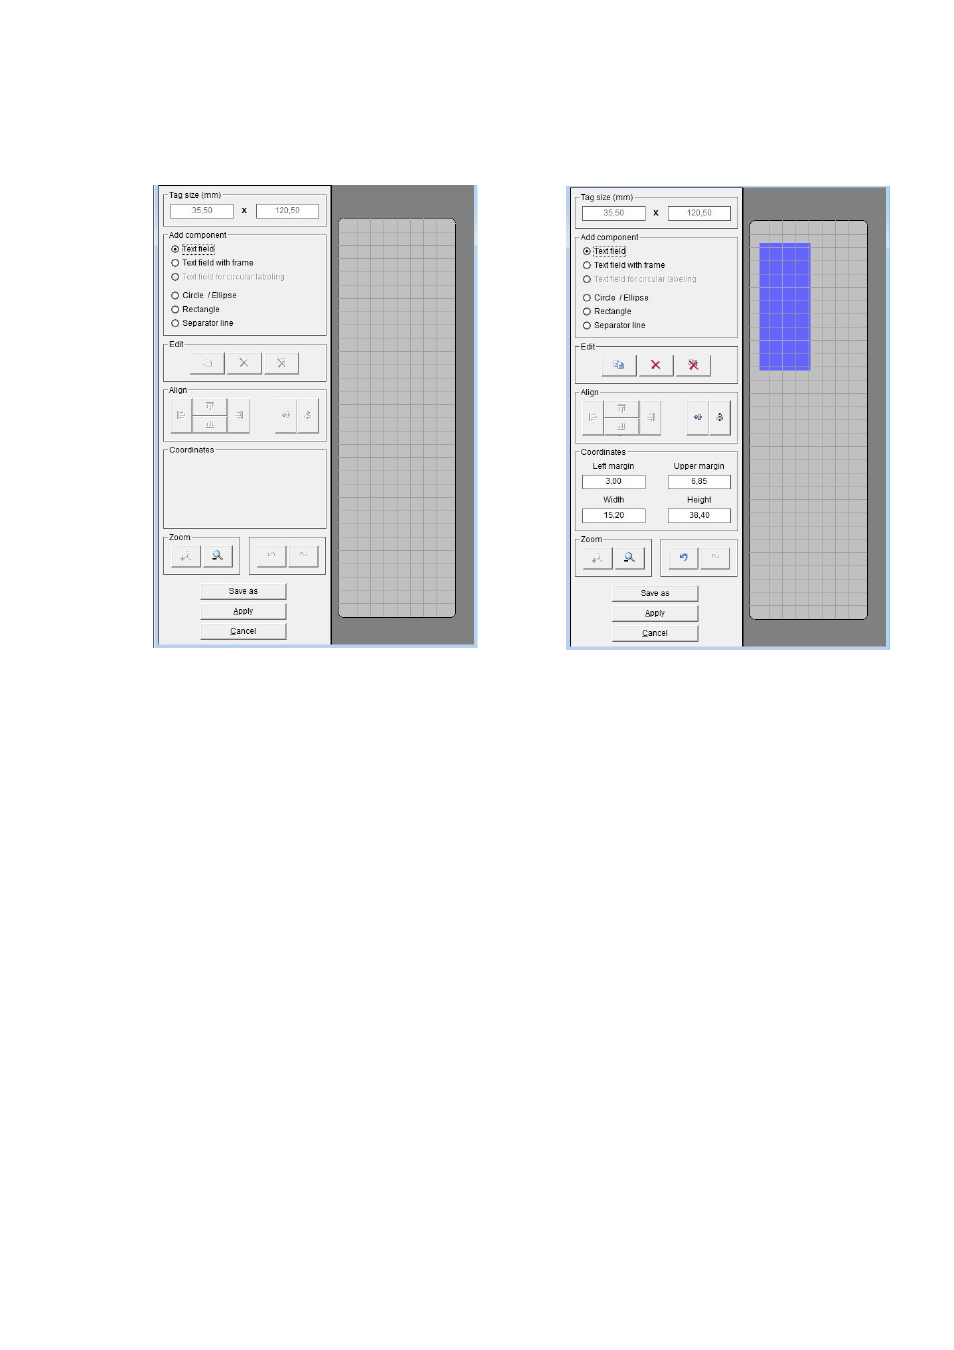
After choosing the layout, the following window appears on screen.
The tag size is displayed in the top left field of the window.
Underneath that, you will see various components available that you can set up on the
tag.
For example, if you want to create a < text field with frame >, click on the
relevant component. You should then use the mouse to position the cursor in the
right-hand side of the window in the tag displayed there, click with the mouse to
specify where the text field should begin, and use the mouse to define the text field.
This will create your text field.
For other selections proceed the same way. You can also place circle / ellipse,
square / rectangle or separator lines on the tag.
Now you can click on the text field and move it to wherever you want it. You can also
enter the coordinates, such as the distance from the margin, height and width of tag,
directly into the relevant fields and confirm by pressing Enter. The entry is immediately
applied and the preview is updated.
Note:
It is easy to inadvertently move the graphic elements you have created when you
click on them with the mouse. In order to avoid moving the elements in error, you can
fix their positions by calling up the drop-down menu.
After fixing the position, you can still change the size and position of graphic elements
by entering the coordinates directly into the relevant fields.