CONTA-CLIP CONTA-Sign 5.2 User Manual
Page 57
Page 57 of 67
Note:
When the labels are subsequently printed out on a thermo transfer printer, the tag
spacing along the Y-axis is detected by a light barrier. The entry on the tab only serves
to ensure that it displays correctly on the screen.
When you click on the Apply button, the tags you have created are displayed on the
screen.
Having completed the labels, you now also have the option of positioning text fields
and graphic elements on the labels. Creating text fields like this is always useful if you
want to divide the label up into different fields, so that you can later use different text
sizes, font types or symbols on the label.
To do this, click on the Create layout for text and graphic button.
See Section 10 of this manual for a description of how to set up a layout.
After you have specified the layout if you wish, click on Back to close the Layouter.
The program takes you back to the main window, which you can then close by clicking
on the Back button.
Click on Close to close the Designer.
You can select the labeling element you have created in the folder
< User defined under > Manufacturer and call it up for printing.
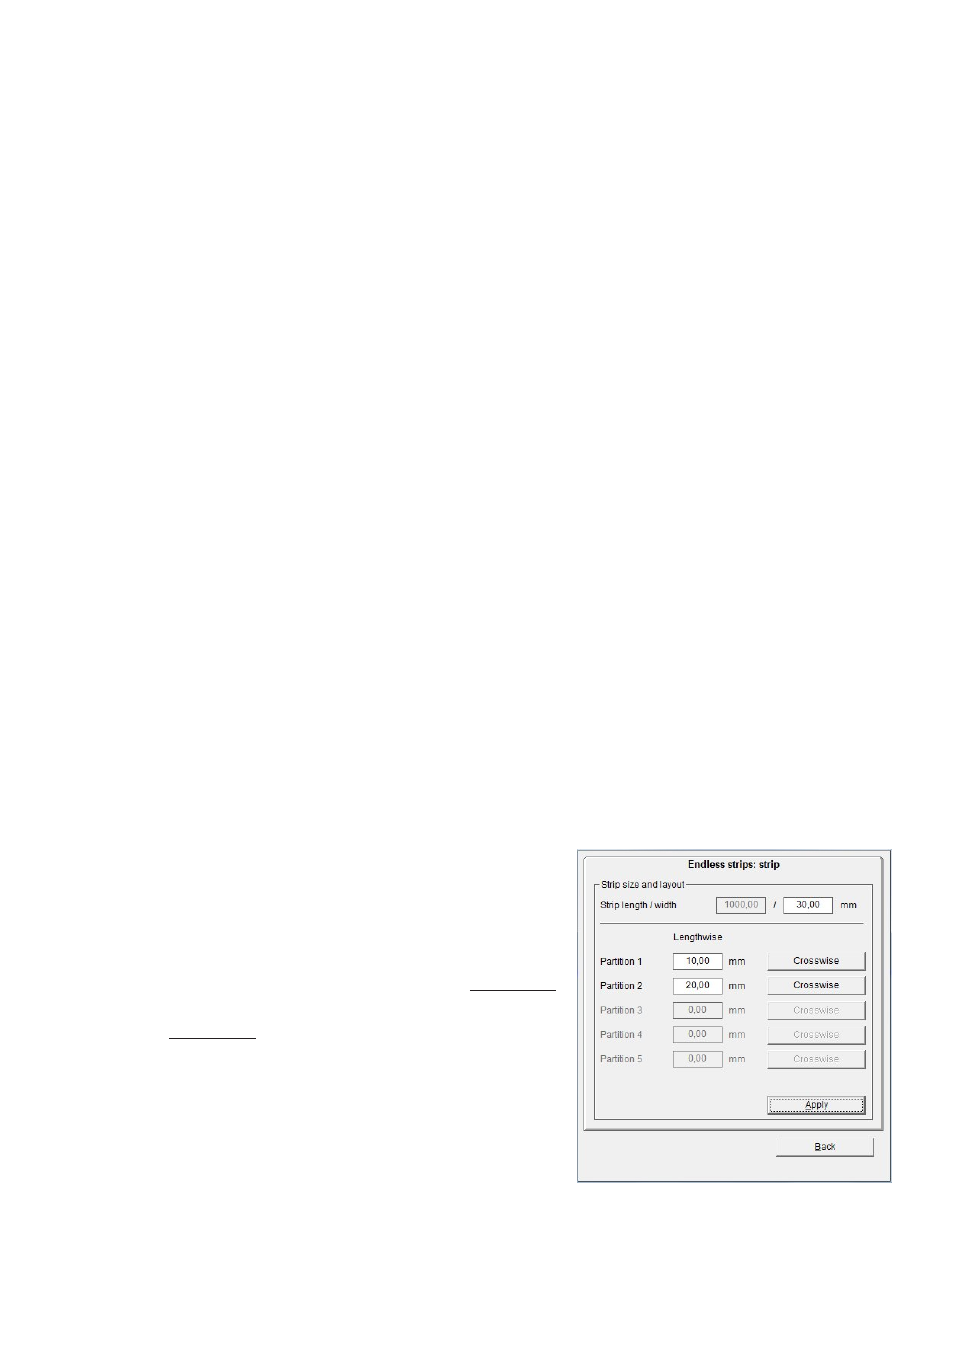
11.4.2 Design an endless strip
First decide on the size of the strip and enter its length and width.
Then you can divide up the strip using horizontal
and vertical scale factors.
If required, divide the strip into horizontal
sections.
First of all, specify the height of the first partition,
by entering the height in mm in the > Partition 1
field. The remaining height is then transferred into
> Partition 2. In this way you can subdivide the
strip into a maximum of 5 partitions.