CONTA-CLIP CONTA-Sign 5.2 User Manual
Page 36
Page 36 of 67
If you are using a plotter or engraver as your output device, you can measure the text
fields with the plotter. To do this, click on the text field whose measurements you wish
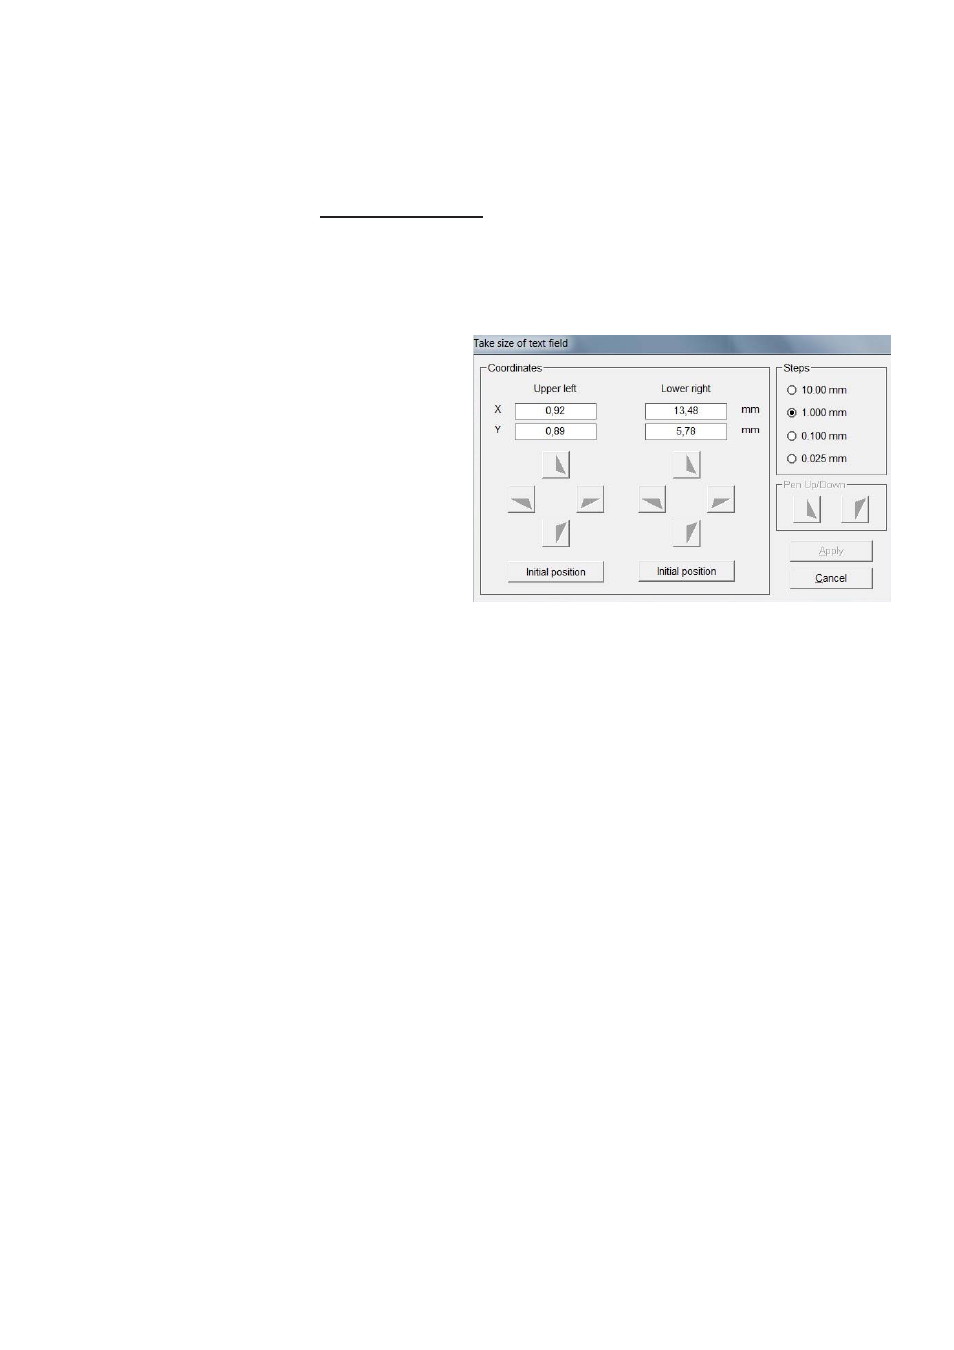
to take and select >Take Measurement of text field function from the drop-down
menu.
The following window opens up:
Insert a pen directly into the
pen holder or take the spindle
out of the engraving head and
insert instead the optical
measurement tool, available as
option.
Then click on the left
Initial position button. The plotter
moves to upper left corner of the total
plot area. You can now go to the text
field in the top left-hand corner and
use the cursor keys to take the tip of
the pen or cross of the tool right to
the corner of the text field.
You can choose the step size for each click of the cursor button.
Once you have defined the upper left corner, go to the lower right corner of the text
field by clicking on the second Initial position button. Proceed as before. When you
click on Apply, the coordinates will be applied.
You can duplicate or delete components that have been created.
You also have options available for setting the alignment of text fields or graphic
elements that have been set up.
If, as shown in the example, you have used the mouse to click on the three
components whilst holding down the Control key and then clicked on the Vertical
alignment button, the elements created are aligned vertically. Other layout options are
available.
You can alter the size of the preview window to make it larger or smaller.