Positioning the easyfeed lite feeder (optional), Positioning the easyfeed 120 feeder (optional), Ositioning the – Rena T-750 User Manual
Page 14: Eeder, Optional
ASSEMBLY AND INSTALLATION
Positioning the EasyFeed Lite Feeder (optional)
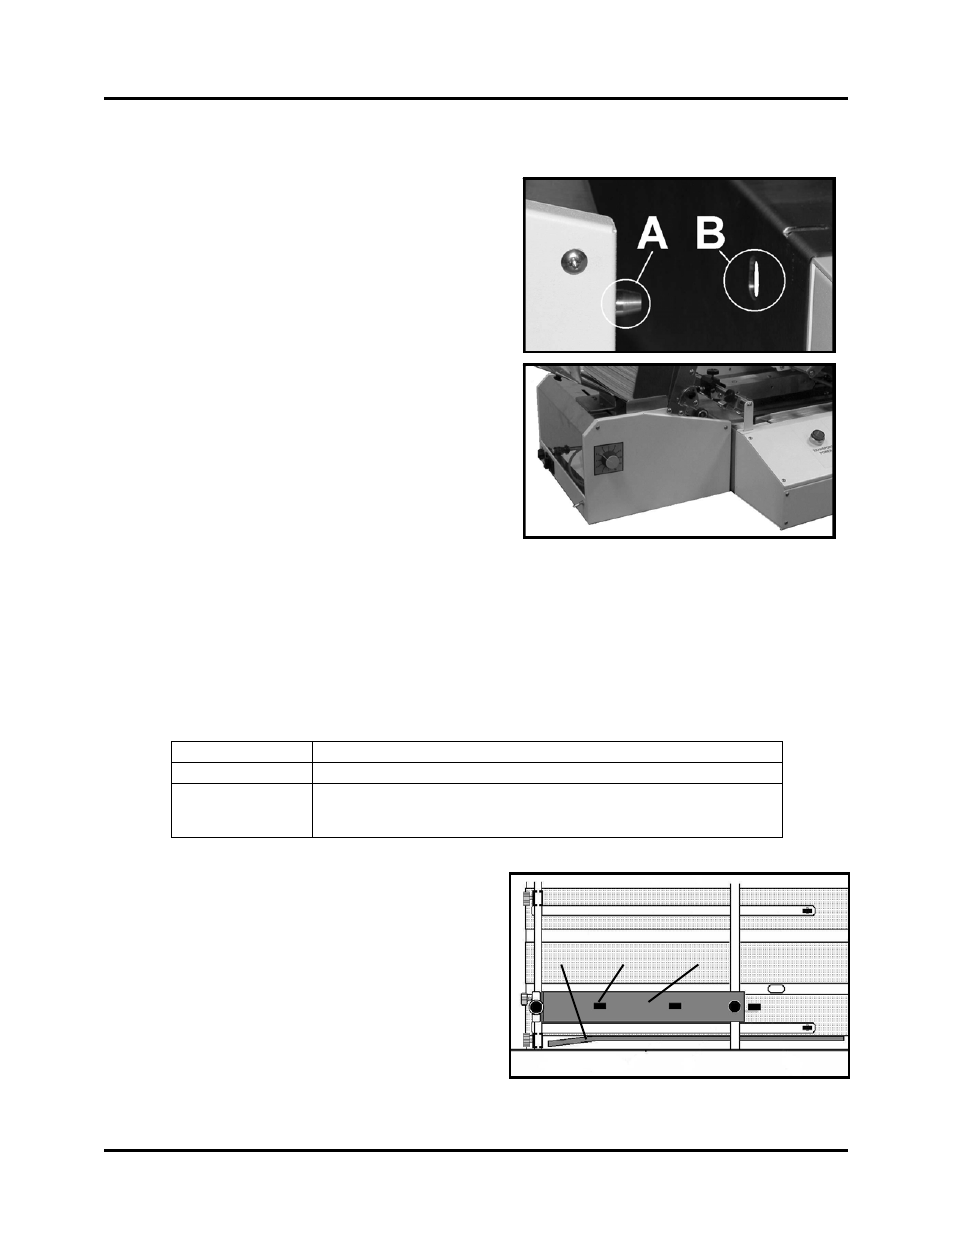
1. The pin [A] on the feeder should mate with
the hole [B] on the Tabber body.
2. When the feeder is properly aligned with the
tabber body it will appear as in this picture.
Positioning the EasyFeed 120 Feeder (optional)
1. If the feeder is being used with the T-750 only, or with the T-750 and Envelope Imager
XT 3.0 / XT 4.0 printer; the feeder should be placed onto its riser stand (RS-400), and
positioned at the entrance end of the tabber.
2.
If T-750 is being used in-line with the Envelope Imager III printer; place the T-750 onto
its riser stand (RS-300) and place the feeder onto its riser stand (RS-200), with the feeder
positioned at the entrance end of the tabber.
3. Place the EasyFeed 120 Feeder onto the riser stand.
Part #
Description
RS-400
Riser Stand for EasyFeed 120 when used with the T-750.
RS-200 & RS-300
RS-200: Riser Stand for EasyFeed 120 when used with the T-750 and
Envelope Imager III
RS-300: Riser Stand for T-750 for use with the Envelope Imager III
4. Align the Feeder with the tabber. Position
the feeder so the distance between the exit
rollers on the feeder and the entrance roller
[2], located inside the Registration
Assembly [1] of the tabber, are about ¼”
less than the length of the media. The
media should just enter under the first
roller [2] of the Registration Assembly [1],
as it just leaves the exit rollers of the
feeder. The media should also enter the
tabber so it is within 1/8” of the Media Guide Fence [3].
1
3
2
T-750 Tabber Operations Rev. 3/4/08
14