Connecting using wireless lan station mode – Sony Ultra Wide Converter For SEL16F28 and SEL20F28 User Manual
Page 50
4. Network Functions: Connecting to Other Devices via LAN
50
[Notes]
ˎ
ˎ
The operation method differs depending on the
device.
ˎ
ˎ
For the SSID and password of the camcorder,
check AP Mode Settings >Camera SSID &
Password (page 102) in the Network menu.
5
Display the web remote control
(page 58). Or connect using the
Content Browser Mobile application.
Connecting by inputting an SSID and
password on a device
You can connect the camcorder to a device by
entering the SSID and password on a device.
1
Select Wireless LAN >Setting >Access
Point Mode in the Network menu.
2
Open the device Network settings or Wi-Fi
settings on the device, and turn Wi-Fi on.
3
Connect the device to the camcorder by
selecting the camcorder SSID from the
SSID list in Wi-Fi Network and entering the
password.
For the SSID and password of the
camcorder, check AP Mode Settings
>Camera SSID & Password (page 102) in
the Network menu.
[Note]
The operation method differs depending on the
device.
4
Display the web remote control
(page 58). Or connect using the
Content Browser Mobile application.
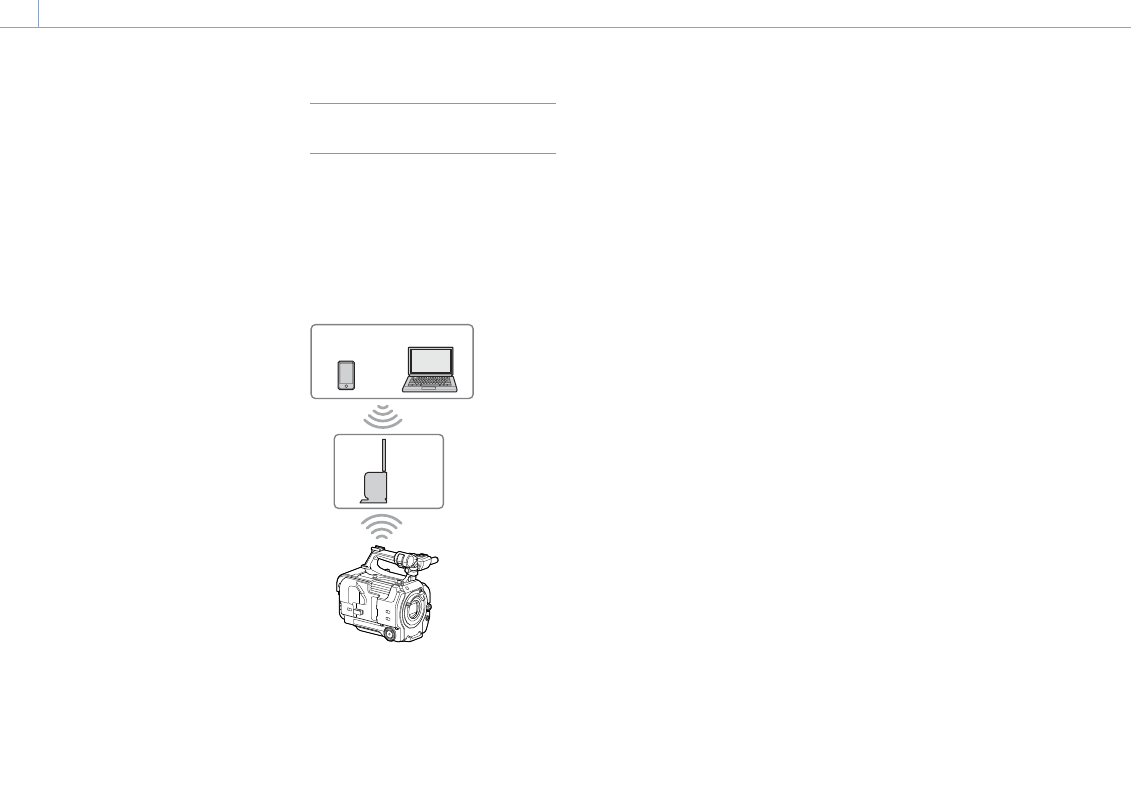
Connecting using Wireless LAN
Station Mode
The camcorder connects to an existing access
point of the wireless LAN as a client. The
camcorder and device connect via the access
point.
The 10 most recently connected access points
are displayed in the history.
The connection history is saved in an ALL
file, but the access passwords are not saved.
Password entry is required the next time you
connect after loading the ALL file.
Smartphone/
tablet
Access
point
Computer
Connecting to an access point using
WPS
If the access point is compatible with the WPS
function, you can connect to the access point
with simple settings.
1
Turn the access point on.
2
Turn the camcorder on.
3
Select Wireless LAN >Setting > Station
Mode in the Network menu.
4
Select Wireless LAN >WPS >Execute in the
Network menu.
5
Press the WPS button of the access point.
For details about the operation of the
WPS button, refer to the operating
instructions of the access point.
When the connection is successful, the
network status indicator icon will show a
strength of 1 or higher on the viewfinder
screen.
[Note]
If the connection fails, perform steps from step 1
again.
6
Connect the device to the access point.
For details about connecting, refer to the
operating instructions of the device.
7
Display the web remote control
(page 58). Or connect using the
Content Browser Mobile application.
Connecting to an access point using
auto network detection or manually
You can configure connection to a desired
access point from the setup menu.
You can configure connection to a desired
access point using the auto network detection
function.
Connecting using the network auto detection
function
1
Perform steps 1 to 3 in “Connecting to an
access point using WPS” (page 50).
2
Select ST Mode Settings >Scan Networks
(page 103) >Execute in the Network
menu.
The camcorder starts detection of
connection destinations.
Possible destinations that are found are
displayed in a list.
3
Select a destination from the list.
The network (access point) details screen
appears. The selected connection is
displayed in SSID.
4
Select Password, and set the password on
the password input screen.
Selecting an SSID in the connection
history automatically configures settings,
including the password.
Set the password to return to the network
(access point) details screen.
5
Configure the following connection
settings.
ˎ
ˎ
DHCP
Set the DHCP setting.
When you set to On, the IP address is
assigned to the camcorder automatically.
To assign the IP address to the
camcorder manually, set to Off.
ˎ
ˎ
IP Address
Enter the IP address of the unit.
This setting is available only when DHCP
is set to Off.
ˎ
ˎ
Subnet Mask
Enter the subnet mask of the unit.
This setting is available only when DHCP
is set to Off.