Installation - water wizard (optional), Evaporative cooling with the water wizard – Greenheck IG / IGX (464104 IOM) (Pre-2009) User Manual
Page 26
26
Evaporative Cooling with the Water Wizard
Installation - Water Wizard (Optional)
Step 3 Wire the Solenoid(s)
Wire the supply solenoid to terminals X and 25 in the
control center. Wire the drain solenoid to terminals X and
26 in the control center.
Step 4 Wire the Temperature Sensor
If the evaporative cooler shipped separate from the unit, the temperature sensor must be wired. The sensor wire
is bundled inside the discharge end of the evaporative cooler. Wire the sensor wire to terminals AI2 and AIC on
the terminal strip in the unit’s control center.
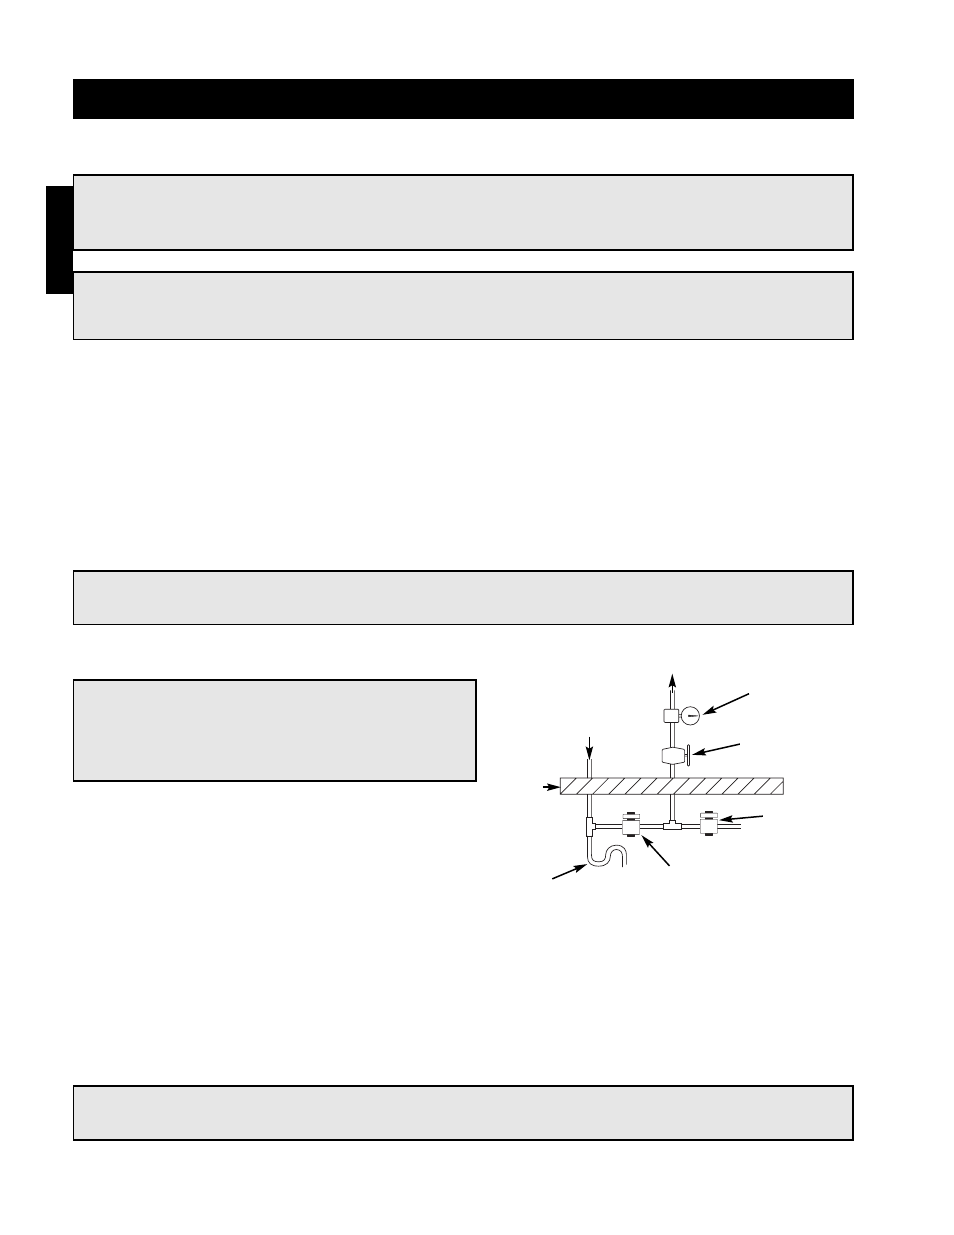
Step 1 Install Supply Line/Solenoid
Connect the water supply line to the manual supply valve in the unit. Install the supply solenoid in the supply
line, upstream of the manual supply valve and below the roofline.
Step 2 Install Drain Line/Solenoid
Connect the drain line to the supply line between the manual supply valve and the supply solenoid. Install a
drain solenoid in the drain line, below the roof line.
CAUTION!
Any wiring deviations may result in personal injury
or property damage. Greenheck is not responsible
for any damage to, or failure of the unit caused by
incorrect final wiring.
NOTE!
The Water Wizard start-up must be completed for proper performance.
NOTE!
Solenoid(s) may be provided by Greenheck (if ordered) or by others.
WARNING!
Disconnect and lock-out all power and gas before performing any maintenance or service to the unit.
Failure to do so could result in serious injury or death and damage to equipment.
Drain Solenoid
Supply
Solenoid
Manual
Supply Valve
Pressure
Gauge
To Media
Sump
Drain
Roof
Line
Trap
Installation
NOTE!
The following instructions are provided for evaporative coolers equipped with the Water Wizard only.
Additional instructions are provided for evaporative coolers equipped with the auto-drain and fill or
bleed-off.