1 using the cal. pushbutton, 1 sensor alignment, Using the cal. pushbutton – MicroE Mercury II 6000 User Manual
Page 10: Sensor alignment, Section, Alignment tool
Sensor Alignment and Calibration
IM-Mercury_II_6000 Series Rev. 1
Page 9
©2014 MicroE Systems
Mercury
II
6000 Series Encoders
Installation Manual and Reference Guide
5.1
Using the Cal. Pushbutton
Use the following instructions to perform sensor alignment and calibration by using the Cal.
Pushbutton located on the ATMII5000 Alignment Tool.
5.1.1 Sensor Alignment
Note: Make sure that the 5VDC power input is disconnected. Encoder should never be
connected to an already energized alignment tool since equipment can be damaged.
Step
Action
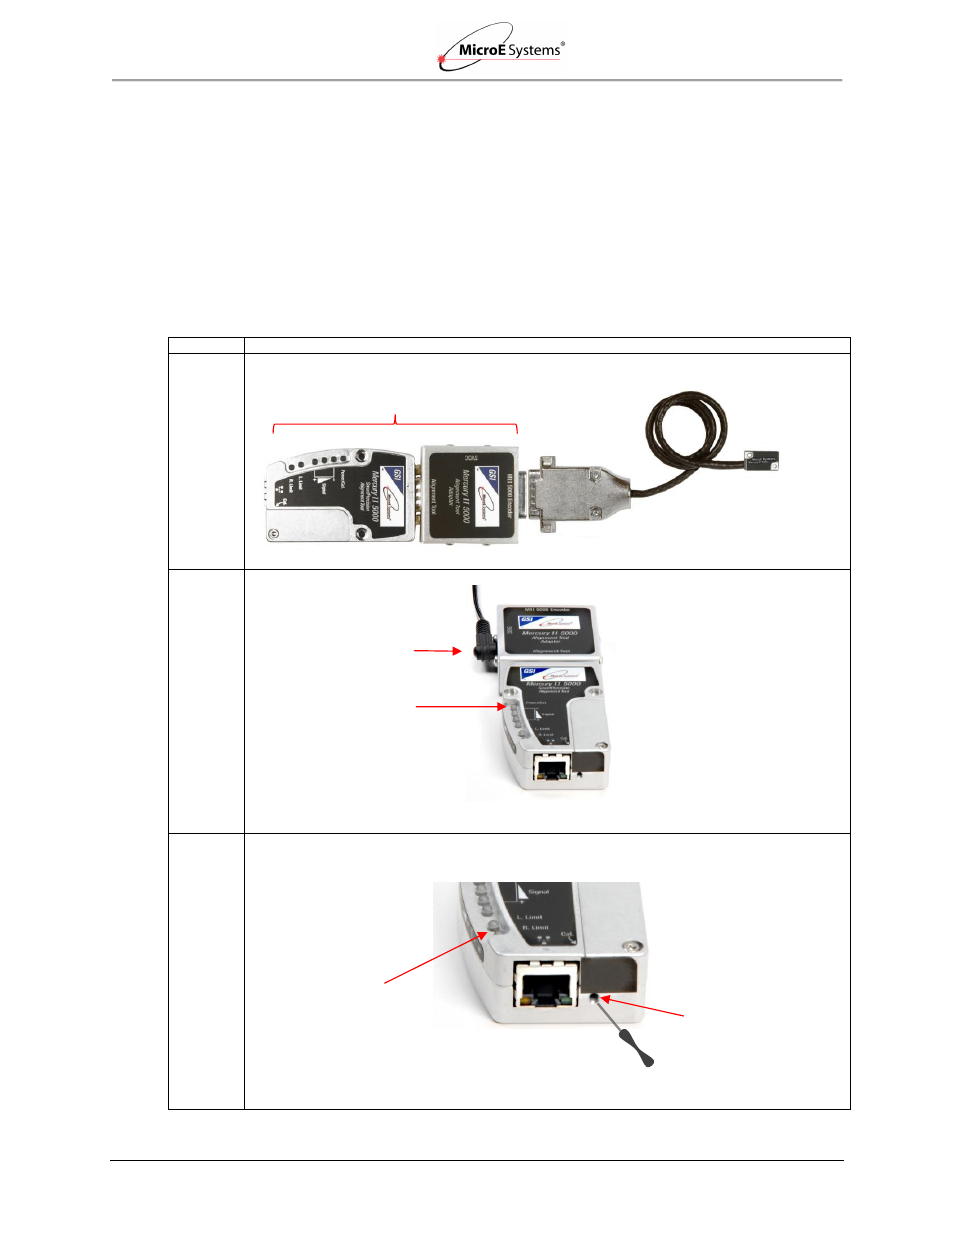
1.
Connect the MII6000 encoder to the SmartPrecision Alignment Tool.
2.
Insert the 5VDC power connector to the Alignment Tool Adapter and apply power.
Result: The Power/Cal. LED illuminates a steady green. The sensor is initialized after an
approximate 10 second delay.
3.
Enter the Alignment Mode by gently pressing and releasing the Cal. pushbutton quickly (within
a second) using a small screwdriver or similar tool.
Result: The two Limit LEDs will begin to blink in unison (slowly). Automatic Gain Control
(AGC) is now inactive. The AGC adjusts gain to maintain a steady signal level.
Alignment Tool
Pushbutton
5VDC Power
Alignment Tool Adapter
Encoder
Sensor Connector
Alignment Tool
Power/Cal. LED
Access to Cal.
Pushbutton
Limit LEDs (two)
Screwdriver