MicroE Mercury II 6000 User Manual
Page 55
PurePrecision Laser Tape II Scale Installation
IM-Mercury_II_PurePrecision_Scales Rev. 1
Page 11
©2014 MicroE Systems
Mercury II PurePrecision Tape and Glass Scales
Installation Manual and Reference Guide
Step
Action
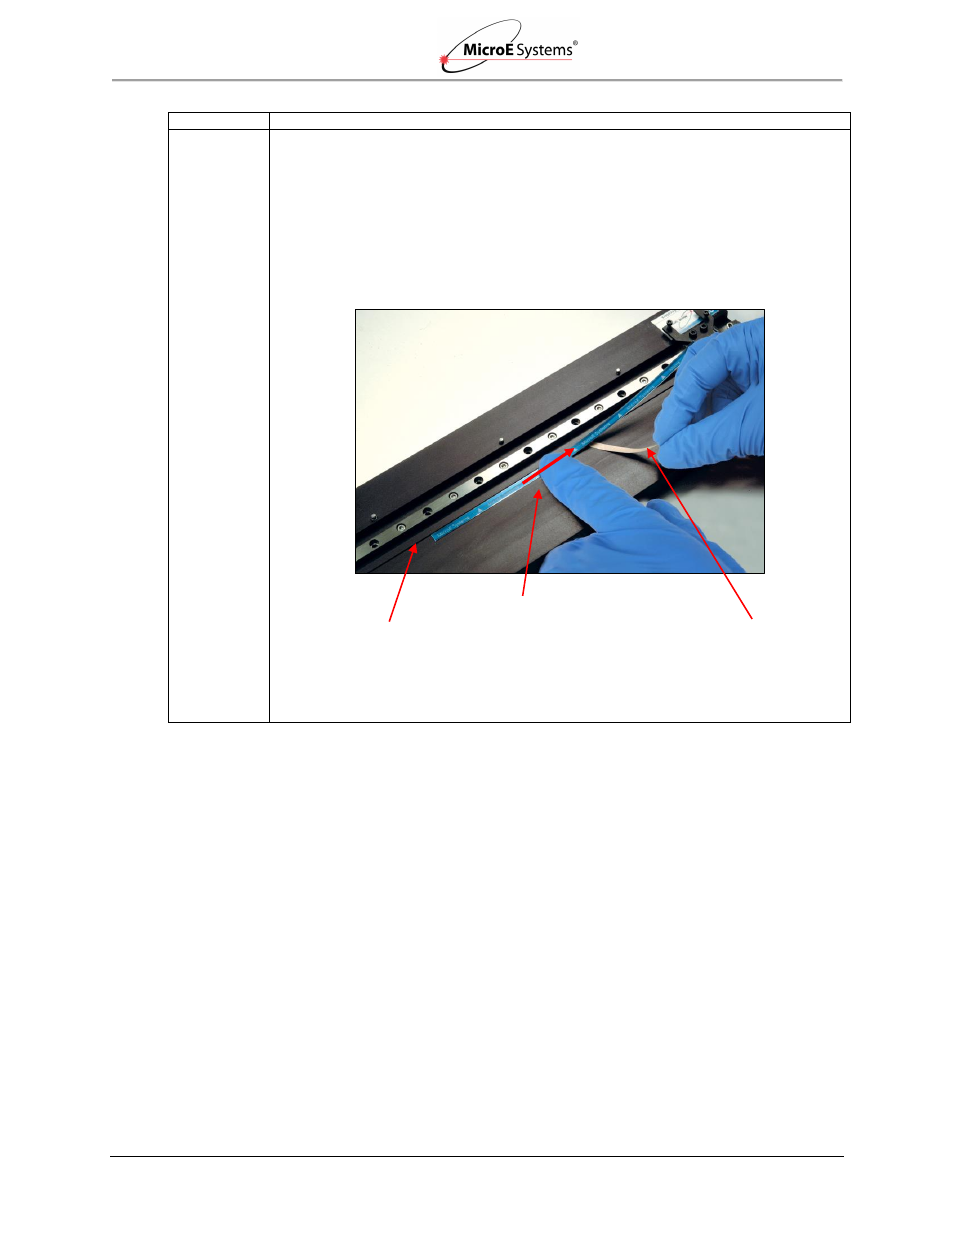
5.
Install the PurePrecision Tape Scale along the remaining length of the mounting surface:
1. With one hand pull the adhesive backing progressively away from the scale while
the other hand slides evenly along the scale.
2. During the sliding motion, press the remaining tape on to the mounting surface
and pull the adhesive backing out of the way.
TIP:
Maintain a gap of approximately 25
– 35mm (1 – 1½ inches) between the two
hands as you progress along the length of the tape scale.
Note:
Be sure to keep the blue top protective film in place. Make sure that the tape
scale is tight against the
“D” reference edge.
Once the tape has been installed, discard the adhesive backing.
Pull adhesive backing out of
the way during sliding. No
obstruction between tape
scale and mounting surface.
Sliding motion of finger
progressively along the
length of the tape
“D” reference edge as shown in
the encoder interface drawing