Install tape scale – MicroE Mercury II 6000 User Manual
Page 60
PurePrecision Laser Tape II Scale Installation
IM-Mercury_II_PurePrecision_Scales Rev. 1
Page 16
©2014 MicroE Systems
Mercury II PurePrecision Tape and Glass Scales
Installation Manual and Reference Guide
Install Tape Scale
When orienting the tape, both tape scale arrows and applicator tool orientation arrows need to
point in the same direction for proper orientation.
Note: The tape scale orientation arrows always point to the
“D” reference edge in the interface
drawing.
Make sure that the applicator tool is free of any particulate contamination.
Step
Action
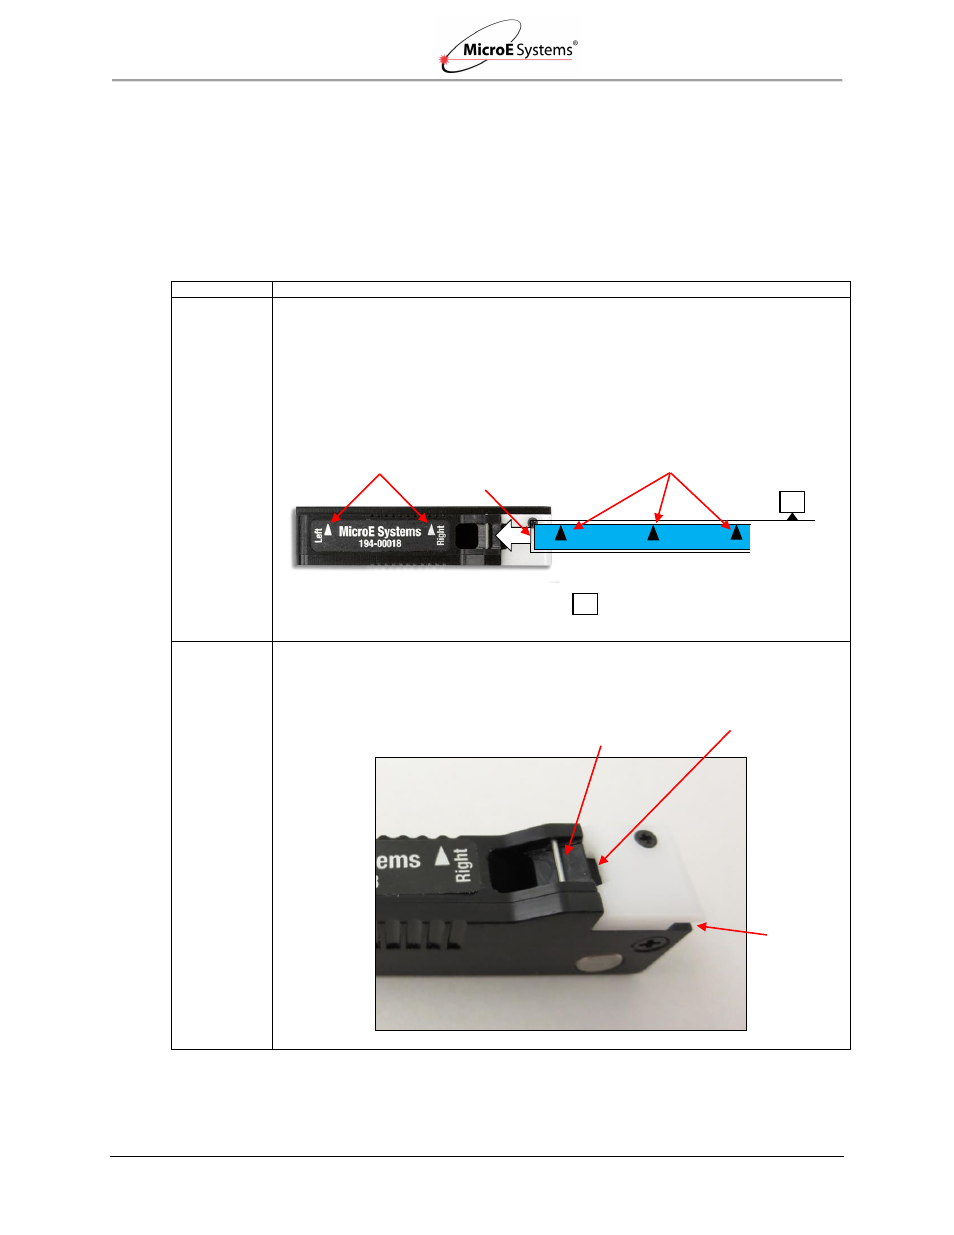
1.
Orient the applicator tool and tape scale:
With the mounting surfaces reference edge away from you, insert the tape scale in the
applicator tool so that arrowheads are pointing away from you as shown. The arrowheads
on the applicator tool should also point away from you.
In the example shown below, the left end of the tape scale will go into the applicator tool
entry channel first.
Correct orientation of the applicator tool is the “MicroE Systems” label
to the left and the white-colored end to the right.
2.
PurePrecision tape scales have 4 layers: blue protective film, Inconel (metal) scale,
adhesive, and adhesive backing. The top two layers fit under the dowel pin, while the
bottom adhesive backing fits into the backing slot as shown below.
= Tape Scale Mounting Surface Reference
Edge (See encoder interface drawings)
D
Applicator tool orientation arrows
Left end of tape scale
Tape scale orientation arrows on blue protective film
Entry slot for tape scale with blue
protective film (under dowel pin)
Entry slot for
adhesive backing
Exit slot for
adhesive
backing
D