MicroE Mercury II 6000 User Manual
Page 65
PurePrecision Laser Tape II Scale Installation
IM-Mercury_II_PurePrecision_Scales Rev. 1
Page 21
©2014 MicroE Systems
Mercury II PurePrecision Tape and Glass Scales
Installation Manual and Reference Guide
Step
Action
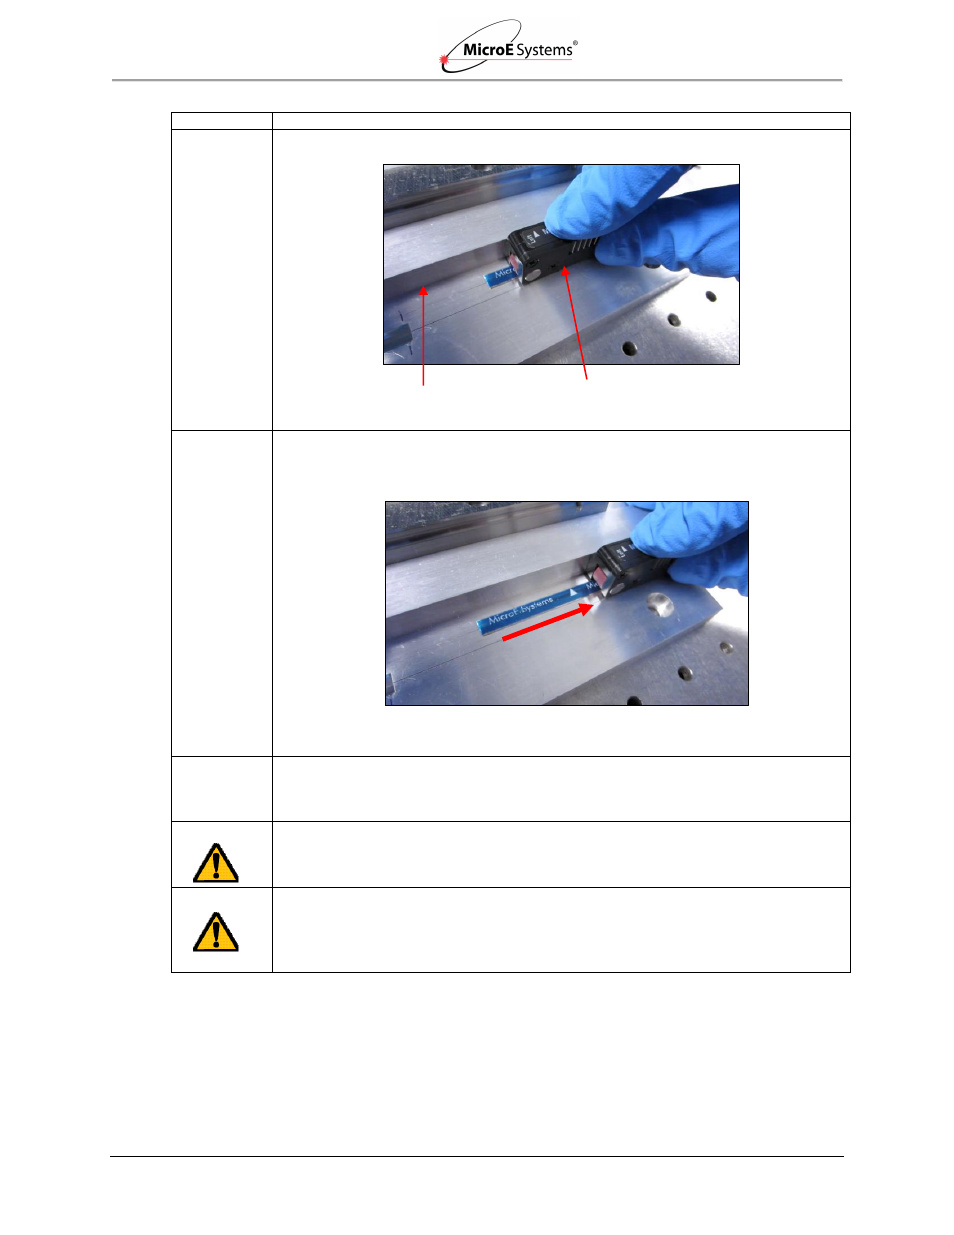
9.
Place applicator tool along reference edge and firmly press down on mounting surface.
10.
Slide tool along guide edge face (in direction shown) with a slow and even pressure
motion until all of the tape is installed on the mounting surface. Be sure the adhesive
backing film does not bunch up and jam inside the tool and exits freely from the exit slot.
11.
Once the scale is applied to the mounting surface, and before the blue protective film is
removed, it is recommended that even pressure be applied over the entire tape scale
length by sliding a glove-protected finger or the applicator tool across the scale. The
applied pressure will ensure that the adhesive is evenly and permanently set.
12.
Peel off the blue protective film:
Start the peeling process using a sharp tool, being careful not to damage the scale. Pull
off the remaining blue protective film. Clean the tape scale using alcohol or acetone and a
lint-free cotton cloth.
13.
Precautions:
If scale damage has occurred, the tape scale may need to be replaced.
The ends of the tape scale can be covered and secured with an end cap.
Clean the tape scale using alcohol or acetone and a lint-free cotton cloth.
Tape scales cannot be reused if removed from mounting surface.
If installing Laser Tape II index/limits, go to Section 5.0.
Applicator tool pressed down and
against high guide edge
High guide edge face
Applicator tool in motion against guide edge face