MicroE Mercury II 6000 User Manual
Page 61
PurePrecision Laser Tape II Scale Installation
IM-Mercury_II_PurePrecision_Scales Rev. 1
Page 17
©2014 MicroE Systems
Mercury II PurePrecision Tape and Glass Scales
Installation Manual and Reference Guide
Step
Action
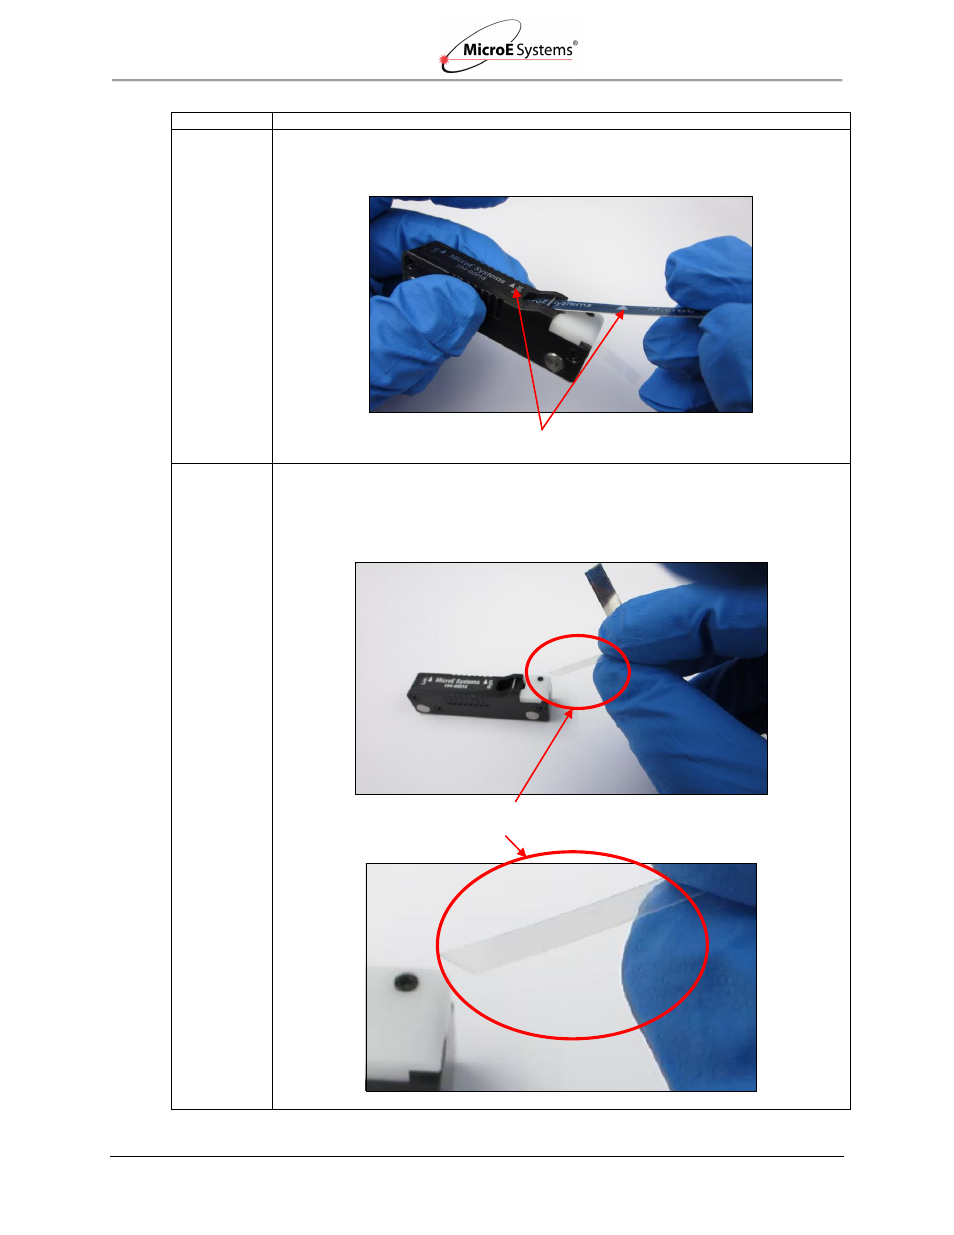
3.
Determine the correct end of the tape scale to insert into the applicator tool entry slot. The
correct end is determined by the direction of the orientation arrows on both the tape scale
blue protective film and the applicator tool arrows. Both sets of arrows have to point in the
same direction.
4.
From the left end (arrows are pointing away) of the tape scale, peel and curl back 50-
75mm (2-3 inches) of the adhesive backing as shown. Take care not to touch the
adhesive on the bottom of the tape scale or allow any particle contamination.
Note: Do not peel the blue protective film off at this time.
Correct orientation
– all arrows point in same direction
Peel and cut back 50-75mm (2-3 inches) of the adhesive backing