3 install tape scale, 1 install tape scale manually, Install tape scale – MicroE Mercury II 6000 User Manual
Page 53: Install tape scale manually
PurePrecision Laser Tape II Scale Installation
IM-Mercury_II_PurePrecision_Scales Rev. 1
Page 9
©2014 MicroE Systems
Mercury II PurePrecision Tape and Glass Scales
Installation Manual and Reference Guide
3.3
Install Tape Scale
When installing tape scale, always perform the following steps to ensure best system
performance:
Wear talc-free gloves or finger cots during all steps of tape scale installation.
Thoroughly clean the scale mounting surface and reference edge using a cotton swab or
lint-free cloth dampened with isopropyl alcohol or acetone.
Remove all dust and particles.
The tape scale can be installed using one of the following methods:
Manually by hand (
Using the Applicator Tool (
Use
to help select the method of installation.
3.3.1 Install Tape Scale Manually
Use the steps in this section to install PurePrecision Laser Tape II Scales manually by hand.
Step
Action
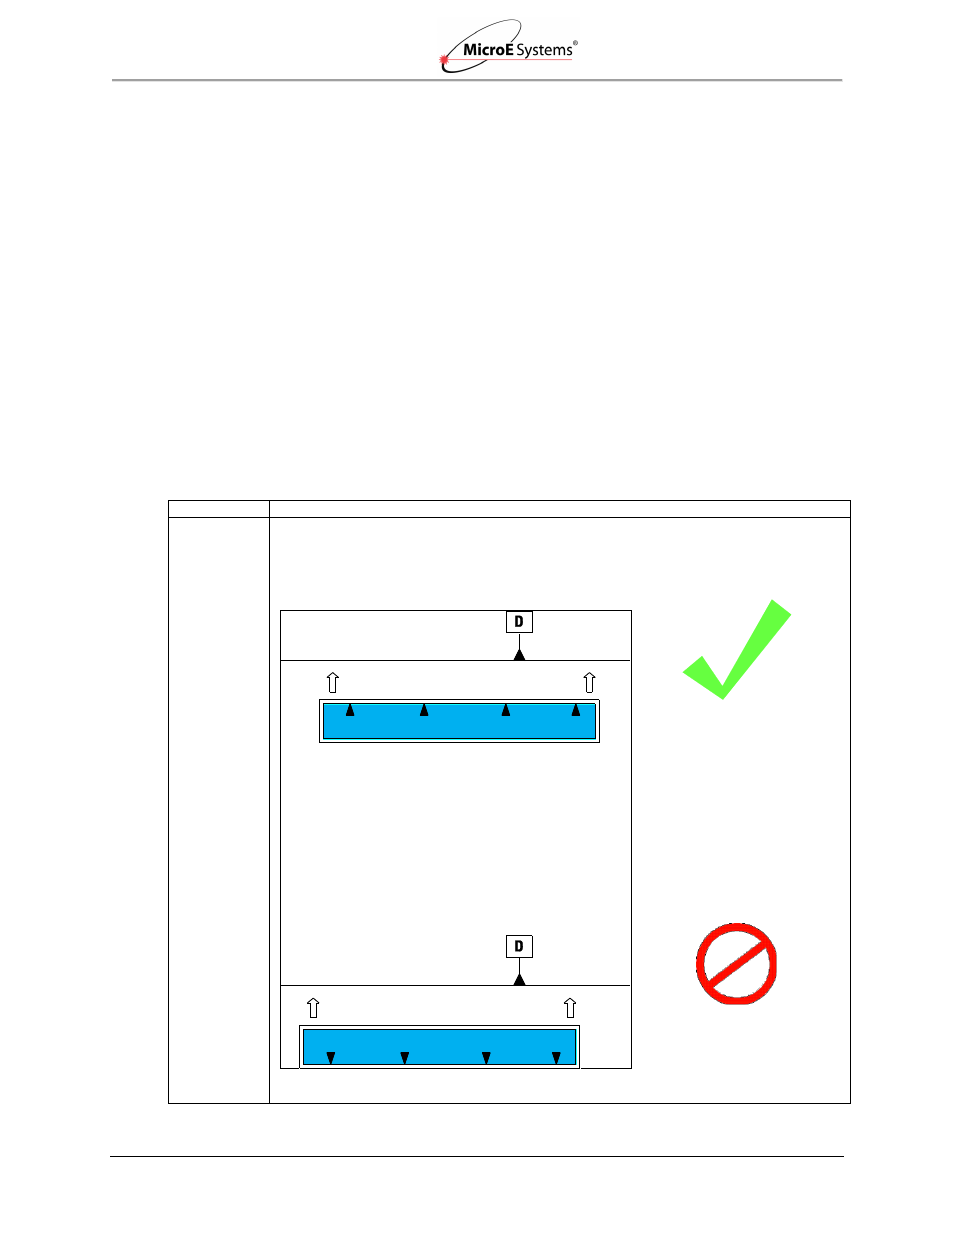
1.
Orient the scale such that the arrowheads on the blue protective film are pointing towards
the mounting surface reference edge
“D” as shown in the interface drawing for your sensor
model
. Refer to the correct model number interface drawing for reference edge “D”
dimensions and sensor orientation.
Correct: Arrowheads on the blue
protective film are pointing
towards the mounting surface
reference edge.
Incorrect: Arrowheads on the
blue protective film are pointing
away from the mounting surface
reference edge.
Reference Edge
Reference Edge
Left end of
tape scale