Removing batteries, Precautions for the use of batteries, Using an external dc power source – Teac HS-P82 User Manual
Page 18: Attaching a v-mount type battery, 3 − preparation
18
TASCAM HS-P82
Removing batteries
Open the cover of the battery compartment by loosening the
screw on the rear panel, and push the lever on the right side
of the battery compartment down. This unlocks and ejects
the battery (or case).
Inserting batteries into the battery case
(BC-10AA)
1 Open the cover of the battery case (TASCAM BC-
10AA).
2 Insert 10 AA batteries with the correct +/-
orientation.
3 Close the cover.
Precautions for the use of batteries
Misuse of batteries could result in leakage, rupture or
•
other trouble. Please read the warnings on the batteries
and page 4 of this manual carefully.
When changing batteries, replace all 10 batteries at the
•
same time.
Using an external DC power source
The unit can be powered by connecting an external DC
power source with an output voltage of 11-16V and an
output current of 2A or more to the
EXT DC
IN
connector (XLR-4-32) on the left side panel of this unit.
For how to use V-Mount type batteries, see the instructions
included with the battery. In the following examples of
external DC power use, the attachment procedures for
a V-Mount type battery from IDX Company, Ltd. are
described.
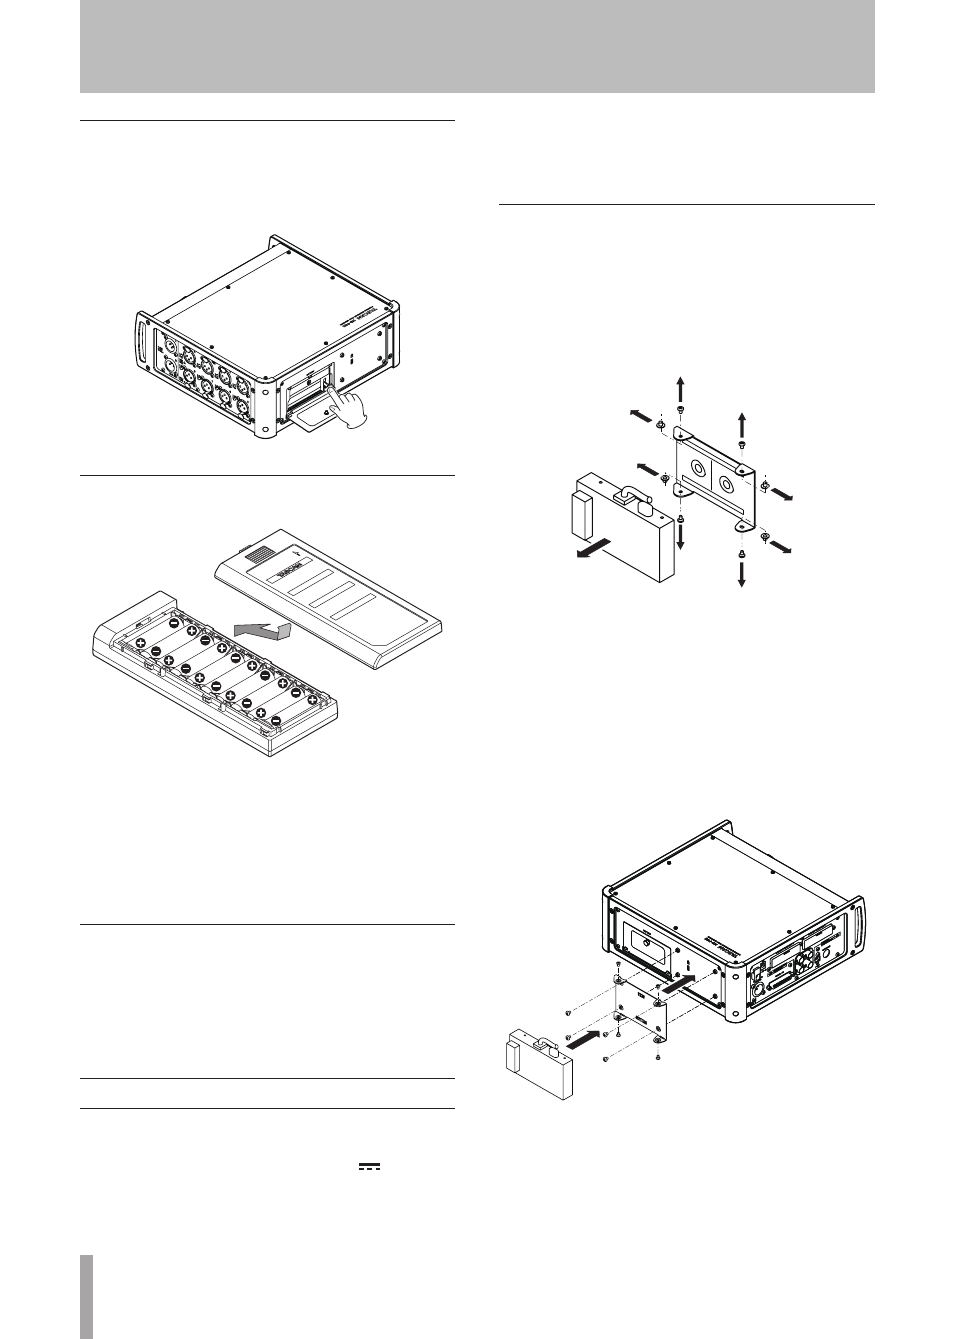
Attaching a V-Mount type battery
1 As shown in the following illustration, remove the
cover attached to the V-Mount external battery
adaptor (IDX C-EB (XLR)).
The a screws are required in step 2.
The b spacers are not needed so store them with the
cover.
a
b
a
a
a
b
b
b
IDX
V-Mount cover
IDX
V-Mount adaptor
2 Attach the V-Mount bracket to the rear panel using
the included V-Mount bracket screw kit (c) as
shown in the following illustration.
Check the TOP and BOTTOM indications for the
V-Mount bracket and attach it with the correct
orientation.
3 Attach the V-Mount external battery adaptor (IDX
C-EB (XLR)) to the V-Mount bracket that is attached
to the rear panel using the a screws removed in step
1.
a
a
a
a
c
c
c
c
V-Mount bracket
IDX
V-Mount adaptor
3 − Preparation