System settings (system setup), 6 – internal settings and operations, Preferences page – Teac HS-P82 User Manual
Page 46: Alarm tone page, Clock adjust page
46
TASCAM HS-P82
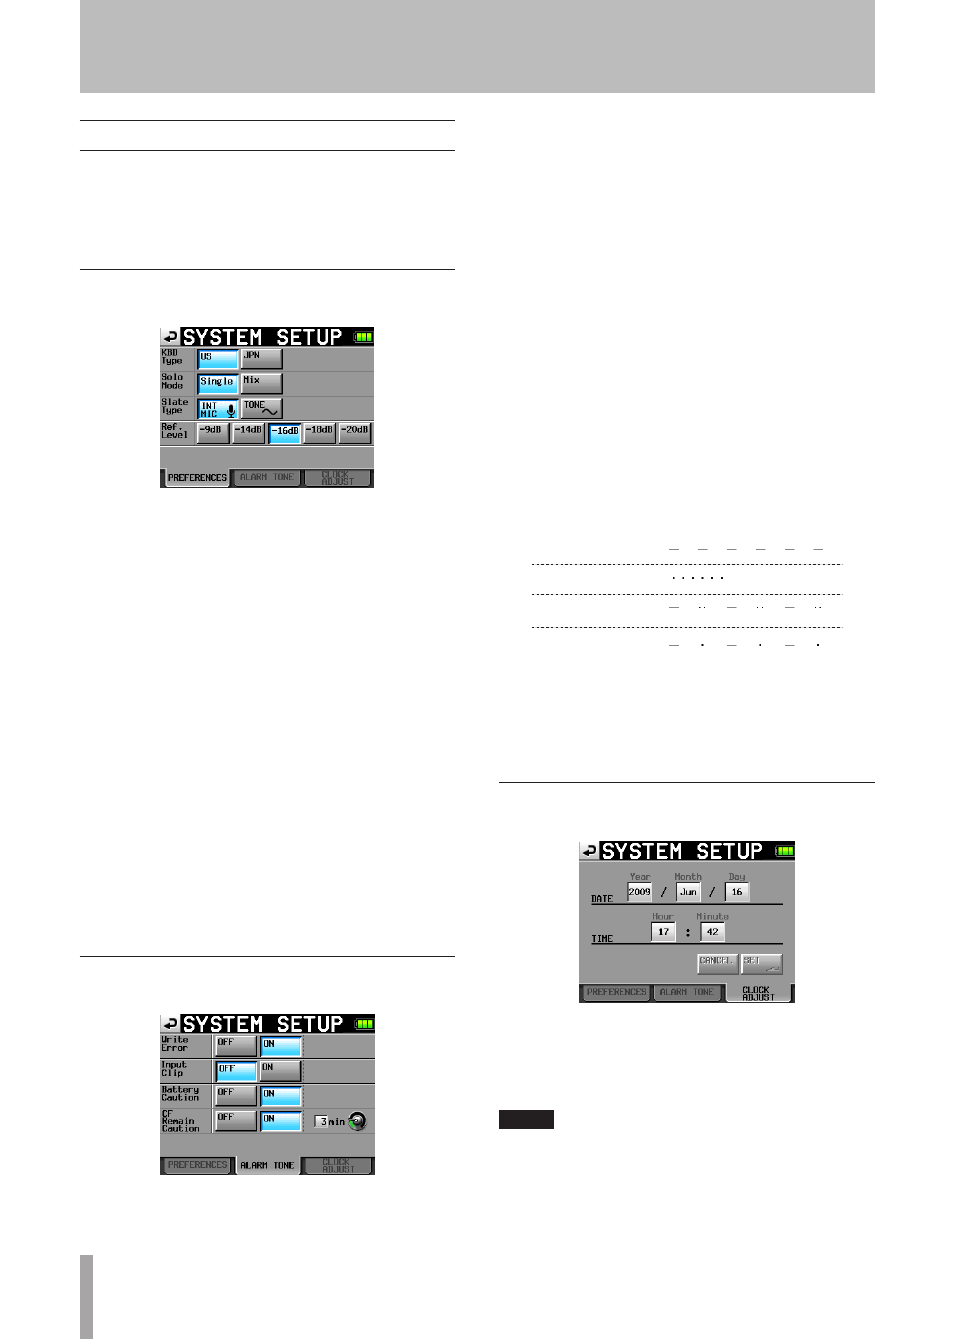
System settings (SYSTEM SETUP)
Make system settings on this screen.
The
SYSTEM
SETUP
screen has 3 pages:
PREFERENCES
,
ALARM
TONE
and
CLOCK
ADJUST
. Touch the tabs at the
bottom of the screen to open the corresponding page.
PREFERENCES page
Set system preferences on this page.
KBD Type
Set the connected keyboard type.
Setting buttons:
US
(default setting) and
JPN
Solo Mode
Set the solo mode.
Set to “Single” to solo one track at a time or “Mix” to allow
more than one track to be soloed at the same time.
Setting buttons:
Single
(default setting) and
Mix
Slate Type
Set whether the slate signal is input from the built-in mic or
is a tone signal.
Setting buttons:
INT
MIC
(default setting) and
TONE
Ref. Level
Set the reference level for analog input and output to a
number of decibels below the maximum level (full bit rate
utilization).
Setting buttons:
–9dB
,
–14dB
,
–16dB
(default value),
–18dB
and
–20dB
ALARM TONE page
Make alarm settings.
Write Error
Set whether or not an alarm sounds when there is a write
error. (Default setting:
ON
)
Input Clip
Set whether or not an alarm sounds when the input exceeds
the maximum. (Default setting:
OFF
)
Battery Caution
Set whether or not an alarm sounds when the battery voltage
becomes low. (Default setting:
ON
)
CF Remain Caution
Set whether or not an alarm sounds when the remaining
amount of time on the CF card becomes low. (Default
setting:
ON
)
Touch the knob and when its background color turns yellow,
use the
DATA
dial to adjust the amount of remaining time
setting. The setting value range is 1–9 minutes. (Default
value:
3 min
)
The alert sounds have the following patterns.
Write Error
Input Clip
CF Remain Caution
Battery Caution
Alert sound patterns
CLOCK ADJUST page
Set the time of the built-in clock.
Touch the item that you want to set. Use the
DATA
dial to
adjust the item. When you finish setting the items, press the
DATA
dial or touch the
SET
button on the
CLOCK
ADJUST
page to confirm the setting.
NOTE
While setting the time, the clock stops and the “:” does not
blink. When you touch the SET button, the clock starts again
and the “:” blinks.
6 – Internal Settings and Operations