Playback settings (play setup), Sync and time code settings (sync t/c), 6 – internal settings and operations – Teac HS-P82 User Manual
Page 40
40
TASCAM HS-P82
PreREC Time
Set the pre-recording time and ON/OFF settings. Turn this
function ON/OFF and set the time in seconds. (Default
setting:
OFF
)
To set the recording time, touch the knob. You can adjust
the value using the
DATA
dial. The range of setting values is
1–5 seconds. (Default value: 2 seconds)
Auto Marker
Make settings related to auto markers.
Audio Over: Use this to add markers when the set audio
level is detected. Turn this function ON or OFF. (Default
setting:
OFF
.)
To set the audio detection level in decibels, touch the
knob. You can adjust the value using the
DATA
dial. The
range of setting values is –0.2 dB to –0.03 dB. (Default
value: –0.2 dB)
Settings made here are reflected in the “Over Level”
setting on the METER SETUP screen.
Time Interval: Use this to add marks at fixed time intervals.
Turn this function ON or OFF and set the time interval.
(Default setting:
OFF
)
To set the time, touch the knob. You can adjust the value
using the
DATA
dial. The range of setting values is 1–10
minutes.
(Default value: 5 minutes)
Sync Unlock: Use this to add a mark when synchronization
with the master clock is lost. Turn this function ON or
OFF. (Default setting:
OFF
)
Playback settings (PLAY SETUP)
Play Mode
Set how the playback of takes is handled.
One Take: Only the currently selected take is played back.
All Take: All the takes in the currently loaded project are
played back.
(Default setting:
One Take
)
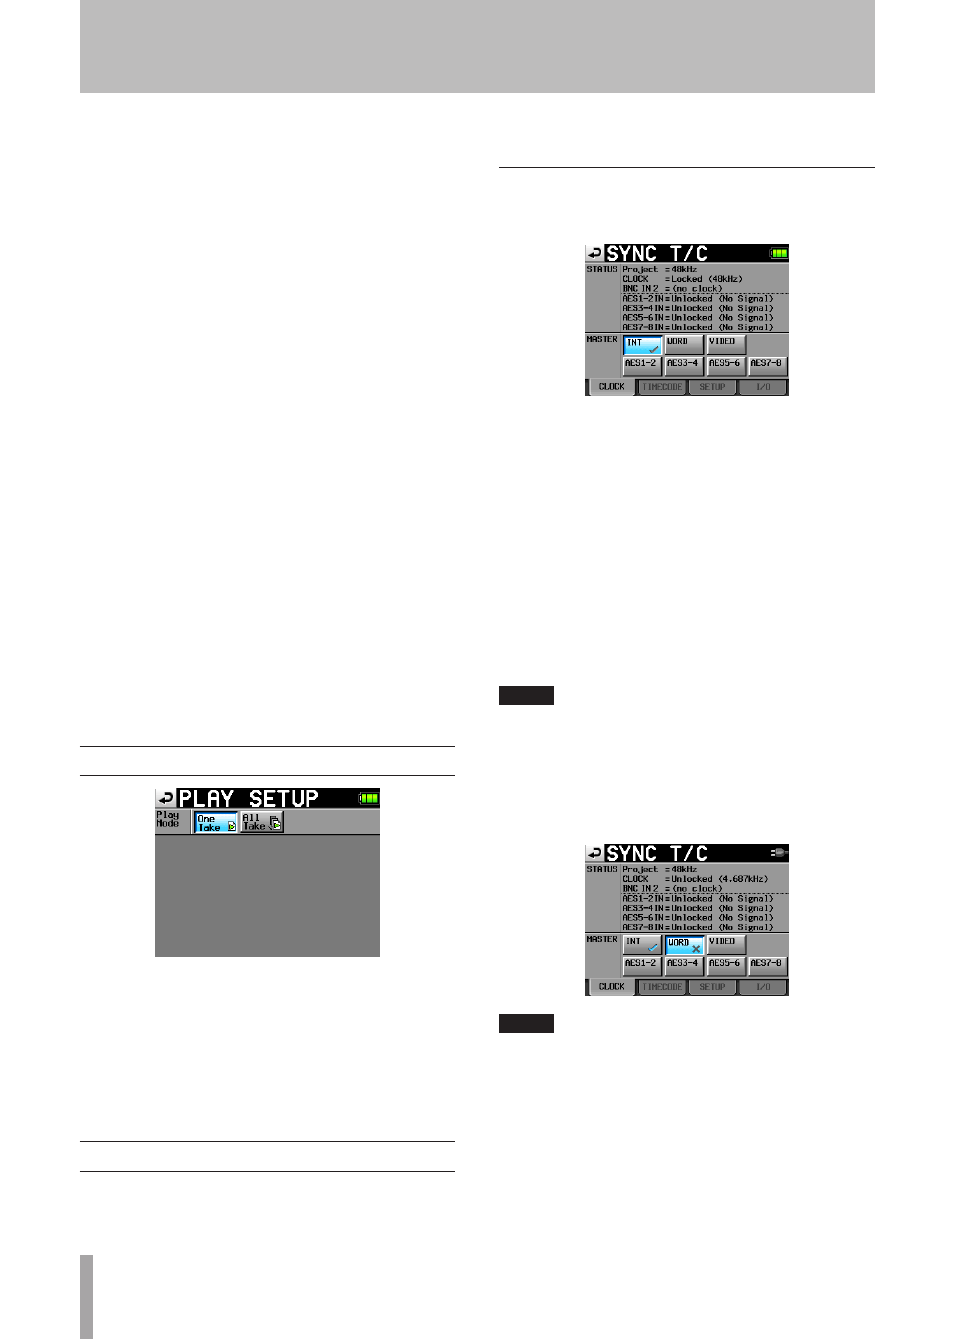
Sync and time code settings (SYNC T/C)
Use the
SYNC
T/C
screen to make synchronization and time
code settings. This screen has four pages:
CLOCK
,
TIME-
CODE
,
SETUP
and
I/O
. Touch the tabs at the bottom of the
screen to open the corresponding page.
CLOCK page
View various clock status information and select the clock
used for synchronization.
Select the master clock to use from the
MASTER
item
options.
INT (default value): Use this unit’s internal clock.
WORD: Synchronize with the word clock input through the
CASCADE/WORD/VIDEO IN
connector.
VIDEO: Synchronize with the video clock input through the
CASCADE/WORD/VIDEO IN
connector.
AES (1-2, 3-4, 5-6, 7-8): Synchronize with the clock of the
AES/EBU digital signal input through the
DIGITAL I/O
connector.
You cannot select an input as the master clock if the
sampling rate converter is ON for that input.
NOTE
A check mark appears on the button of the currently active
•
master clock.
If synchronization from an external clock is interrupted,
•
the unit’s internal clock becomes active. In this case, a
check mark appears on the INT button to show that it has
become the active clock, and an “x” appears on the button
of the external clock that had been selected.
NOTE
The statuses of the digital input signals (AESx-x IN) are shown
in the STATUS item as follows.
When locked
"Locked (xx.xxxkHz)"
When sampling frequency conversion is ON
"Locked (xx.xxxkHz FsCnv)"
When unlocked
"Unlocked (xx.xxxkHz)"
When there is no signal
6 – Internal Settings and Operations