Setting the inputs, 4 − recording and playback – Teac HS-P82 User Manual
Page 27
TASCAM HS-P82
27
3 Touch the buttons next to the
PHANTOM
+48V
item
on the
INPUT
page for the input channels that need
phantom power to turn it ON.
CAUTION
Confirm that phantom power is OFF before connecting a
•
line level device to a MIC/LINE IN connector. If you connect
a line level device while phantom power is ON, that device
or this unit could be damaged.
Confirm that phantom power is OFF before connecting
•
or disconnecting a condenser microphone to a MIC/LINE
IN connector. If you connect or disconnect a microphone
while phantom power is ON, that mic or this unit could be
damaged.
Do not connect an unbalanced dynamic microphone to an
•
XLR connector that is supplying phantom power. Doing so
could damage the microphone or this unit.
Setting the inputs
1 Press the
MENU
key on the front panel to open the
MENU
screen.
2 Touch the
MIXER
SETUP
button to open the
MIXER
SETUP
screen.
On the
INPUT
page, set each channel’s input source,
turn phantom power ON or OFF for each input, and turn
the sampling rate converter ON or OFF for each pair of
inputs. For details, see “INPUT page” on page 43.
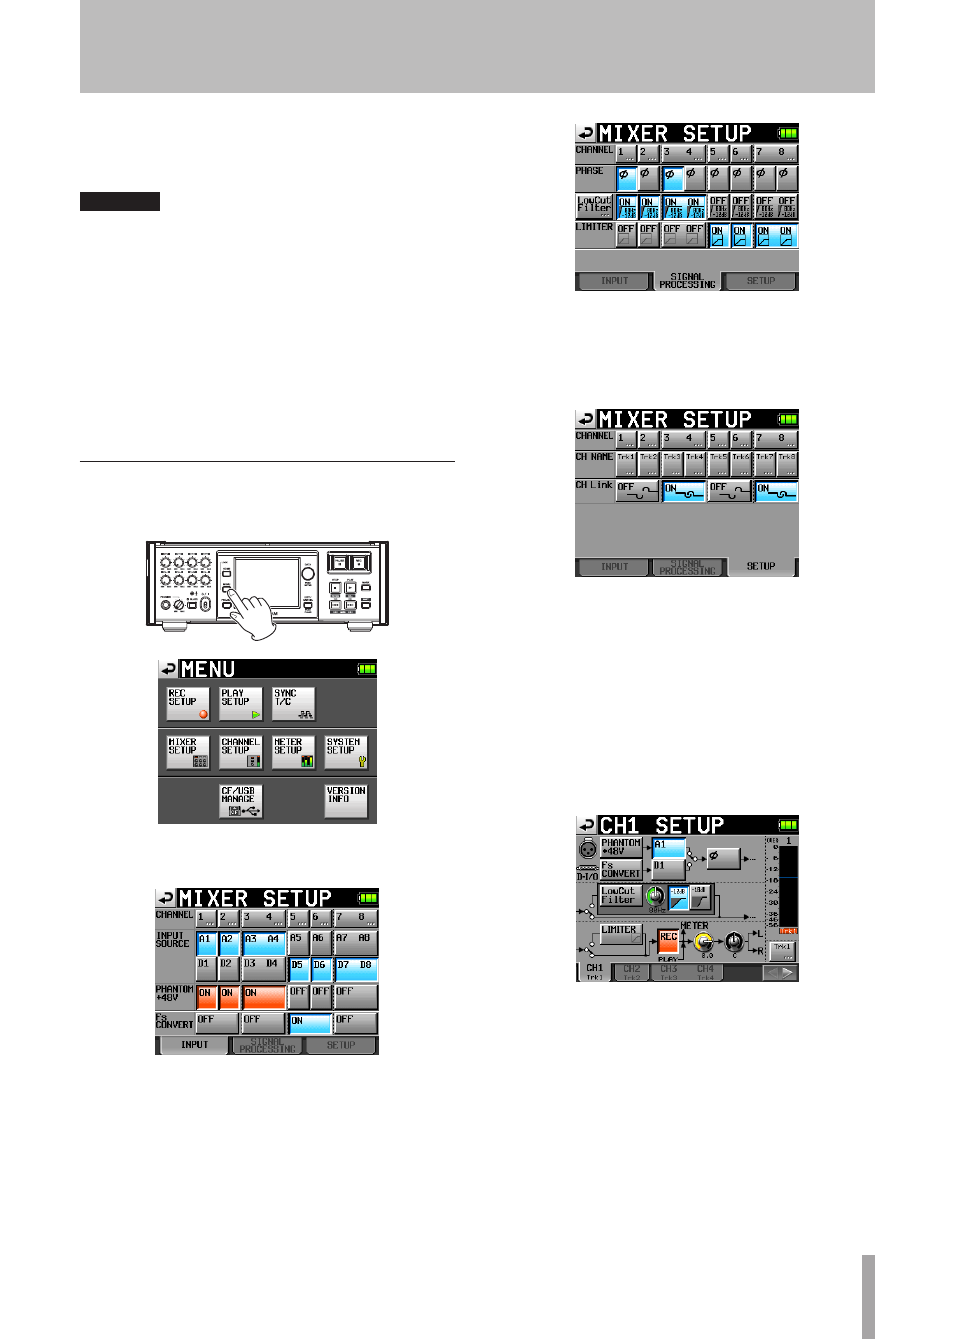
3 If necessary, open the
SIGNAL
PROCESSING
and
SETUP
tabs to make additional settings.
On the
SIGNAL
PROCESSING
page, you can reverse the
phase, and turn the low-cut filter and limiter ON or OFF.
To adjust the low-cut filter settings, touch the
LowCut
Filter
button to open the
LOW
CUT
FILTER
screen. For
details, see “SIGNAL PROCESSING page” on page 43.
From the
SETUP
page, you can edit channel names and
turn channel links ON and OFF.
To edit channel names, touch the buttons next to the
CH
NAME
item. For details, see “CHx NAME (button)” on
page 44.
Input settings can also be changed on the
CHx
SETUP
(1-8)
screens.
Touch the
CHANNEL
SETUP
button on the
MENU
screen.
To open a
CHx
SETUP
screen, touch that
CHANNEL
button at
the top of the
MIXER
SETUP
screen.
See “Channel Settings (CHANNEL SETUP)” on page
44 details about making settings on the
CHANNEL
SETUP
screens.
4 − Recording and Playback