Smartsensor trip times – Wavetronix Command Translator (CMD-DT) - User Guide User Manual
Page 135
134
CHAPTER 11 • TASKBUILDER SUB-WINDOWS
sensor IDs and custom names work the same as the left, right and delete buttons when edit-
ing route elements.
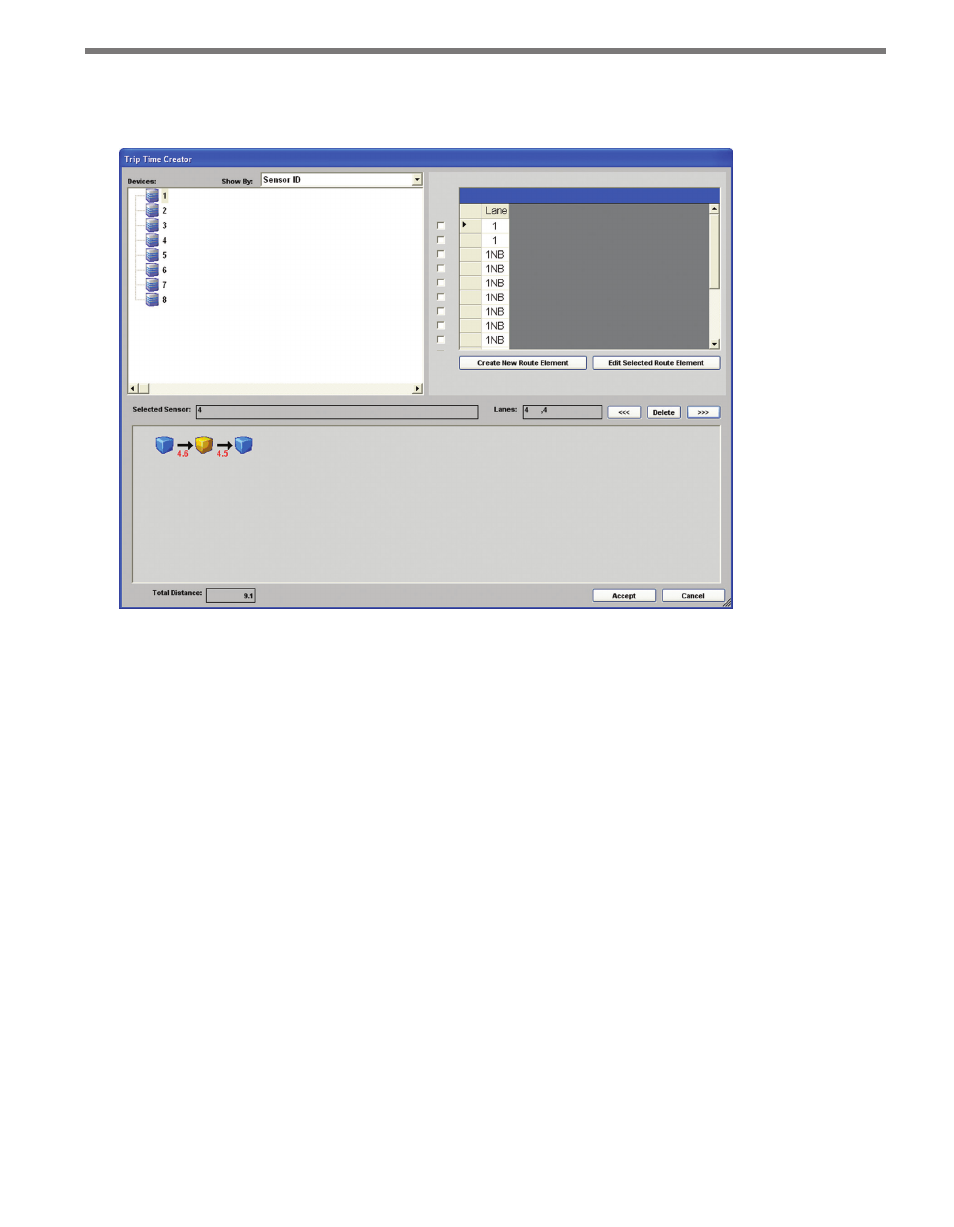
Figure 11.7 – Sensor + Lane/Approach Trip Times
Once a sensor is selected, the right side of the screen will show a list of lanes, approaches or
other sensor subdivisions listed in the data set for that sensor. Each lane will have a check
box next to it, allowing you to select one or more lanes for inclusion in a route element.
After selecting the desired lanes, click the Add Selected Lanes button to add a new route
element to the route display below.
Selecting a route element in Lane mode will display the element information in text boxes
immediately above the route display.
Once the route is complete, click Accept to save the information and return to the main
TaskBuilder window. Clicking Cancel will close the sub-window without saving any chang-
es.
SmartSensor Trip Times
When the Trip Time Mapping is set to SmartSensor mode, the Trip Time sub-window will
look similar to Sensor/Lane mode but with additional columns in the lane display (see
Figure 11.8).