RISCO Group ACUS User Manual
Page 45
ACUS Quick Start Guide
Uncontrolled
when
printed
©
RISCO
Group
44
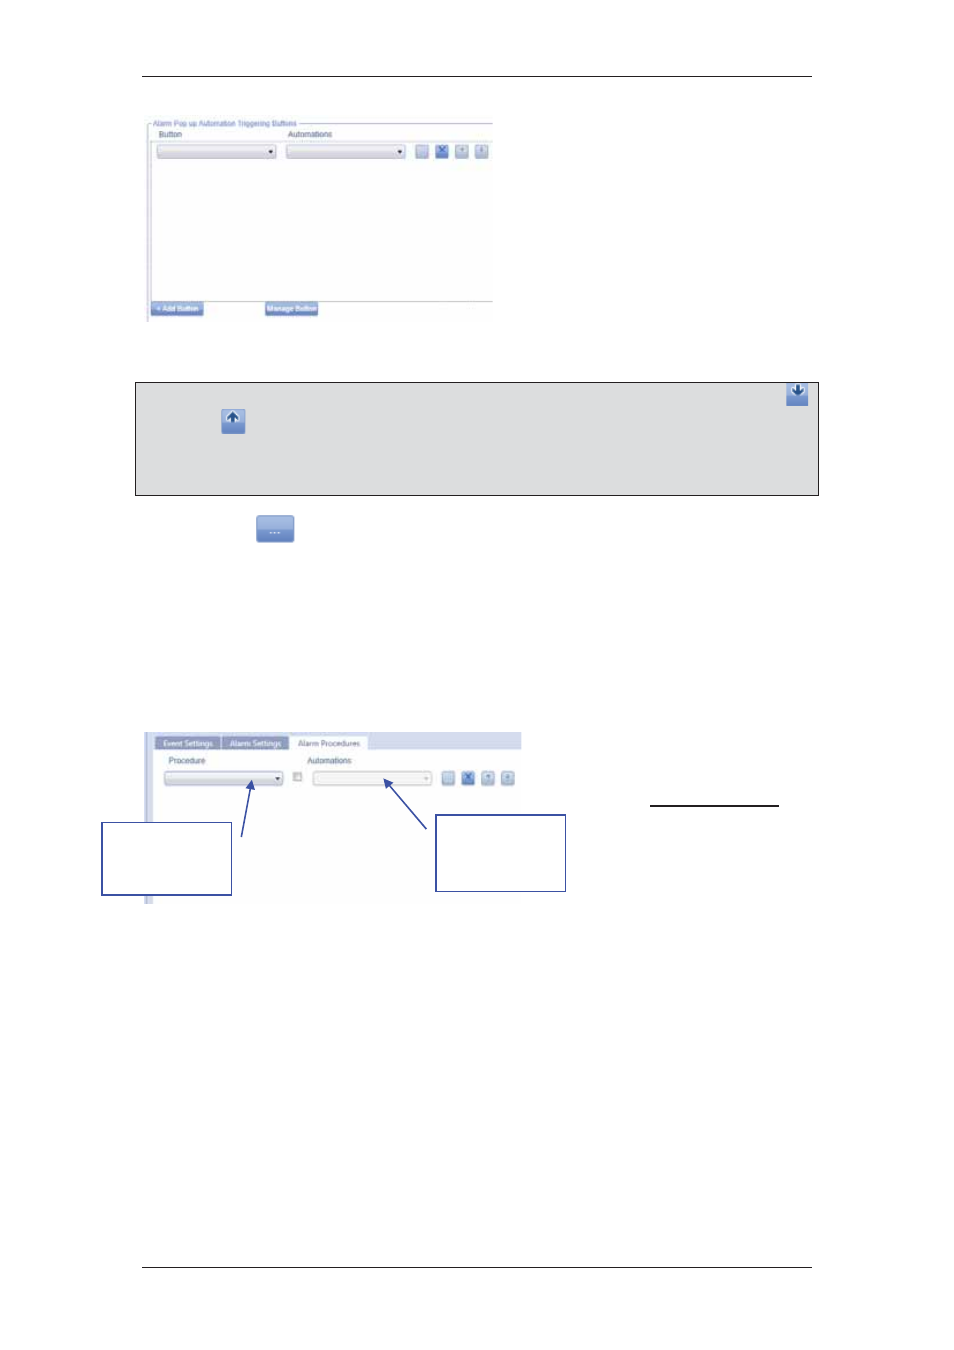
11. Click Add Button. A new row is
added in the area. You can add
as many buttons as you want.
12. Select the button name from
the drop-down list.
13. Select the automation that
should be executed when you
click this button on the alarm
alert from the adjacent drop-
down list.
Figure 57: Immediate Buttons
Note: If you add more than one immediate button, you can decide the priority by using the
and
buttons. The buttons will appear in the order that they are arranged.
Note: You may add new buttons to the list. To add new buttons, refer to section
10
Configuring Alarms and Events
in the
ACUS User Manual
.
14. Click
. The Automation dialog box appears where you can edit the selected
automation. Refer to section
14 Using Automation
in the
ACUS User Manual
for
details on editing automation.
15. Apart from the automations in the list, if you want to add, edit, duplicate or delete
automation, then click Manage next to the Automations label. The Automation
dialog box appears where you can add, edit, duplicate and delete automations. For
details, refer to
14 Using Automation
in the
ACUS User Manual
.
16. Click Save. The message appears, “Event Configuration created successfully”.
To configure alarm procedures:
1. Click
the
Alarm
Procedures tab.
2. Click
+ Add Procedure to
add a procedure. A new
row is added.
3. Select the alarm procedure
from the drop-down list.
Figure 58: Alarm Procedures
4. Select the adjacent check box to enable this procedure. The Automations drop-
down list is enabled.
5. Select the automation that should be executed when this procedure is implemented
from the Automation drop-down list.
Alarm
Procedure
drop-down list
Automation
drop-down list