Processor fan and heat-sink assembly, Removing the processor fan and heat-sink assembly – Dell OptiPlex 7010 Small Form Factor Desktop Computer User Manual
Page 77
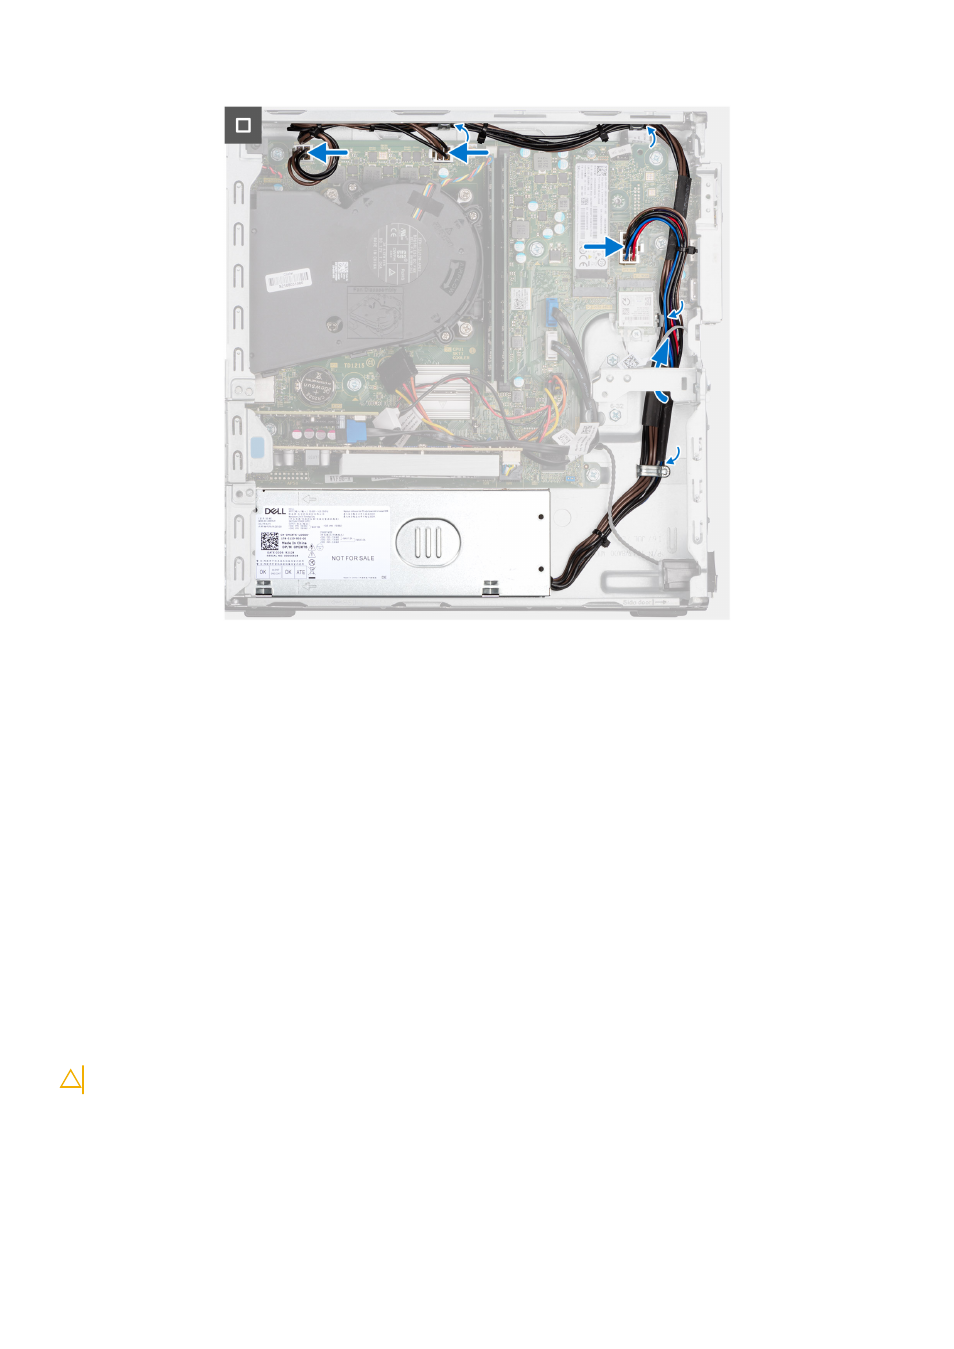
Steps
1. Place the power-supply unit on the chassis and slide it towards the back of the chassis.
2. Replace the three (M6-32) screws to secure the power-supply unit to the chassis.
3. Route the power-supply cables through their routing guides on the chassis.
4. Connect the power-supply cables to their connectors on the system board.
Next steps
1. Install the
.
2. Install the
if applicable.
3. Install the
if applicable.
4. Install the
.
5. Install the
6. Follow the procedure in
After working inside your computer
.
Processor fan and heat-sink assembly
Removing the processor fan and heat-sink assembly
CAUTION:
The information in this section is intended for authorized service technicians only.
Prerequisites
1. Follow the procedure in
Before working inside your computer
.
.
.
if applicable.
Removing and installing Field Replaceable Units (FRUs)
77