Applying the silicon dielectric compound, Connecting the smartsensor 6-conductor cable – Wavetronix SmartSensor Matrix (SS-225) - User Guide User Manual
Page 19
18
CHAPTER 1 • INSTALLING THE SMARTSENSOR MATRIX
downstream of the stop bar.
2 Tilt the sensor down so it is aimed at the center of the lanes of interest.
3 If necessary, rotate the sensor so that the bottom edge of the sensor is parallel with the
roadway. This is necessary where the intersection approach has a significant grade.
Note
To fully complete sensor alignment, you will need to connect to the Matrix sensor
using SmartSensor Manager Matrix and verify that your alignment is detecting the
vehicles in the lanes of interest (see Chapter 8).
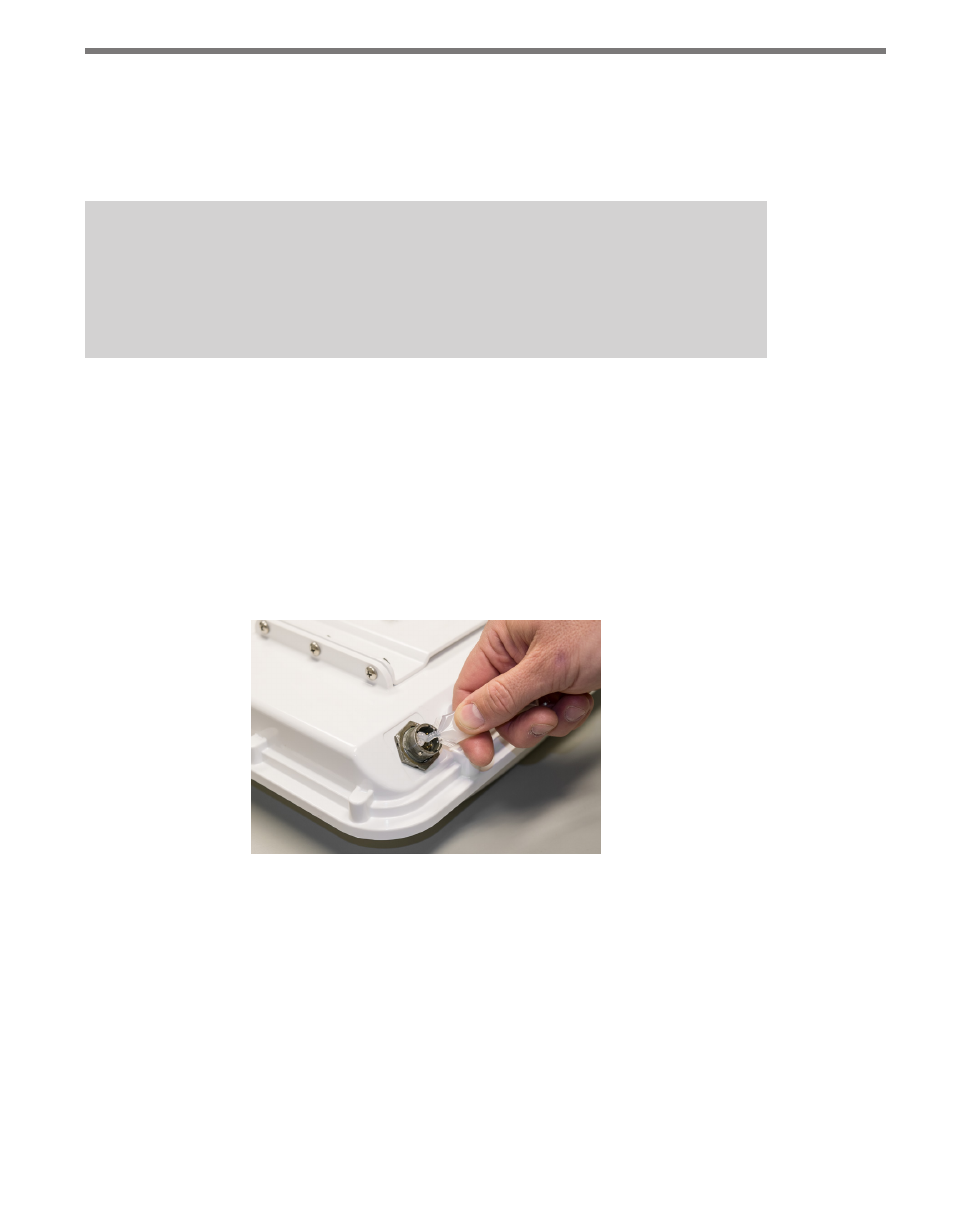
Applying the Silicon Dielectric Compound
Use the following steps to correctly apply the silicon dielectric compound to the cable con-
nector:
1 Tear the tab off of the tube of silicon dielectric compound.
2 Squeeze about 25% of the silicon onto the pins of the receptacle side of the connector
at the base of the SmartSensor Matrix (see Figure 1.5). Be sure to wipe off any excess
compound.
Figure 1.5 – Connector Receptacle
Connecting the SmartSensor 6-conductor Cable
The next step is to plug the SmartSensor 6-conductor cable into the connector. The sensor
connector is keyed to ensure proper connection (see Figure 1.6); simply twist the plug end
of the connector clockwise until you hear it click into place. To avoid undue movement
from the wind, strap the 6-conductor cable to the pole or run it through a conduit, but leave
a small amount of slack at the top of the cable to reduce cable strain. Route the cable from
the sensor location back to the main traffic cabinet.